New Tech for Dimir Murktide: Echo of Eons


Note: This article was translated from Chinese by AI and may contain errors. Read the original Chinese version.
Before We Start
Hi everyone. Recently I have been entering Modern MITQs with Dimir Murktide, and my results have gone up and down like ocean waves. One day, jeffchen recommended a super cool piece of tech, Echo of Eons, and I felt like I had found a treasure. That’s it!!! I can’t describe how excited I was at the time. The unpleasantness of losing a match vanished instantly, replaced by the thought that I absolutely had to play this fun combo. Incidentally, when my mindset shifted from pure Spike to Spike with a bit of Timmy mixed in, my attitude suddenly became remarkably healthy and relaxed.
If you are interested in the classic Spike, Johnny, Timmy player classification, check out this translated article, “Timmy, Johnny and Spike: Player Types as Seen by MTG Card Designers”. I am a bit of a Spike + Timmy type myself, no wonder this combo has me so excited XD
I am writing this article partly because I made top 4 at Cardmaster’s MITQ#8 on September 8, 2024 and qualified for the MIT main event, and partly because I felt something this fun should not be known only to me so let me benefit everyone. I hope Echo of Eons can become a new variant of Dimir Murktide, and become the opponents’ nightmare that night (just kidding XD)
If you are interested in the tournament report for Cardmaster’s MITQ#8 on September 8, 2024, see this post. If you want to learn more about my journey with Dimir Murktide, read the previous post on the fan page, which I won’t repeat here.
Changes in Modern
For details, see MiohitoKiri5474’s article: Why Nadu Must Die: Aug 26th BnR Predictions
The Modern meta over the past 7 days, as of September 9, 2024: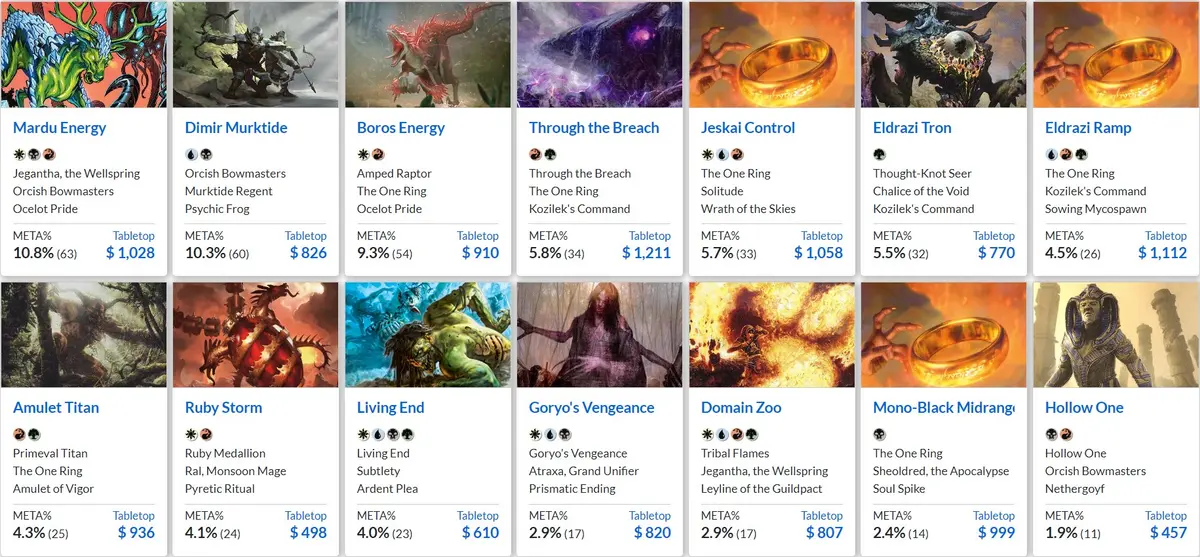
The Modern meta over the past 14 days, as of September 9, 2024: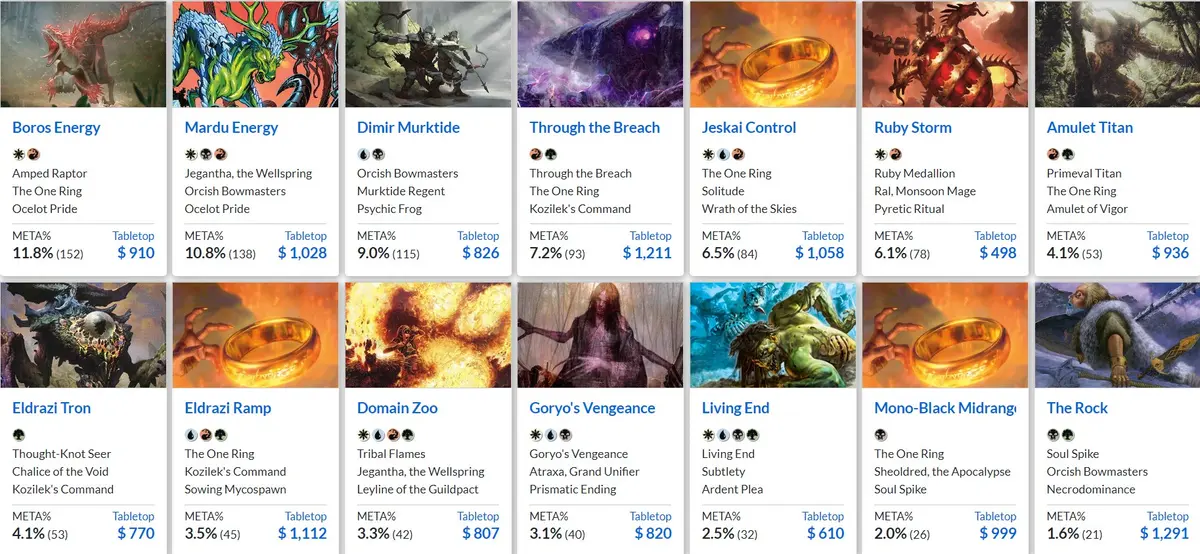
As you can see, since Nadu was banned, the energy archetypes (Boros + Mardu), which were not weakened at all, firmly hold the top spot in the meta. Unsurprisingly, the Eldrazi archetypes (Tron, Ramp, Through the Breach) also hold around 20% of the meta. Meanwhile, Dimir Murktide has risen as a dark horse, with its usage continuing to surge, looking much like Izzet Murktide after the release of MH2, standing firm in the new meta with a tempo-based counterattack.
Deck Introduction
Decklist
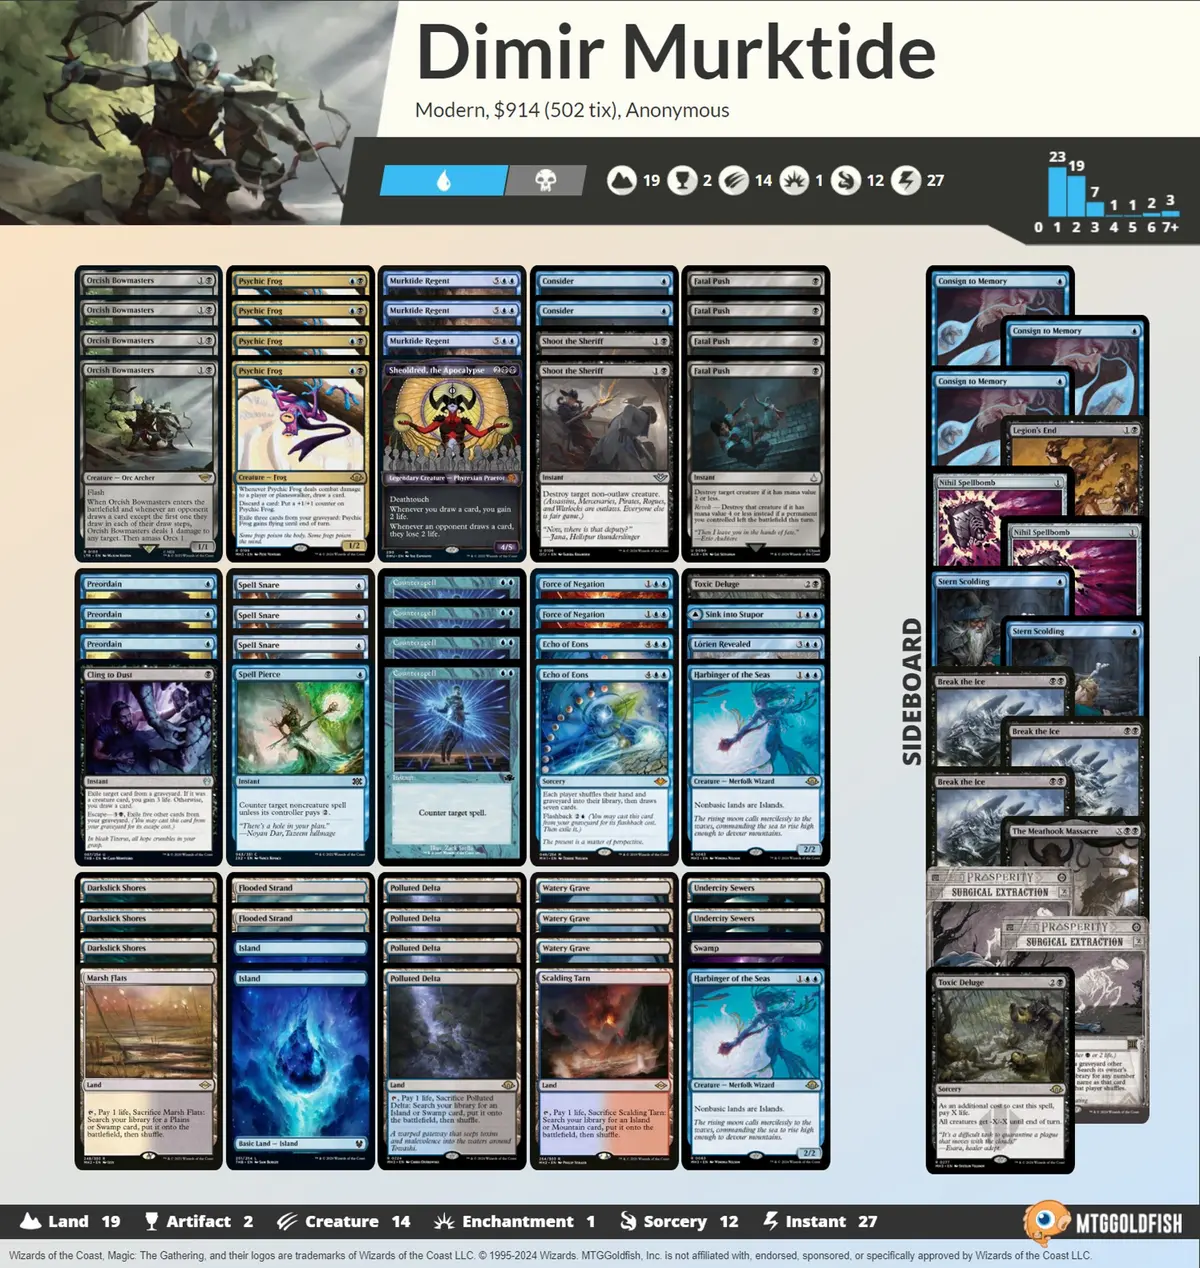
Here you can see that our tech, Echo of Eons, is played as just 2 copies. The following sections explain what this tech does and how we chose it.
Echo of Eons! Your nightmare tonight!!!
Where the inspiration came from!
Right after MH3 came out, Dimir Murktide would run flashback cards like Deep Analysis that can be cast from the graveyard, using the ability of Psychic Frog to increase the payoff of filling the graveyard. But they didn’t work well and were dropped, so I started looking for a good flashback card.
Also, while testing I noticed that the deck is at a significant disadvantage against all sorts of aggro decks, or gets locked out by all sorts of control decks. The weakness of Dimir is also obvious: once the creatures don’t show up or get removed, your hand is full of counterspells and removal, and you win very slowly.
I had always wanted to play the Narset, Parter of Veils + Echo of Eons combo in Modern but never had the chance. With Psychic Frog arriving in MH3, I realized it could be a component of this combo, but in testing I found that, rather than drawing seven and letting the opponent draw one, I could just shoot the opponent dead with Orcish Bowmasters!?
On August 26, 2024, Grief was banned, which made the main deck Subtlety non-essential, and the freed-up slots could be used to experiment with a new toy!
Why play this combo?
Because of love! Because it’s fun! Because I want to blow up the opponent with the archers!
The above is part of the reason, yes, but another part is wanting to improve Dimir Murktide against the problem of winning too slowly when Murktide and/or Frog get removed. Adding the Echo of Eons combo gives the deck another dimension of winning, a powerful card that can turn the game around in topdeck mode when both sides have traded away their resources.
Combo explanation
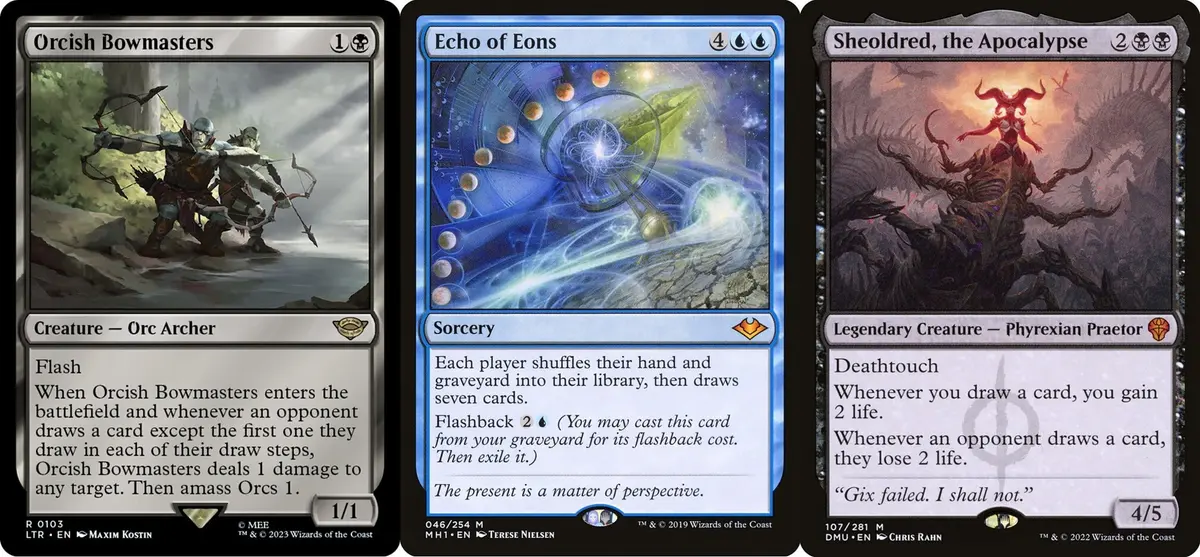
Basically, alongside the 4 Orcish Bowmasters that Dimir Murktide already plays, we add 1 extra Sheoldred, the Apocalypse, for a total of 5 powerful creatures that deal extra damage whenever the opponent draws. Then 2 copies of Echo of Eons shuffle your hand and graveyard into your library and draw 7. As long as one of the above creatures is on the battlefield when Echo of Eons resolves, you get the following combo:
- Orcish Bowmasters: deal 7 damage in total to any targets, divided however you like, and Amass 7 at the same time.
- Sheoldred, the Apocalypse: the opponent loses 14 life and we gain 14 life, simple and brutal.
In the Bowmasters case above, if you already have an Amass 1 + Orc Army token from an earlier Bowmasters, you will pump it to 8/8 or bigger as well. And as long as you did this in your first main phase, that giant can then attack, and if things go well, deal about as much damage as the Sheoldred case.
Then, don’t forget these effects stack. With two or more Bowmasters, the joy doubles!
Why 2 copies of Echo of Eons?
Although it is a combo, it uses 3 flexible slots of Dimir as combo pieces, and we can’t play more without hurting the deck’s structure. In addition, Echo of Eons is not essential to the deck’s makeup; its role is to give us an unfair way to win, or a way to widen our advantage all at once. We assume it works best as a card that turns the game around, or even seals it, once we get into topdeck mode. So we don’t need to play a full set, since a full set would only clog your hand, and 1 copy is no better than none, so we settled on 2 as a reasonable number.
Isn’t Sheoldred too clunky?
True, at four mana she can be answered by the common Fatal Push (with revolt), or by Unholy Heat after delirium, among others. But we don’t mainly win through Sheoldred; the single copy is there to raise the combo’s chance of winning. After discussion we agreed that an extra Sheoldred makes our combo win more comfortable, and a Sheoldred resolved in topdeck mode is deadly, giving us more haters against the opponent’s The One Ring, which is extremely important in the current environment. Her life gain whenever we draw is also something Dimir Murktide badly needs. So our conclusion is that Sheoldred is not too clunky, and she fits perfectly into our game plan, further raising the deck’s power.
How to use Echo of Eons
In our build, there are several ways to cast Echo of Eons:
- Discard it with the ability of Psychic Frog, then cast it with flashback. (Frog on turn two, Bowmasters on turn three, Echo of Eons on turn four! Awesome!)
- Put it in the graveyard with the surveil effects of Consider or Undercity Sewers, then cast it with flashback.
- Hard-cast it for six mana, and cast it again if needed.
- If there’s no time, feed it to FON or Subtlety (though I don’t play it).
Of these, apart from the first two, which cheat on mana a bit, it is worth explaining the hard-cast for six. This usually happens because the card is stuck in hand with no other discard outlet, but it can also be a mid-to-late-game topdeck. With that in mind, I usually don’t mindlessly feed lands to the Frog, unless I am very sure the game will end quickly, so that I keep the flexibility of hard-casting for six when I draw Echo of Eons later with no Frog to discard it to.
Other fun interactions
By the way, besides drawing 7, doesn’t Echo of Eons also shuffle your graveyard back into your library? In our build, this effect leads to a few interesting things:
- When we have Murktide Regent on the battlefield, every instant/sorcery card we shuffle back puts one more +1/+1 counter on Murktide!
- When we have Psychic Frog on the battlefield, remember to respond to the shuffle effect when casting Echo of Eons by discarding the cards you can’t use to the froggy, then fly away as needed, since you are about to draw 7 anyway!
- When we have an important card in the graveyard that we want to reuse, shuffling it back might just get it drawn among the 7!
- When we have been milled until our graveyard is bigger than our library, don’t worry: Ech-o of E-ons! Whoa! Suddenly the library is tall again! Amazing grace!
Are there any fixed slots?
Besides the 7 combo pieces mentioned earlier, the following are the parts of the Dimir Murktide build that I won’t touch:
- 3 Murktide Regent: the centerpiece of the deck. We don’t play a fourth because we are not the other version with Thought Scour, the fast Murktide, and 3 is enough.
- 4 Psychic Frog: the Frog is too strong, always a full set.
- 4 Counterspell: Counterspell is always a full set.
- 2 Force of Negation: 2 is the minimum, and 3 is the usual count.
- 4 Fatal Push: always a full set. It is black’s best removal; without it, don’t bother playing against energy.
- 2 Spell Snare: a quality card with tons of targets in Modern besides Eldrazi. 2 is the minimum, and 3 is the usual count.
- 3 Preordain: usually a full set, but I swapped one for Lórien Revealed.
- 1 Sink into Stupor: it can be a land or a soft removal/counter. Although Yuta Takahashi thought three weeks ago that this card is not very good and that an Island is better, I find it quite good, and our build wants more lands anyway.
- 2 Shoot the Sheriff: these 2 slots are for hard removal and can be adjusted by the meta, but it has to be 2 copies.
- 1 Toxic Deluge: one main-deck sweeper to keep things safe.
- 1 Cling to Dust: this card might be the only good-luck charm exclusive to Modern Dimir. It gains life, draws cards, and hoses graveyards.
The cards above are ones I would absolutely never cut from the main deck so far. They are the important cards that form the core of the deck.
How to choose the flexible slots?
- The third Spell Snare is added against the common two-mana threats in the environment.
- 1 Spell Pierce replaces the usual third FON, because good players will basically play around your FON, and when you keep one mana open, sometimes this Spell Pierce is worth far more than a third FON. In the mirror or against other counter-heavy control decks, this Spell Pierce can often be a surprise ambush!
- 1 Lórien Revealed replaces the fourth Preordain. Since most of our early Preordains are used to find lands, a Lórien Revealed that can find lands at instant speed is something I would rather have. And since our deck wants to hit land drops steadily and keep six mana available to hard-cast Echo of Eons, five-mana hard-cast draw 3 in the mid to late game is great flexibility to have when needed, even though we don’t expect to go that long.
- Whether to play Shoot the Sheriff or other removal is worth discussing, but considering that energy, mirrors and Eldrazi are the mainstream in the current meta, two-mana hard removal is still quite reliable. Compared with Go for the Throat, which may miss artifact creatures, the only mainstream creature Shoot the Sheriff can’t kill right now is Ragavan, Nimble Pilferer, but it shouldn’t be something we worry about, as it basically doesn’t survive. Some people play Drown in the Loch in this slot, but I don’t want a removal spell with a somewhat higher ceiling but an extremely low floor. Face a mirror with a Frog on the battlefield and you’ll understand what I mean.
- The 2 Harbinger of the Seas in the main deck improve our bad matchups, such as Eldrazi, Mardu Energy, and opponents who don’t dutifully fetch basic lands. Hitting Amulet Titan and Domain Zoo is just a bonus XD.
Mana base
Since I am not on the fast Murktide version, I still play 19 lands plus 1 double-faced Sink into Stupor.
- 3 fastlands Darkslick Shores: a safe, life-free partner that saves our life total for casting Toxic Deluge. We don’t play a fourth because our deck may reach six lands, and a land that has to enter tapped then is unbearable.
- 3 shocklands Watery Grave: I actually hesitated over whether to play one more trick with Otawara, Soaring City, but I didn’t have the courage to play only 7 lands that can be fetched. Also, Sheoldred, the Apocalypse and quite a few sideboard cards that demand two black mana are the main reason I gave up on the idea and dutifully played a full 3 Watery Graves.
- 2 surveil lands Undercity Sewers: awesome!
- 2 basic Islands: it can’t go any lower.
- 1 basic Swamp: although Yuta Takahashi really dislikes being stuck by a Swamp when casting Murktide at four mana, unable to cast Counterspell for protection, we now play Harbinger of the Seas in the main deck, so some trade-offs are needed.
- 8 fetchlands, of which 4 Polluted Delta (the blue-black ones) are always a full set. I also recommend 2 each of the fetchlands that can find a basic Island and a basic Swamp.
In my build, I played 3 fetches for basic Island + 1 fetch for basic Swamp, but 2 each should be the better configuration.
Sideboard choices
- 3 Consign to Memory: the Eldrazi decks and The One Ring must be respected. Against energy, you can also bring some in to counter the opponent’s creature/enchantment enter-the-battlefield effects, which makes the tempo better.
- 3 Break the Ice: Eldrazi must be respected. Accidentally hitting Hammer or Urza’s Saga is not intentional.
- 2 Stern Scolding: I originally didn’t want to play it since Grief was banned, but then found that playing against Yawgmoth without it is too painful, so I dutifully brought it back. And don’t forget to use this card, not FON, to counter Grist, the Hunger Tide.
- 2 Surgical Extraction: passive graveyard hate. It is actually for exiling Eldrazi lands after destroying them, or exiling the opponent’s key card after countering it. If needed, you can also eat your own graveyard to grow Murktide and shuffle your library, pretending you found nothing.
- 1 Toxic Deluge: the second sweeper, but it really hurts QQ
- 1 The Meathook Massacre: so I added one that gains life. It works fine so far, but if it feels too slow later it will be swapped for Glistening Deluge or another painless sweeper.
- 1 Legion’s End: it should be bringable against everything except Eldrazi. Removing and weakening the opposing threat at once is great!
- 2 Nihil Spellbomb: I still want one active graveyard hate card, a one-mana card that combines graveyard hate, filling the graveyard, and card draw. However, if you want to target Eldrazi and The One Ring more, using those slots for the fourth Consign to Memory is also fine.
Game Play

Understanding the tempo of Dimir Murktide
When to rush? When to turtle? When to go all-in with your hand to the Frog? When to tap out for Murktide?
These are the fated homework and soul-searching questions for every Murktide player. Different situations call for different plays, and getting it wrong can be the difference between winning and losing. There are simply too many scenarios, and different decks call for different responses. Below I only explain a few perhaps more common ones. You still need a lot of practice to grasp the tempo, and I am still learning too.
On the play, you don’t have to Frog on turn two
When facing a mirror, if you are on the play with a Frog in hand but no FON, and the opponent has a fetchland that can find a blue or black land, it is possible that when you cast Frog they counter it with Spell Snare, or kill it with Fatal Push after it resolves. That would cost you tempo, and it may be better to pass while holding the cards that can counter or answer the opponent’s turn-two Frog. Of course, if you have both Orcish Bowmasters and Frog in hand, and you both pass, you can jump out Bowmasters, see how the opponent responds, and then cast Frog on your own turn three while holding Snare or Spell Pierce. Even if nothing resolves successfully after that round, Murktide’s arrival is not far off.
When to go all-in with your hand on the Frog?
Basically, although the Frog can draw cards and fly, without pumping it, chipping away one point at a time is far too inefficient.
Generally, I suggest pumping the Frog to at least 2/3 to speed up the clock, and against decks with red removal, pumping it to 3/4 to survive at least one Lightning Bolt, or a Galvanic Discharge without extra energy. And against black opponents with Fatal Push, keeping it at 2/3 and jumping up when the chance arises is the recommended play.
Of course, if you are sure the opponent’s hand is full of counterspells with no removal, then go all-in boldly! The window to win doesn’t wait for anyone!
You basically can’t Murktide on turn two
We don’t have quick graveyard-stuffing tools like Thought Scour as the fast Murktide does. Cards go into our graveyard one by one, so generally, casting Murktide on turn three while holding Spell Pierce or FON, or on turn four while holding Counterspell, is the more common and steady approach.
In response to fast Murktide mirrors, Subtlety has returned to this type of Dimir Murktide build, which is bad for us in spots where we have no Counterspell when casting Murktide. Don’t forget that the faster the environment (for example, the meta when its siblings Grief and Fury were still around), the better Subtlety performs. That is no exception for fast Murktide.
Landing a big threat after resources are spent often settles the game
This refers not only to mirrors and counter wars between control decks, but also to facing an opponent with lots of removal who has killed all your early threats. At that point, tapping out to resolve a Murktide or Sheoldred, or even a Lórien Revealed, can swing the game your way. Of course, the opponent’s The One Ring or other threats may be sharpening their knives in hand or on top of the library. However, sometimes, if the known resources on both sides have mostly been traded off, resolving your own threat early is always reasonable.
But how do you know they have really mostly been traded off? That depends on accumulated experience and on-the-spot reactions. Deeper mind games aren’t discussed in this article; you can imagine more similar situations and ask yourself!
Understanding the tournament meta
After understanding yourself, we need to understand your opponents.
Based on the tournament meta listed in the Changes in Modern section above, before entering a tournament, what I do is take the top 15 to 20 decks of the past 7 to 14 days, pick the best-performing deck in MO Challenges or even bigger events to look at, see whether they have added anything new, and think about whether my main deck and sideboard need adjusting. For the top few decks I look at a few more lists to make sure no tech has slipped through and put up results.
This is only the most basic, armchair-player routine, but quite effective. After you have seen these decklists, you can think about the strategic plan in each matchup, which hands to keep or mulligan, how to plan sideboarding, and even adjust your main deck and sideboard to some degree.
This is only a big-picture concept; the practice is up to each person.
Gameplan: better to push forward with one thought than to stop at one thought
I quote a line from the movie The Grandmaster as the section title, mainly hoping readers realize how important a far-sighted game plan, and sticking to it after deep thought, truly is!
Imagine you have only two untapped lands that make blue on the battlefield, Murktide in hand, and 4 cards in the graveyard. You have activated a fetchland and found a surveil land, planning to surveil and then cast Murktide. When you surveil, you see a card you need on top of the library, such as Psychic Frog or Counterspell. If you stop here, and, possessed, tell yourself it would be nice to keep this card and leave it on top, then when you come to your senses you realize: oh no! My Murktide can’t come down this turn…
If you have already decided you will cast Murktide this turn, why would you trip yourself up? If you predict, or know, that the opponent has a counterspell or Subtlety in hand, you wouldn’t choose to cast Murktide, unless you want to use it as bait… This kind of thinking three steps ahead is what distills your own gameplan. Once you have thought it through, unless a change significant enough to alter the gameplan occurs, we should stick to our gameplan as much as possible.
The above is only a very decontextualized example, but decisions like this are situations every Murktide player meets often. We must keep asking ourselves and strengthen ourselves through deep practice.
Matchup Tips
Phlage, Titan of Fire’s Fury
You have a Frog on the battlefield, the opponent hard-casts Phlage, and they have four mana open to escape it afterward. You should first activate the Frog’s ability to get a trigger, then counter Phlage, and then, in response to your own Frog ability, before it resolves, use graveyard hate to exile Phlage, so you don’t give the opponent priority to escape it.
Sideboard Strategy
OTP: On the Play, meaning you go first
OTD: On the Draw, meaning you go second
Boros Energy
| Side Out | Side In |
|---|---|
-2 Force of Negation | +2 Stern Scolding |
-1 Sink into Stupor // Soporific Springs | +1 The Meathook Massacre |
-1 Spell Pierce | +1 Legion's End |
-3 Preordain | +1 Toxic Deluge |
+2 Surgical Extraction |
Basically, we take out the FON, which loses cards, and the Spell Pierce, which is weak against their small threats, and bring in more sweepers. The sideboard Legion's Endis both removal and disruption in one, and works quite satisfyingly. With this swap we only have four real Counterspells left to deal with the opponent’s hard-to-handle Ring and Phlage, so Counterspell should basically be saved for those, while creatures are handled with sweepers and removal. Surgical Extractionexiles the opponent’s Ring, Phlage, or important two-mana threats like Ajani, Nacatl Pariah // Ajani, Nacatl Avenger and Amped Raptor
 when they hit the graveyard, reducing our later worries. But we still need to keep watching the key cards; even with one side cut away, the opponent can still beat us with the remaining threats.
In addition, Spell Snare is still the MVP of this matchup.
Mardu Energy
| Side Out | Side In |
|---|---|
| -2 Force of Negation | +2 Stern Scolding |
| -1 Sink into Stupor // Soporific Springs | +1 The Meathook Massacre |
| -1 Spell Pierce | +1 Legion's End |
| -3 Preordain | +1 Toxic Deluge |
| +2 Surgical Extraction |
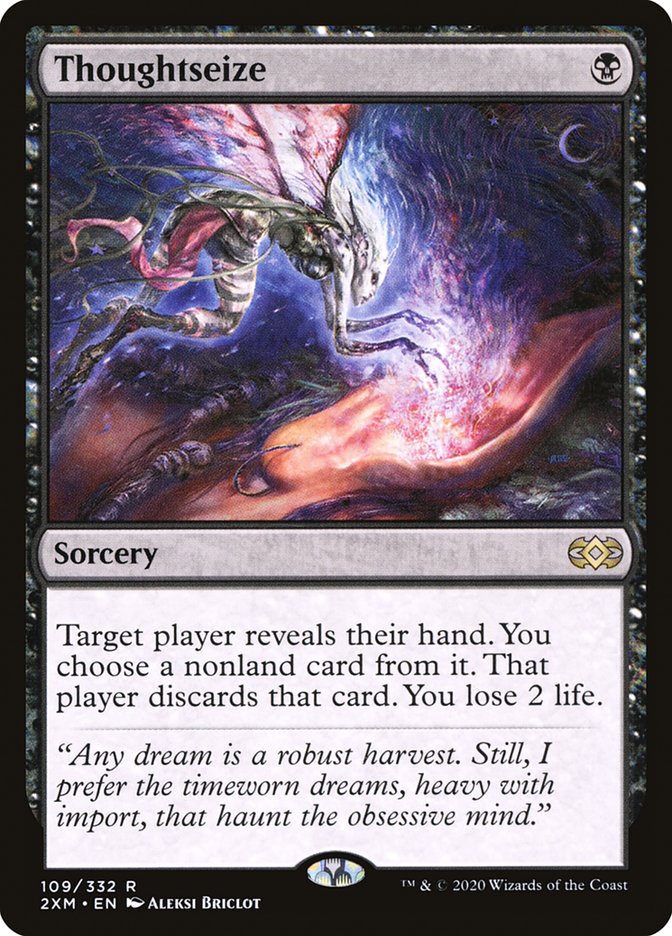
The sideboarding is the same as against Boros Energy, but Mardu plays Fatal Push , Thoughtseize
 , and Orcish Bowmasters
 , which target us more. This also makes our combo easier for the opponent to interrupt, so when we go for the combo we must watch whether the opponent might jump out a Bowmasters.
Don’t forget, when both players are at 7 life or less and we do the Echo of Eons combo and get responded to with a Bowmasters, our Bowmasters effect goes on the stack first and the opponent’s goes on after it. On resolution, the ability put on the stack last resolves first, so we get shot dead by the opponent’s Bowmasters first XD
Mirror (fast Murktide)
| Side Out | Side In |
|---|---|
| -2 Force of Negation | +2 Nihil Spellbomb |
| -1 Toxic Deluge | +2 Surgical Extraction |
-1 Echo of Eons | +1 Legion's End |
-2 Harbinger of the Seas | +1 Stern Scolding |
Against fast Murktide, especially when the opponent is on the play, our current build, which doesn’t play Subtlety , is relatively hard to play. Two-mana hard removal and hard counters both come too late. If you want to improve this matchup, one more Mystical Dispute
 in the sideboard helps a little. Otherwise, just join them and play Subtlety too!
Jeskai Control
| Side Out | Side In |
|---|---|
| -4 Fatal Push | +3 Consign to Memory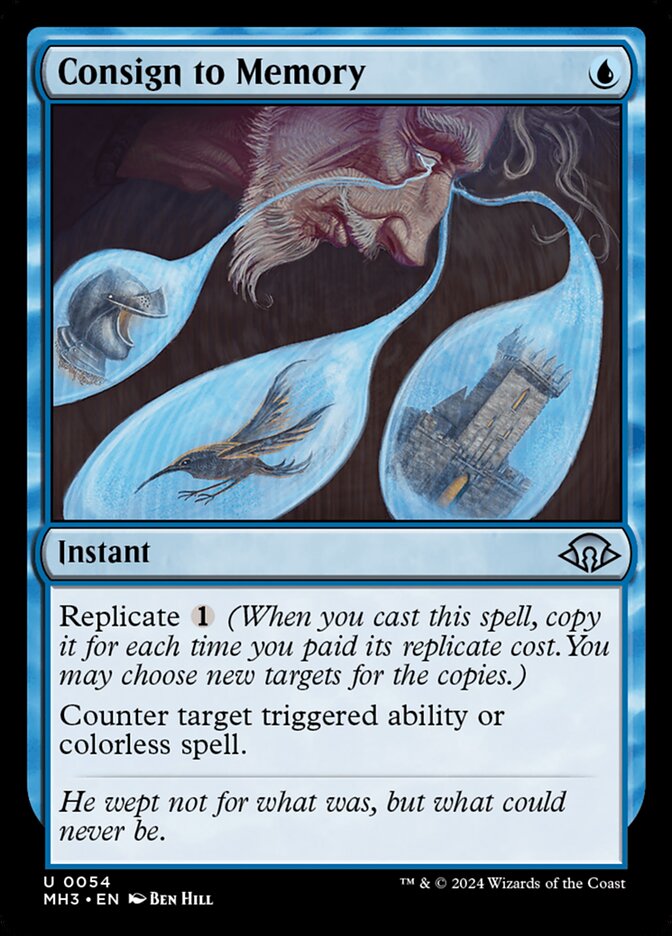 |
| -1 Toxic Deluge | +2 Nihil Spellbomb |
| -2 Spell Snare | +2 Surgical Extraction |
In this matchup, Phlage, Titan of Fire's Fury basically has to be countered and then exiled, and we try not to let it resolve at all. If it does resolve, Consign to Memorycan counter its life-gain effect, while we also watch The One Ring
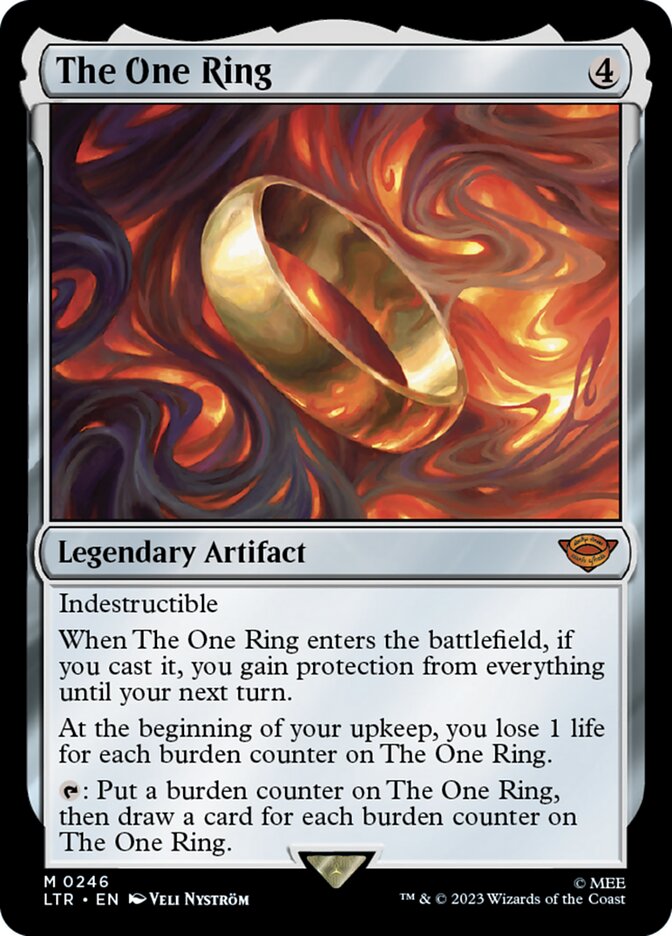 and the enter-the-battlefield effects of their white and blue evoke Elementals. Our creatures are basically better than theirs apart from Phlage, so if we hold the ground we can push back.
Spell Snarein this matchup basically can only target the opponent’s Counterspell, so considering its value we keep only 1 copy.
Eldrazi decks (Eldrazi Tron, Ramp, Through the Breach)
| Side Out | Side In |
|---|---|
| -4 Fatal Push | +3 Consign to Memory |
| -3 Spell Snare | +2 Surgical Extraction |
| -1 Spell Pierce | +3 Break the Ice |
Basically this sideboard is already specialized against the Eldrazi decks, and if needed you can destroy their lands and then Extract them. But besides the Tron lands, Eldrazi also has Ugin's Labyrinth and Eldrazi Temple
 , so destroying and Extracting one of the Tron lands doesn’t necessarily slow them down. Pay special attention to which lands you destroy. If you can resolve an overloaded Break the Iceafter one round of exchanges, it is basically a win.
Ruby Storm
| Side Out | Side In |
|---|---|
| -1 Sink into Stupor // Soporific Springs | +3 Consign to Memory |
-2 Shoot the Sheriff | +2 Surgical Extraction |
| -2 Harbinger of the Seas | +2 Nihil Spellbomb |
| -2 Fatal Push |
Spell Snareis the MVP of this matchup, since lots of Storm’s key cards cost two. Also, don’t forget that Consign to Memorycan counter the storm trigger of Grapeshot , and one counter means none of the copies happen, so patiently wait for the opponent’s last play.
Amulet Titan
Traditional
| Side Out | Side In |
|---|---|
| -3 Spell Snare | +3 Consign to Memory |
| -4 Fatal Push(OTD) | +2 Stern Scolding(OTD) |
| -2 Fatal Push(OTP) | +2 Surgical Extraction |
Analyst version
| Side Out | Side In |
|---|---|
| -4 Fatal Push | +3 Consign to Memory |
| -1 Spell Snare | +2 Surgical Extraction |
| -1 Force of Negation(OTP) | +2 Nihil Spellbomb |
| -1 Spell Pierce(OTD) |
This is the type that plays Aftermath Analyst , aka the Analyst.
Goryo’s Vengeance
| Side Out | Side In |
|---|---|
-1 Sheoldred, the Apocalypse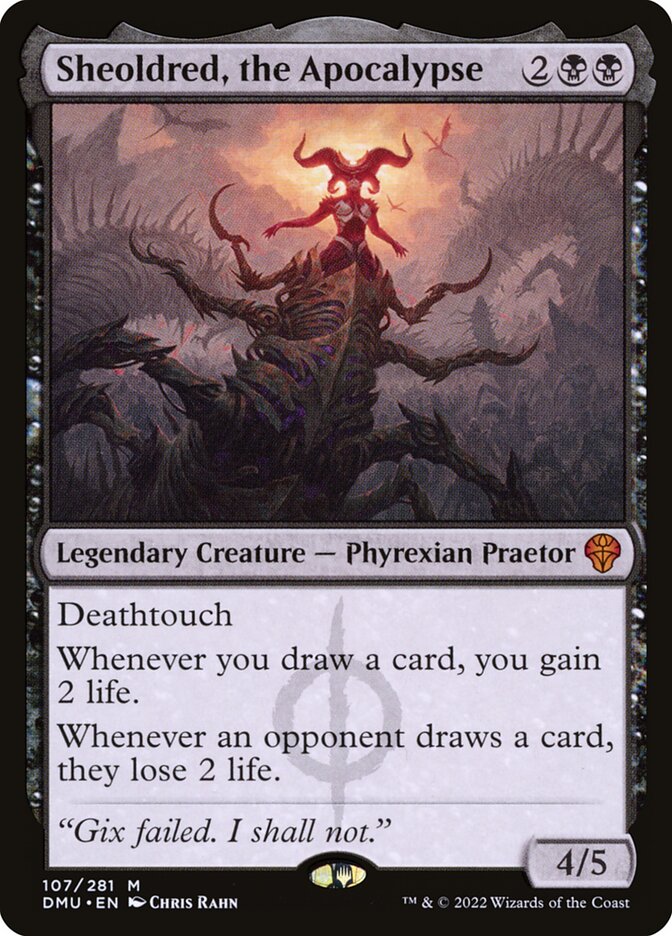 | +2 Nihil Spellbomb |
| -3 Preordain | +2 Surgical Extraction |
-1 Murktide Regent | +1 Legion's End |
Take out the slower Sheoldred and 1 Murktide, take out the sorcery-speed Preordain, and bring in 4 graveyard hate cards and 1 Legion's End.
Don’t forget, as mentioned earlier, our Echo of Eons can shuffle away the opponent’s graveyard. However, in this matchup every time you tap out you risk paying a painful price. Even if you have FON, the opponent will usually play around it, or clear the way with Thoughtseize and then follow up with Goryo’s, so the key in this matchup is not to let the opponent’s graveyard hold any threat. Prioritize Goryo’s with Surgical Extraction to stay safe.
Today’s Goryo’s lists play Emperor of Bones and Priest of Fell Rites
 as backup plans, but we never take out a single removal spell, and wait there for them.
You have to stay calm in this matchup. Sometimes cutting the opponent’s Solitude to make sure your Murktide survives and ends the game quickly is also an option.
Domain Zoo
| Side Out | Side In |
|---|---|
| -4 Orcish Bowmasters | +2 Surgical Extraction |
| -1 Sheoldred, the Apocalypse | +1 Toxic Deluge |
| -2 Echo of Eons | +1 Legion's End |
| +2 Stern Scolding |
In this matchup we take out our combo and bring in more efficient sweepers and cheap counters. Since we play Harbinger of the Seas in the main deck, we should be slightly ahead in this matchup. As long as we are sure the opponent has no counterspell, one Toxic Deluge to clear the board followed by Murktide locks up the win.
Living End
| Side Out | Side In |
|---|---|
| -4 Fatal Push | +2 Nihil Spellbomb |
| -3 Spell Snare | +2 Surgical Extraction |
| +3 Consign to Memory |
This matchup isn’t that fast, so I won’t take out Preordain, but even if we resolve one or two graveyard hate cards, we still won’t win easily. Resolving an Echo of Eons early is equivalent to making the opponent’s plan of activating Living End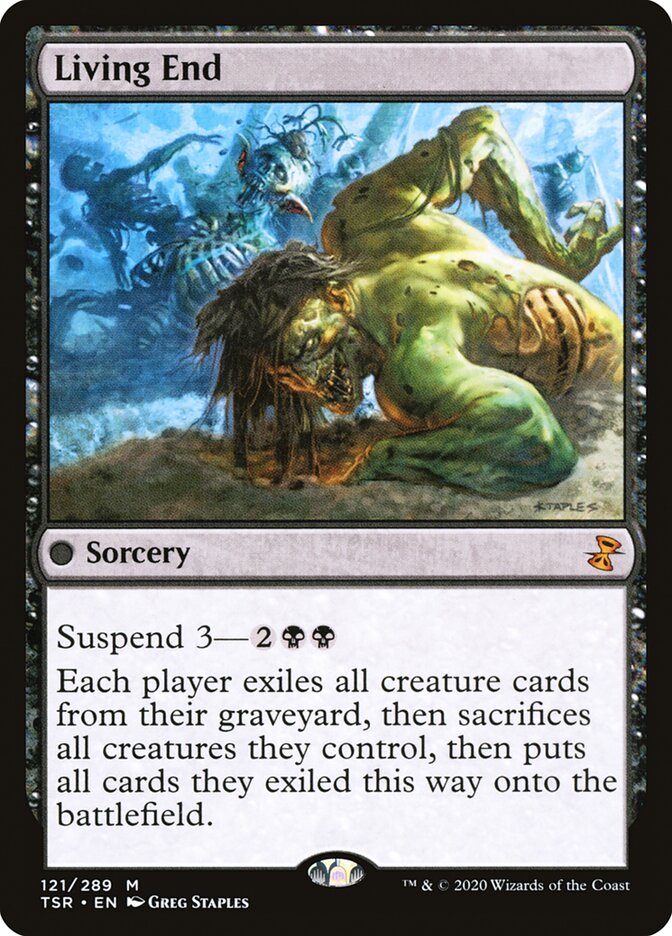 start over.
Although the opponent looks like a four-color deck at first glance, apart from the double Cascade (Shardless Agent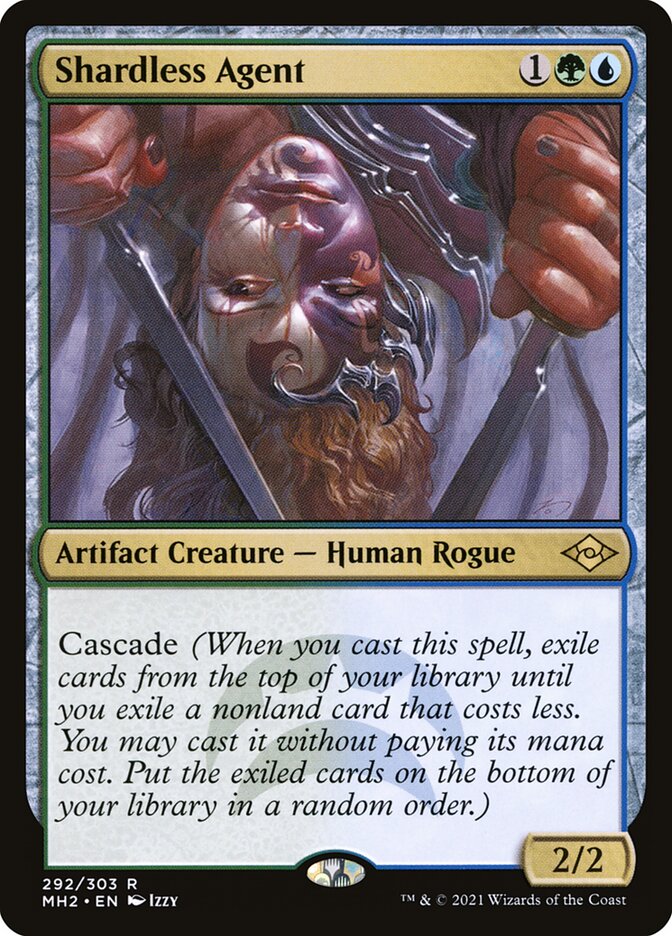 , Ardent Plea
 ), they are not really stuck by Harbinger of the Seas turning all their lands into Islands, and the opponent can still leisurely fill the graveyard, then use bounce effects to return Harbinger to hand to Cascade, or even use Press the Enemy
 to bounce plus Living End from hand. If we resolve Harbinger of the Seas, we should remove the opponent’s graveyard as soon as possible so the opponent can’t calmly accumulate resources.
Teferi, Time Raveler is still our lifelong enemy. We can’t let him resolve, a high-priority Extraction target. Spell Piercemay look a bit silly against a pile of free spells, but it still has to be kept for Teferi and the on-time turn-three Cascade into Living End. After all, the even worse Fatal Pushand Spell Snarehave to be shown the door first.
Don’t forget to watch out for the opponent’s Colossal Skyturtle .
Mono Black Midrange
| Side Out | Side In |
|---|---|
| -3 Spell Snare | +2 Stern Scolding |
| -2 Harbinger of the Seas | +1 Legion's End |
| +2 Surgical Extraction |
Resolve our Murktide at 5/5 or bigger as soon as possible (so it doesn’t die to a single Soul Spike or to March of Wretched Sorrow
 exiling two cards from hand, where we at least get a four-for-one), then stop the opponent’s Necrodominance
 and The One Ring.
All of the opponent’s creatures die to our Fatal Push, and remember to save fetchlands for Sheoldred!
Yawgmoth (Golgari)
| Side Out | Side In |
|---|---|
| -1 Echo of Eons | +2 Stern Scolding |
| -2 Harbinger of the Seas | +2 Surgical Extraction |
| -3 Preordain | +1 Toxic Deluge |
| -1 Spell Pierce | +1 Legion's End |
| +1 The Meathook Massacre |
This is a tough matchup. The opponent has a vast number of ways to win, while we must proceed carefully and answer with the most appropriate removal.
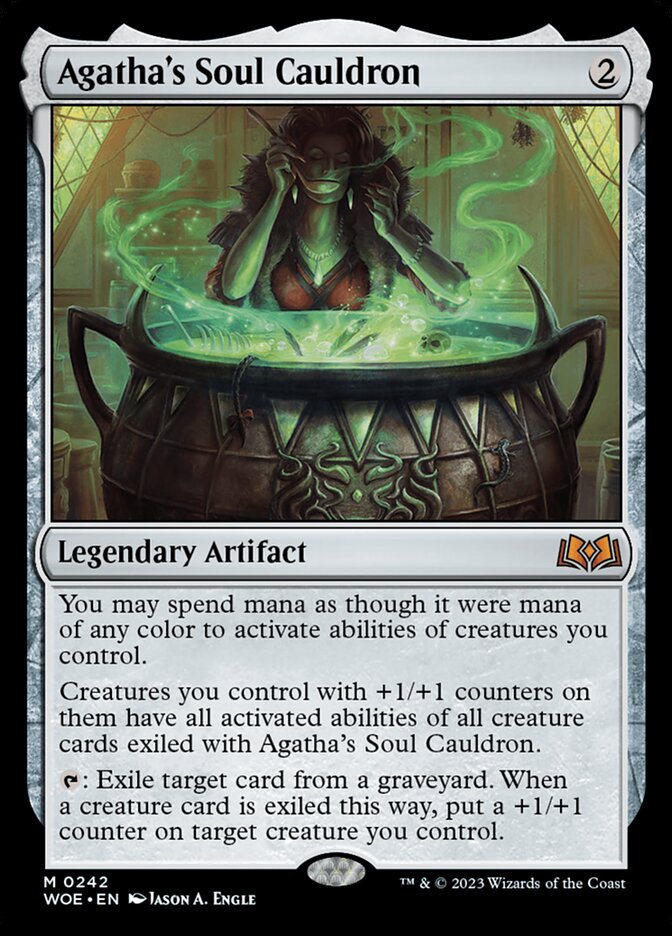
Our opening hand must be able to deal in time with Delighted Halfling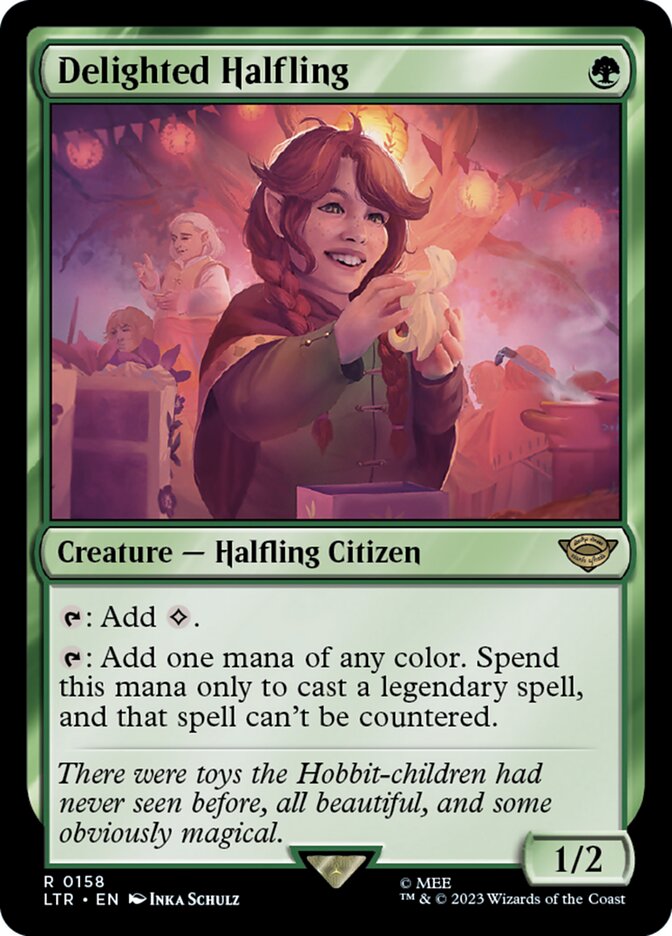 , and the subsequent Agatha's Soul Cauldron
 , Grist, the Hunger Tide
 , and Yawgmoth, Thran Physician
 . The turn-one Halfling must die, or what dies is the counterspells in our hand, and then us.
Don’t forget, Grist, the Hunger Tideis a creature card outside the battlefield, so we should use Stern Scoldingto counter it, not FON or Spell Pierce
Sometimes using Surgical Extraction to cut Young Wolf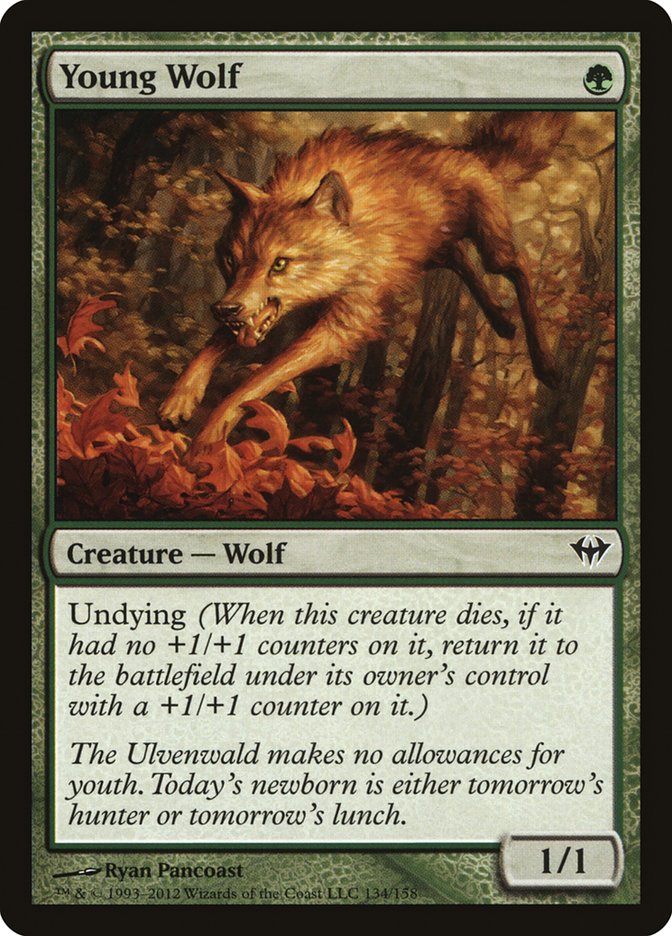 can break the opponent’s infinite combo, but no matter how bad things get, they still have a Plan B of pushing through on the ground, and then sweepers are crucial. The Meathook Massacreis usually not too slow.
Conclusion
Although my results went up and down along the way, I am very happy to have found friends to develop the combo with. Even after losing, we can go out for a meal and a walk together, then go home to keep practicing and think of new builds and sideboard strategies. Along the way I also met several impressive players. Losing doesn’t matter; I stand behind them and watch how they play, follow the flow of their games, and think about how I would play each hand, and I have learned a lot of valuable experience from that.
Behind a single win there are often countless defeats. But so what? We are all still moving along the road of improvement! I hope this article gives some encouragement to interested players, and to friends who keep fighting in competitive formats but have yet to prove themselves! Good luck, everyone!
- Title
- New Tech for Dimir Murktide: Echo of Eons
- Author
- cephille, jeffchen
- Created at
- September 13, 2024
- License
- This work is licensed under CC BY-NC-SA 4.0 .