A Guide to Temur Rhinos for the RC

Note: This article was translated from Chinese by AI and may contain errors. Read the original Chinese version.
Introduction
Hi everyone, I’m ClarkShih. I played “Temur Rhinos” at the Season 5 U.S. RC, went 11-3, finished 28th, and qualified for the Seattle PT.
In this article I’ll try to give players who are interested in playing Temur Rhinos at this RC a comprehensive guide. Whether you are new to the deck or have been playing it for a long time, I hope to help you find the build and strategy that suit you best.
I’ll start with a brief look at how the Modern metagame has shifted over the past few weeks, then go deep into card choices and sideboarding strategy. For the common matchups, I’ll try to give some practical advice and tips to help you do better at the RC. I’ll also share some valuable lessons and strategies I picked up during the tournament, which I hope will inspire and improve your play.
Guildmage’s Forum editor’s note:
Here is the link to ClarkShih’s previous Rhinos article. Readers are welcome to go back and see what changed between the two versions
Fury is gone.
Changes in Modern
With Fury and Up the Beanstalk banned, and the arrival of Tishana’s Tidebinder, Modern has changed a lot. “Temur Rhinos” has firmly taken its place as the leader of the format, while “Rakdos Evoke”, “Golgari Yawgmoth”, “Izzet Murktide” and “Amulet Titan” compete in the T1 slot. “Living End”, “4-Color Control”, “Boros Burn”, “Scales Affinity” and “Hammer” sit in T2 because each is “extreme” in a different way, trying to pull the T1 decks down at the tournament.
Based on the analysis above, we have a preliminary picture of the current format:
- T1: “Temur Rhinos”, “Rakdos Evoke”, “Golgari Yawgmoth”, “Izzet Murktide” and “Amulet Titan”
- T2: “Living End”, “4-Color Control”, “Boros Burn”, “Scales Affinity” and “Hammer”
Of course, Modern has many more decks, and with such a wide card pool there is never a shortage of brewing wizards who put together unexpected decks to shake up the tournament. Recently Leyline of the Guildpact has also had no small effect on Modern, but we’ll come back to that later.
Deck Introduction
Decklist
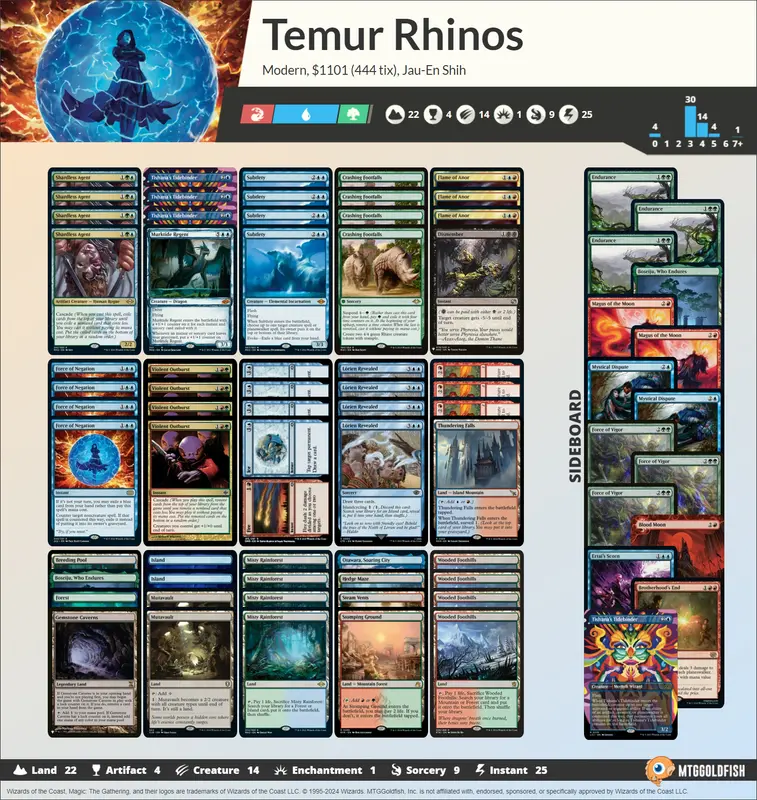
This is the list that earned me the PT qualification. I’ll get to why I built it this way in a moment.
Which Slots Are Fixed?
The following slots are fixed:
4 Shardless Agent
4 Violent Outburst
4 Crashing Footfalls
4 Force of Negation
4 Lórien Revealed
4 Fire // Ice
3 Dead // Gone
3 Tishana’s Tidebinder
3 Subtlety
1 Murktide Regent
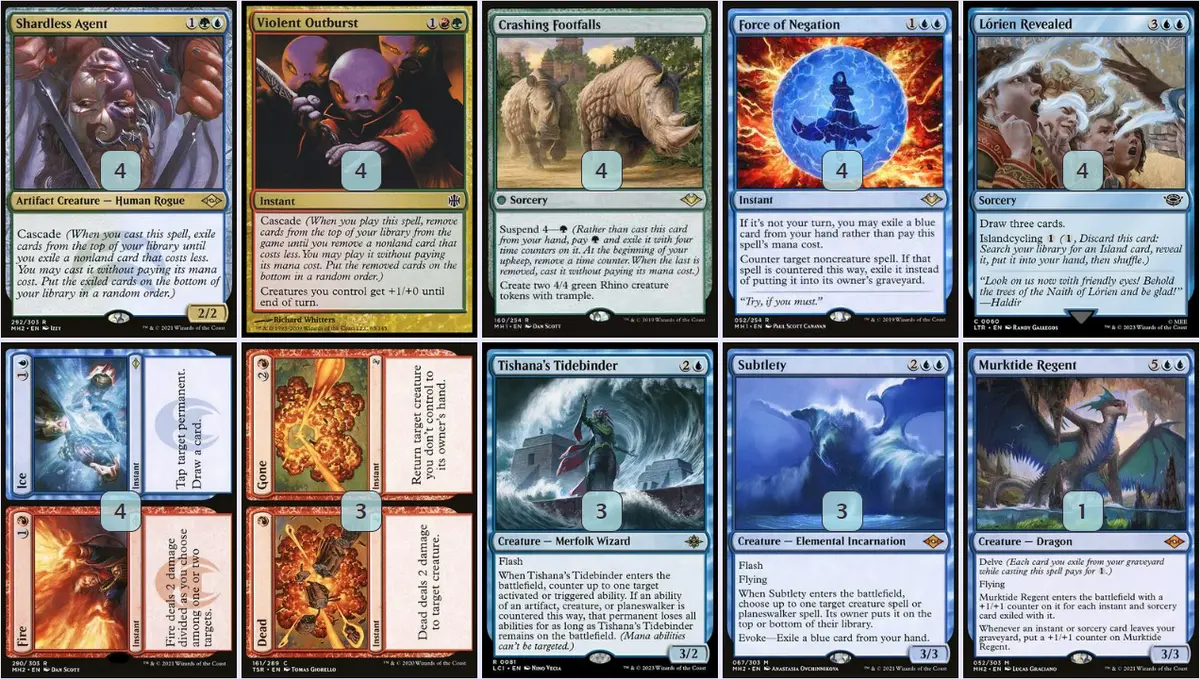
Shardless Agent, Violent Outburst, Crashing Footfalls, Force of Negation, Lórien Revealed and Fire // Ice are the very core of the deck. No matter how the format shifts, the number of copies of these cards won’t change. What matters more are the rest of these cards, which all perform well against most of the T1 decks, making them the fixed supporting cast of the deck.
Dead // Gone: Used to deal with the small creatures of Rakdos Evoke, Golgari Yawgmoth and Izzet Murktide. The rest of the time it is mediocre or even useless, so there is no need to max it out; the 4th slot can be Dismember instead.
Tishana’s Tidebinder: Does well in the mirror, against Golgari Yawgmoth and against Amulet Titan, is average against Rakdos Evoke, but is poor against Izzet Murktide.
Subtlety: Shines against Rakdos Evoke, Golgari Yawgmoth and Amulet Titan, is poor against Izzet Murktide, and in the mirror plays the role of countering Tishana’s Tidebinder and Murktide Regent.
Murktide Regent: Apart from being mediocre against Amulet Titan, it is basically very powerful against all the T1 decks. Its only drawback is that drawing two of them early leaves you with clunky hands.
How to Choose the Flex Slots?
After subtracting the fixed slots above, there are only 5 flex slots left, which players can adjust according to the format they expect. My choices were 3 Flame of Anor, 1 Dismember and a 4th Subtlety.
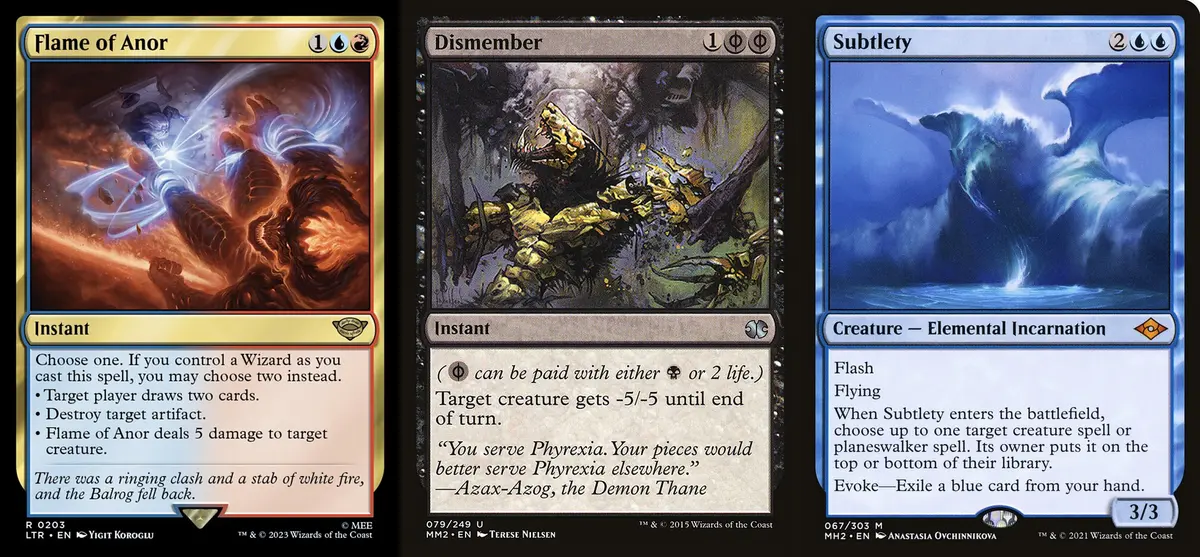
Besides the above, the following options are also worth considering:
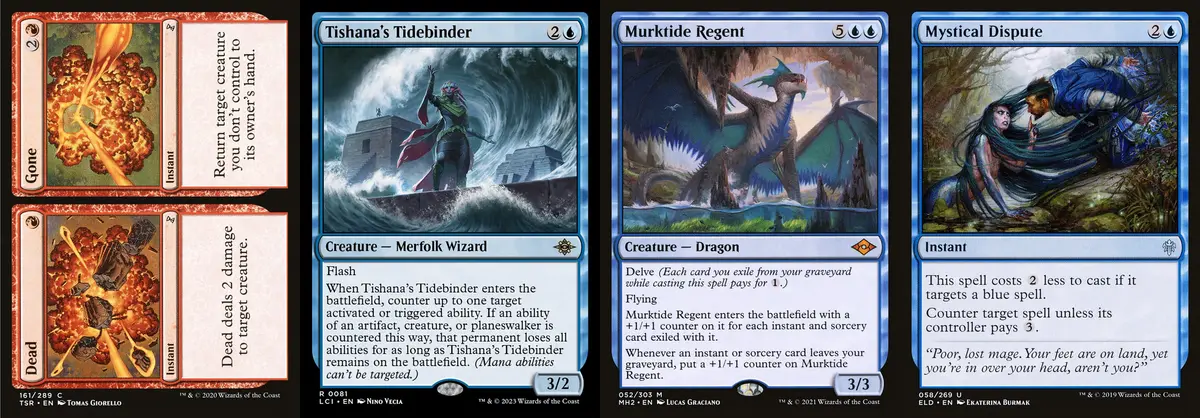
A 4th Dead // Gone
A 4th Tishana’s Tidebinder
A 2nd Murktide Regent
A few Mystical Dispute
As for how to choose, like I said, it depends on “what you expect the format to look like.” My predicted play rates at the time, from 1st to 5th, were: Temur Rhinos, Amulet Titan, Izzet Murktide, Golgari Yawgmoth, and finally Rakdos Evoke. Based on that prediction, my friends and I came to the following conclusions:
Flame of Anor: This card is good in all the matchups I expected, and it also ensures my stability in the mid to late game. It was the first card I immediately decided to play at least 2 of, and I played a 3rd because I found I would bring it in during almost every sideboard game. Of course it has a drawback: it is clunky. It can do anything, but it costs 3, and if you also want to pair it with Mutavault it costs 4. That keeps it from having an immediate impact in tight matchups such as Scales Affinity and Hammer, but I don’t think I’ll run into many of those; and since I want to make sure my topdecks are strong in the mid to late game, after some thought I decided on 3.
Dismember: I figured “Golgari Yawgmoth + Rakdos Evoke” would see more play than “Amulet Titan”, and I wanted a spell that can cheaply deal with the big creatures in the Rakdos Evoke and Golgari Yawgmoth matchups (Grief, Sheoldred, the Apocalypse, Yawgmoth, Thran Physician, Wall of Roots, and so on…). Besides, this card is decent in most matchups anyway. Another point is that against Izzet Murktide we have almost no answer early to Ledger Shredder; the 3-mana Dead // Gone or Flame of Anor are a bit clunky by comparison, so Dismember is the better answer there.
Subtlety: I figured “Rakdos Evoke + Amulet Titan + Golgari Yawgmoth” would see more play than “the mirror + Izzet Murktide”, so I wanted more Subtlety rather than Tishana’s Tidebinder, and it is also passable in the mirror (in response to the opponent’s Tishana’s Tidebinder or Murktide Regent). More importantly, I wanted more Subtlety that can be cast for free to answer Amulet Titan’s explosive turns in the first few turns.
The other options are also reasonable. If you think Amulet Titan won’t be as popular as expected, you could skip the 4th Subtlety and play a 2nd Murktide Regent, or if you want to focus more on the mirror and Izzet Murktide matchups, 1-2 Mystical Dispute would be a good choice.
Land Configuration
Shocklands, 1 each: This basically needs no explanation.
Red-green and blue-green fetchlands, 4 each: Because we already have Lórien Revealed, I prefer the fetchlands that can find green, so they can fetch a basic Forest. The only thing to note is that if you have a red-green fetchland early, use it first, so that when you need a basic Island or basic Forest in the mid game, the blue-green fetchland in hand is more flexible.
Red-blue and blue-green surveil lands, 1 each: Surveil lands are absolutely worth playing. Temur Rhinos’ mana isn’t tight in the first two turns, and it has the hard requirement of “must have 3 lands”, so the extra information from an early surveil gives you much more flexibility in how you mulligan and sequence the opening hand. I play 1 red-blue and 1 blue-green, replacing the original basic Mountain and Ketria Triome.
Mutavault, 2: It shines against the mirror, Izzet Murktide, Living End and control, decks that are tight on removal. The opponent finds it hard to convince themselves to use instant-speed removal on a 2/2 creature, and in the meantime you can steal a lot of life. It also raises the ceiling with Flame of Anor; since I play 3 Flame of Anor, I want to have 1 Mutavault to pair with it in every game.
Gemstone Caverns, 1: This one is a miracle maker; turning the draw into the play is truly crucial in the mirror and against Murktide. The reason I don’t play more than 1 is that I want to “stay stable”: I already play two Mutavault, and there is simply no room for more colorless lands in this three-color deck. That said, if you want to play more aggressively, cutting 1 Mutavault for 2 Gemstone Caverns is also fine.
Boseiju, Who Endures, 1: An artifact/enchantment answer, good against Indomitable Creativity, Amulet Titan and Hammer. In the main deck I only want 1, because I don’t want to be bothered by the legend rule; in sideboard games I’d want more if the opponent has Chalice of the Void or an artifact/enchantment-heavy deck.
Otawara, Soaring City, 1: Much like Boseiju, Who Endures; in most situations it is worse than Boseiju, but it is better than Boseiju in that it can deal with planeswalkers and creatures.
Basic lands: I play 2 Islands and 1 Forest. I originally had 1 Mountain, but burn’s performance has dropped recently, so it was replaced by a surveil land. The winner of the U.S. RC played 2 Islands and 2 Forests, probably wanting to still be able to cast Force of Vigor or Endurance while casting Blood Moon, but both of those cards can be cast for free and don’t necessarily conflict with Blood Moon, so I don’t think it is particularly necessary.
Sideboard Choices
As with the main deck, sideboard choices mainly depend on which matchups you want to focus on. Below are my sideboard choices and the reasons.
Ertai’s Scorn, 1: This is our only answer when on the draw to the opponent’s turn-three Cascade (this is really very important), and it is also an excellent hard counter in midrange and control matchups.
Mystical Dispute, 2: I wanted some cheap counters to fight the mirror, Izzet Murktide and Living End. I considered a 3rd, but couldn’t find the room, and the card is after all rather passive; in the topdeck phase I want to draw cards that create value.
Tishana’s Tidebinder, 1: I predicted that the mirror and Amulet Titan would be the most played decks, and Tishana’s Tidebinder does well in both matchups, so I wanted more.
Endurance, 3: Effective graveyard hate, especially good against Izzet Murktide and Living End. It has room to perform in other matchups too, for example in response to Agatha’s Soul Cauldron’s ability, or to recycle your own Crashing Footfalls.
Force of Vigor, 3: I predicted a lot of Amulet Titan, so I played 3. In that matchup you want to hold mana to respond to the opponent’s plays, and in sideboard games Amulet Titan brings in 3-4 Defense Grid; the free-cast nature of Force of Vigor frees up mana to pay Defense Grid’s extra cost. Against Hammer and Scales Affinity, although the sweeping power of Brotherhood’s End could be devastating, Force of Vigor, which can be cast instantly, better answers their early tempo explosions.
Blood Moon / Magus of the Moon, 3 total: I personally play a 1/2 split. After all, against Amulet Titan they have ways to find Boseiju, Who Endures to destroy Blood Moon, but they can only draw into an answer to Magus of the Moon. That said, as Amulet Titan plays more red removal, I think any split is reasonable. You can also choose a 3/0 or 2/1 configuration, because other decks afraid of Blood Moon, such as Death’s Shadow or Indomitable Creativity, have a harder time dealing with the enchantment Blood Moon than with the creature. If you don’t expect Amulet Titan to be as popular as I did, you can even cut the number of copies and leave more sideboard room for other matchups.
Brotherhood’s End, 1: The best sweeper against Rakdos Evoke and Golgari Yawgmoth, letting our Rhinos survive while it clears their creatures. Against Hammer and Scales Affinity, we have a way to win with this one card.
Boseiju, Who Endures, 1: I wanted more artifact removal to deal with the opponent’s Chalice of the Void in sideboard games, and besides, this card can effectively disrupt Amulet Titan.
Common Matchups
Mirror
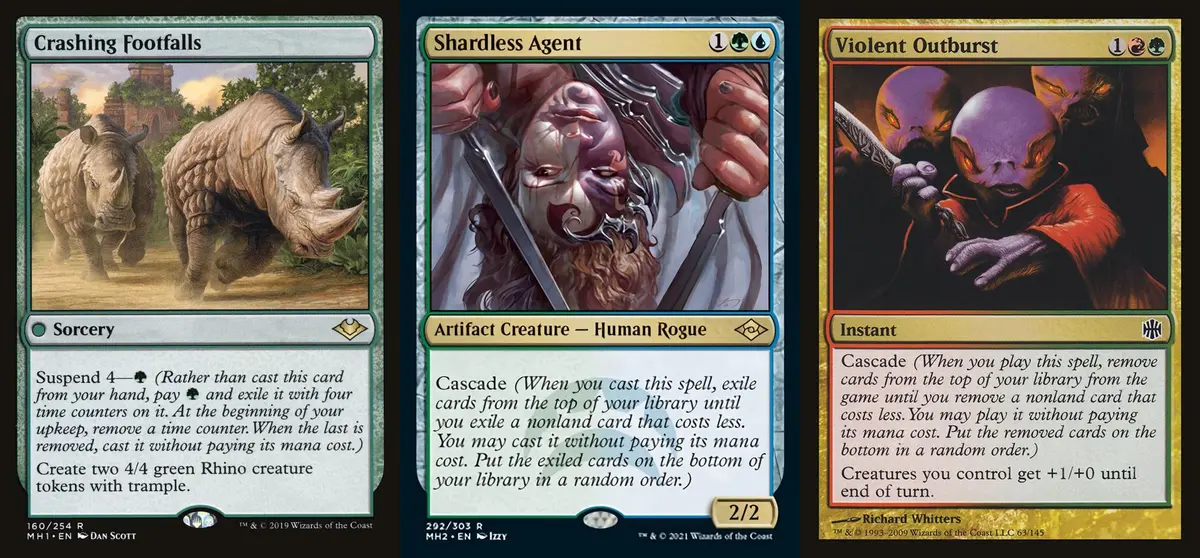
The old saying about the mirror: “whoever draws better wins,” though of course player skill and deck construction matter somewhat.
I recommend finding a “Line to Play” during the matchup. Sometimes suspending Crashing Footfalls on turn 1 can be better than cascading on turn 3, because if you Cascade on turn 3 you are just giving the opponent the chance to Cascade into a Rhino and trade with yours. In that case, if the opponent has counters and you don’t, the matchup may turn against you, and if both of you resolve Crashing Footfalls, neither side is ahead; you just trade. So a turn-1 Suspend lets you have mana on the crucial turns 3-4 to interact with the opponent’s spells, and then try to resolve the suspended Crashing Footfalls afterward.
Since both players’ hands drain very quickly, resource advantage is also a major theme of the mirror. Flame of Anor does well in the mirror, and sometimes you can hold back Lórien Revealed to secure a late-game resource advantage, while Murktide Regent has a huge influence on how the mid to late game goes.
Golgari Yawgmoth
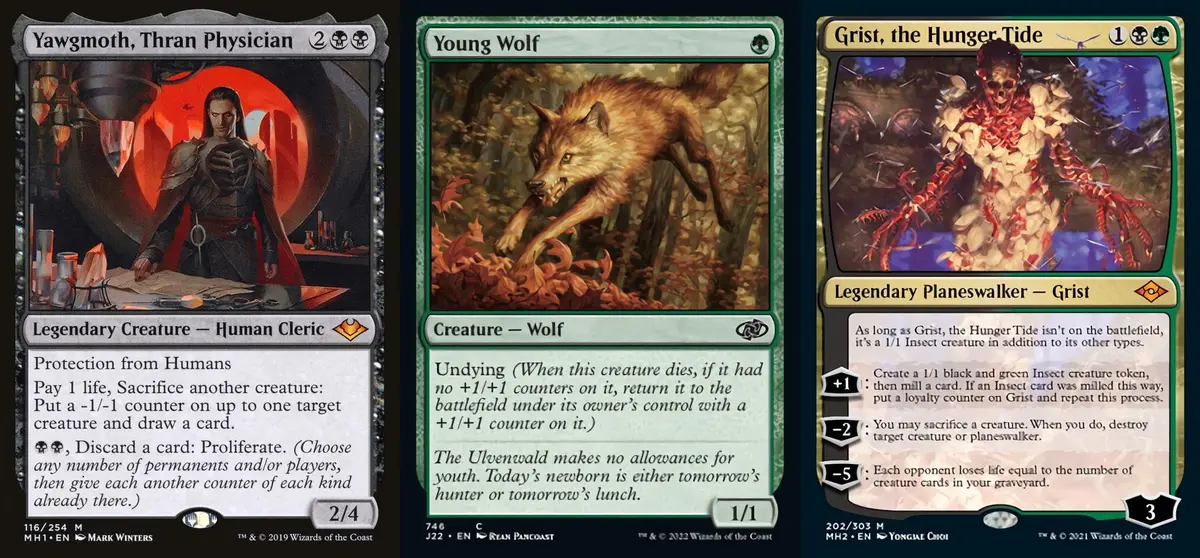
In theory this matchup is very favorable for us, especially since they can barely stop our turn-3 Cascade and need to spend a lot of resources to trade with us. I think there are 4 key things to watch out for in this matchup: Yawgmoth, Thran Physician, Hapatra, Vizier of Poisons, Grist, the Hunger Tide, and Agatha’s Soul Cauldron”.
The faster you deal with Yawgmoth the better; give our Rhinos -1/-1 and it can easily block us, gaining a lot of resources at the same time. Although Tishana’s Tidebinder can counter and lock down Yawgmoth’s abilities, if the opponent has enough creatures they can respond to the ability by killing Tishana’s Tidebinder, so that Yawgmoth doesn’t lose its abilities. Also note that “Yawgmoth has protection from Humans” and “Shardless Agent is a Human”. That is how I lost my round 3 match at the RC: I wanted to use Fire // Ice to kill the Yawgmoth blocking my Shardless Agent, and ended up losing two cards at once.
I strongly recommend always keeping an answer for Hapatra, Vizier of Poisons, because it’s the only card that trades with us while spending the fewest resources. Also pay attention to each of her abilities: when she deals combat damage to a player she puts a -1/-1 counter, and putting a -1/-1 counter makes a 1/1 Snake token with deathtouch.
Grist, the Hunger Tide can kill one of our Rhinos and then keep producing blockers on the battlefield. Their expectation for this card is “kill 1 Rhino + take one hit,” so I don’t think it must be stopped, but deal with it as soon as it lands or it gets very troublesome.
The problem with Agatha’s Soul Cauldron is that it gives creatures the abilities of Yawgmoth or Grist, the Hunger Tide and also makes creatures bigger. Although we have plenty of removal for it, still deal with it as soon as possible.
Finally, make sure you understand all the ways the opponent can go “infinite,” and although Orcish Bowmasters doesn’t do much against us, don’t draw cards recklessly either. In theory, as long as you don’t draw too badly, this matchup can be won easily.
Rakdos Evoke
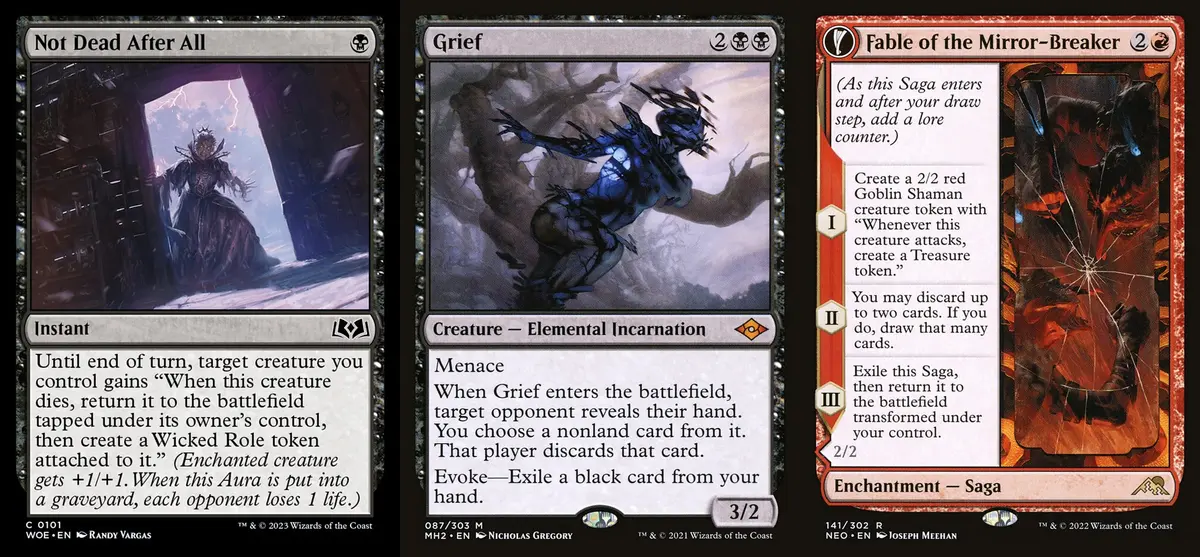
A matchup where we have the advantage, and generally our topdecks are better. The simplest way to beat Grief + reanimation (single cards like Not Dead After All / Undying Evil) is a pair of Rhinos. Although we are forced to discard two cards, it doesn’t matter, since our deck has 8 Cascade cards and we’ll always draw into them. If they don’t have a turn-1 Grief + reanimation, then they are just an ordinary midrange deck.
Besides that, you also need to consider whether to give your only removal spell in hand to Ragavan, Nimble Pilferer or Dauthi Voidwalker. I think a turn-1 Ragavan is indeed annoying, but it can’t actually get many useful cards from us, so I’d rather save the removal for Dauthi Voidwalker, to keep it from stealing our Crashing Footfalls to use, and just block Ragavan with a Rhino.
Izzet Murktide
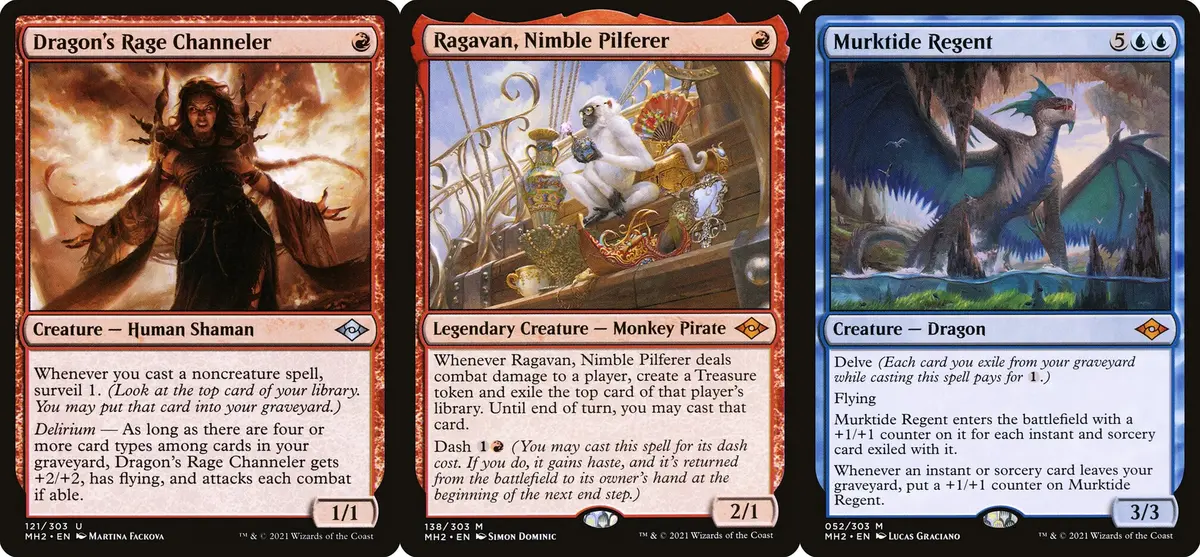
I don’t like this matchup very much. When they go first, Ledger Shredder + counters make the matchup very strange, because your Crashing Footfalls will be hard to resolve, and Ledger Shredder will grow big enough to block Rhinos and to a point your life total can’t afford.
I think in this matchup we want to play the role of the control deck, and we’ll have quite a lot of time, because they can’t really afford to tap out with the risk of us having Violent Outburst. So kill the opponent’s creatures, use Flame of Anor or Violent Outburst to force the opponent to tap out, and finally resolve Crashing Footfalls. Once we resolve Crashing Footfalls, they need to spend resources to deal with us, which gives us more chances to follow up with the next Crashing Footfalls. So this is another matchup where I like a turn-1 Suspend of Crashing Footfalls, because we can force the opponent to use mana on turn 4 and then try to resolve Crashing Footfalls on turn 5.
If we have Murktide Regent, we can switch to a different plan: Cascade aggressively to trade with the opponent, and finally try to resolve Murktide Regent. Usually the opponent can’t deal with Murktide Regent effectively, and if they do, we’ll have more chances to resolve our remaining Crashing Footfalls.
Amulet Titan
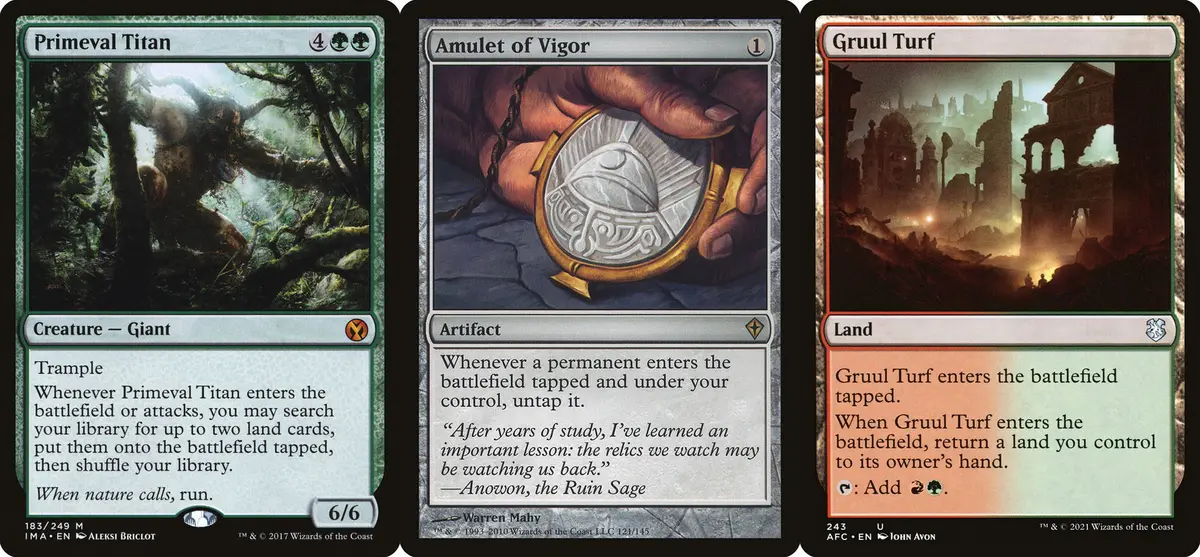
One of the best matchups, even more favorable than Golgari Yawgmoth. What we do is keep a hand with Cascade + disruption, Cascade on turn 3, and then lock the opponent out: whatever makes them uncomfortable, we do it.
Sideboard games are harder to call, since the opponent may have Defense Grid to answer our counters. If the opponent plays Defense Grid on turn 2 on the play, our only options are to counter it or destroy it with Boseiju, Who Endures; if the opponent plays Defense Grid on turn 2 on the draw, we still have the option of casting Force of Vigor on the opponent’s turn on turn 3.
Living End
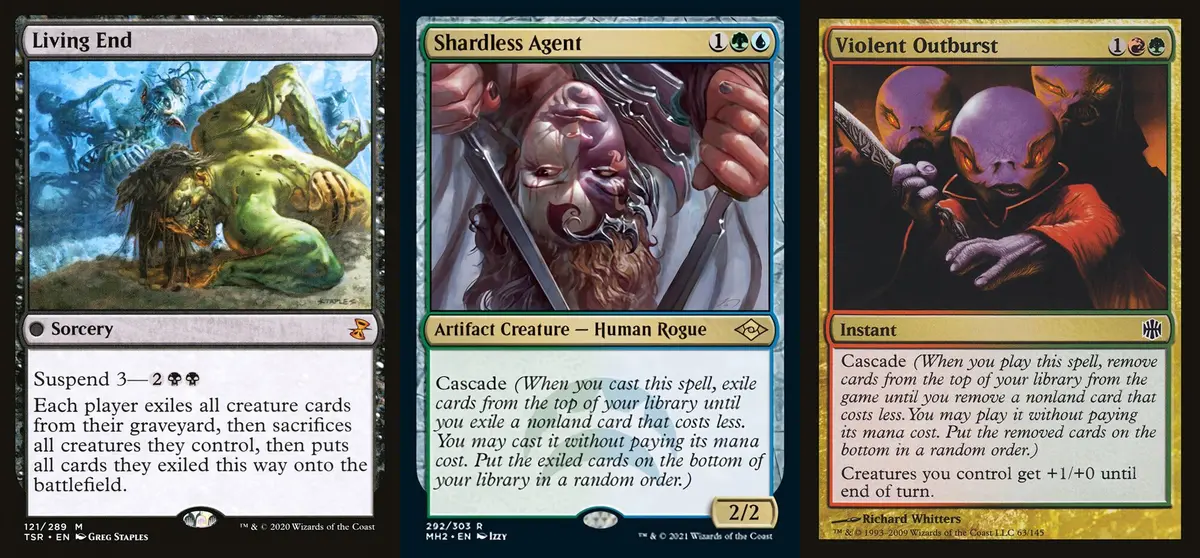
The worst matchup. We can only pray that we Cascade on turn 3 and the opponent has no Cascade spell at all, or that if we have Endurance, we trade spells wildly with the opponent when they Cascade, successfully stop them, and then win the game with the remaining Endurance.
Honestly, I really don’t have any advice for this matchup. All you can do is try to read the opponent’s hand and make either super aggressive or super conservative decisions to try to win, though usually we still lose…
4-Color Control
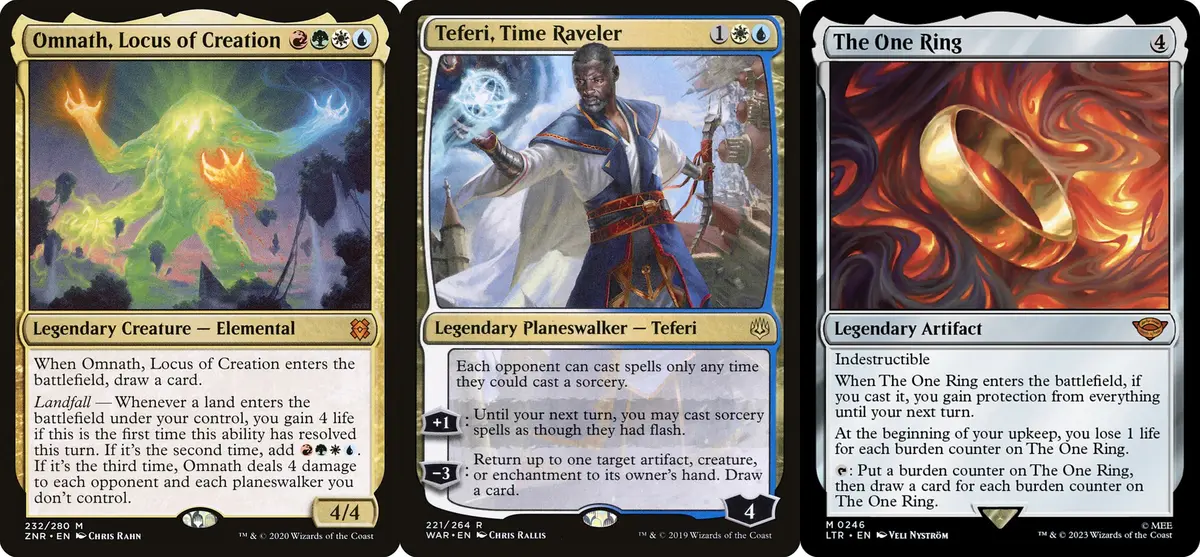
This matchup is very complicated. In my experience I want to play the role of a flash deck, because the opponent doesn’t want to spend their counters on anything other than Crashing Footfalls, so our flash creatures can usually resolve, forcing the opponent to act and leaving them no time to cast cards that threaten us, such as Teferi, Time Raveler or The One Ring.
Teferi, Time Raveler and The One Ring are definitely the key to us losing this matchup, and I save my counters for these two cards first. If we can’t, we have a few solutions: we can respond to Teferi, Time Raveler with a flash creature to force them to -3 to bounce the creature, then use Fire // Ice on our turn to deal with Teferi, Time Raveler; Tishana’s Tidebinder is a good answer to The One Ring, stopping The One Ring while the creature we play puts pressure on them.
Mutavault and Flame of Anor shine in this matchup: Mutavault dodges most of the opponent’s removal and applies life pressure, while Flame of Anor helps us refill our hand after using free spells, and the two work even better together.
Boros Burn
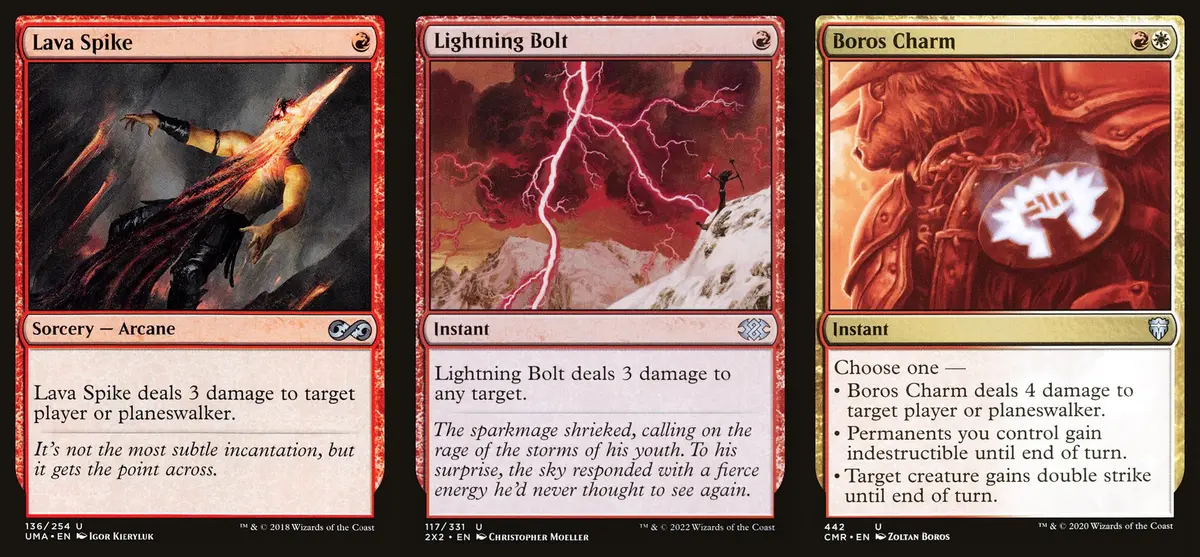
This matchup is a race of life totals. For the most part it favors us: as long as the opponent doesn’t have Roiling Vortex, our turn-3 Cascade can almost win it outright. Tishana’s Tidebinder is good in this matchup, able to stop the opponent’s suspended Rift Bolt and the Sunbaked Canyon (draw land), and can also serve as a blocker or attacker.
Scales Affinity
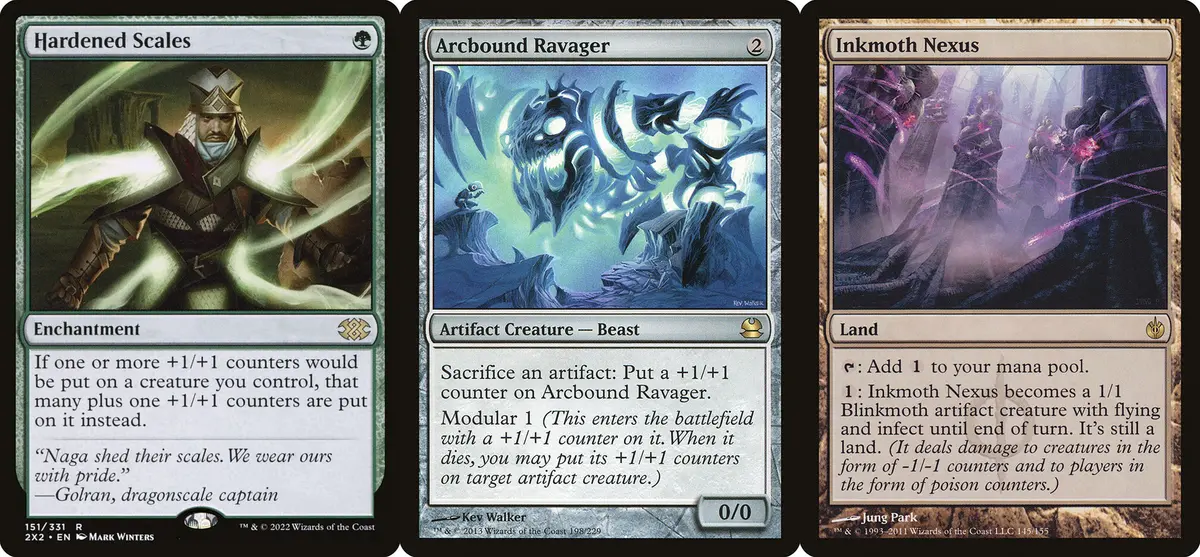
Also a race, but not very favorable for us, because their creatures grow too fast and quickly get out of the range of Dead and Fire, and can also block our Rhinos. In game 1 there isn’t much we can do: pressure with Rhinos, and slow them down with Gone, Ice and Tishana’s Tidebinder. In sideboard games we have more removal and the pressure is relatively lower.
Hammer
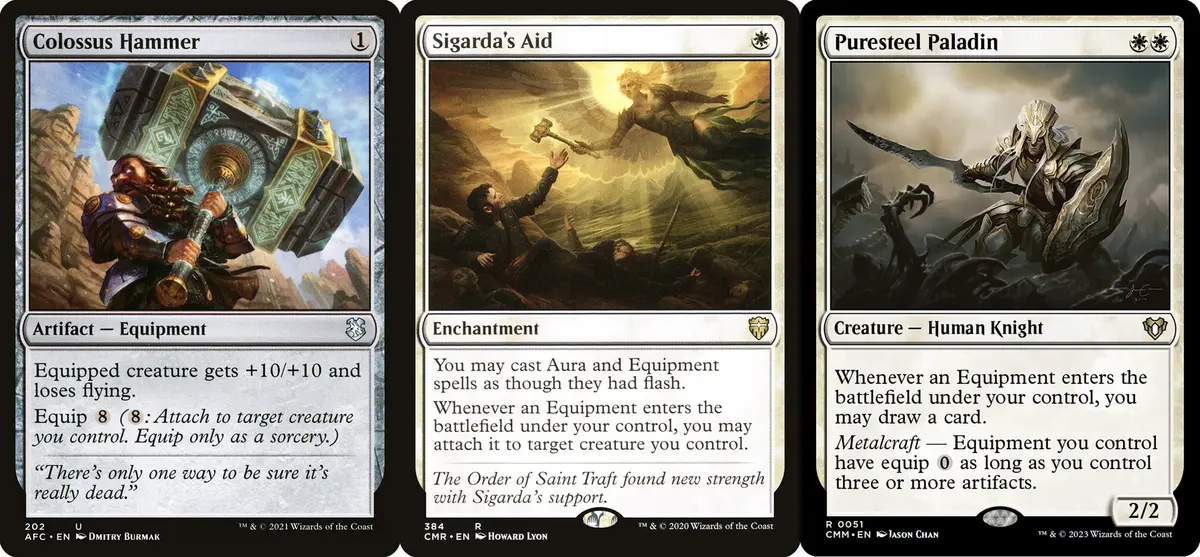
A matchup very similar to Scales Affinity. Although the opponent’s creatures don’t grow too fast, they have more protection spells that are harder to deal with, so be more careful when using removal.
5-Color Zoo
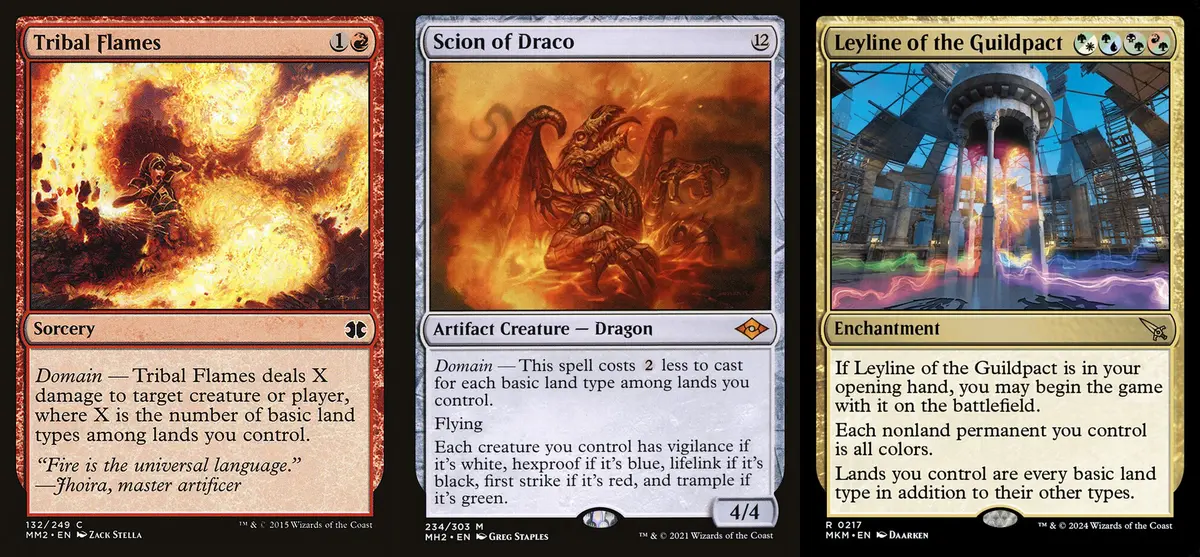
We really have no answer to an opening Leyline of the Guildpact. In the main deck only Boseiju, Who Endures can remove Leyline of the Guildpact; in the sideboard Force of Vigor can answer it, but our deck will have more dead cards. If they don’t open with Leyline of the Guildpact, the matchup is somewhat better, because we can use Tishana’s Tidebinder to counter the trigger of the opponent’s Territorial Kavu, making Territorial Kavu lose its abilities and die.
All we can really do is pray they don’t open with Leyline of the Guildpact; if they really don’t, the matchup becomes much easier.
5-Color Rhinos
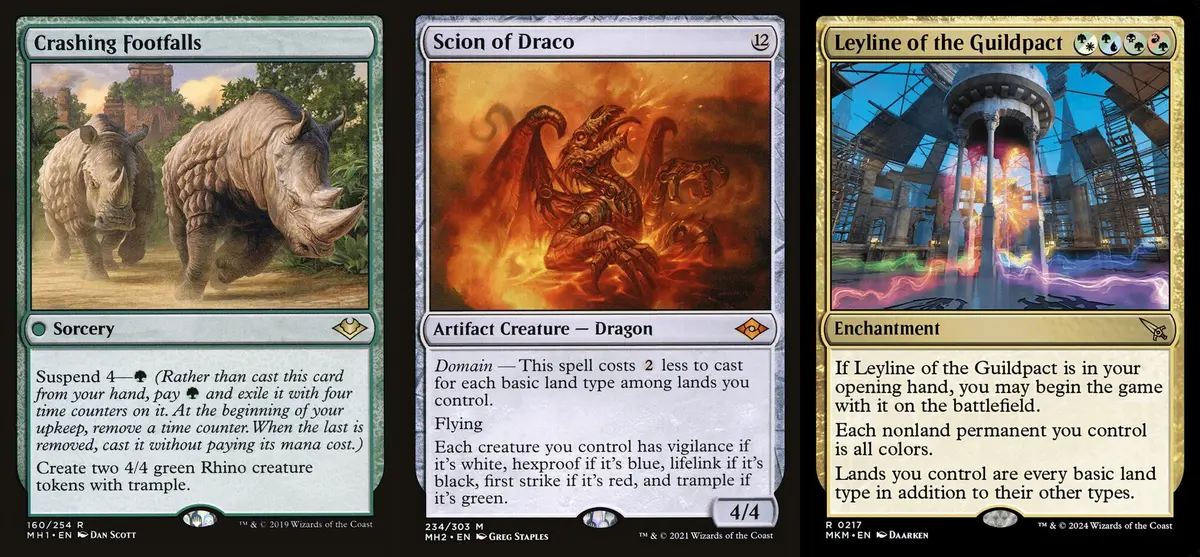
Like 5-Color Zoo, Leyline of the Guildpact is truly rather unanswerable. If they don’t have it, the matchup gets much better, because they would then be a worse Rhinos deck.
Sideboard Strategy
OTP: On the Play, meaning you go first
OTD: On the Draw, meaning you go second
Mirror
| Side Out | Side In |
|---|---|
| -1 Subtlety | +1 Endurance |
| -1 Dismember | +1 Tishana’s Tidebinder |
| -3 Dead // Gone | +1 Ertai’s Scorn |
| +2 Mystical Dispute |
Dead // Gone and Dismember are not good in this matchup, because Dead has almost no targets, and although Gone can effectively deal with a Rhino or temporarily deal with Murktide Regent, I don’t think it’s worth it. Ertai’s Scorn is excellent, especially on the draw, while Endurance helps us recycle Crashing Footfalls, giving us staying power in a longer game.
Golgari Yawgmoth
| Side Out | Side In |
|---|---|
| -4 Force of Negation | +1 Brotherhood’s End |
| -1 Gemstone Caverns (OTP) | +2 Endurance |
| -1 Mutavault (OTD) | +1 Tishana’s Tidebinder |
| +1 Boseiju, Who Endures |
Rakdos Evoke
| Side Out | Side In |
|---|---|
| -4 Force of Negation | +1 Brotherhood’s End |
| -1 Gemstone Caverns (OTP) | +3 Endurance |
| -1 Mutavault (OTD) | +1 Boseiju, Who Endures |
Izzet Murktide
| Side Out | Side In |
|---|---|
| -1 Tishana’s Tidebinder | +3 Endurance |
| -1 Subtlety | +1 Ertai’s Scorn |
| -4 Force of Negation | +2 Mystical Dispute |
| -1 Gemstone Caverns (OTP) | +1 Boseiju, Who Endures |
-1 Mutavault (OTD)
If the opponent doesn’t have Chalice of the Void, there is no need to bring in Boseiju, Who Endures.
Amulet Titan
| Side Out | Side In |
|---|---|
| -1 Murktide Regent | +1 Blood Moon |
| -1 Dismember | +2 Magus of the Moon |
| -2 Flame of Anor | +1 Tishana’s Tidebinder |
| -3 Dead // Gone | +3 Force of Vigor |
| -1 Gemstone Caverns (OTP) | +1 Boseiju, Who Endures |
-1 Mutavault (OTD)
I want to keep mana sources, so Brotherhood’s End isn’t good enough. In fact Dismember and Flame of Anor perform decently in this matchup, so if you don’t need to bring in that many cards, you can keep a few more.
Living End
| Side Out | Side In |
|---|---|
| -1 Murktide Regent | +3 Endurance |
| -1 Dismember | +1 Ertai’s Scorn |
| -2 Flame of Anor | +2 Mystical Dispute |
| -3 Dead // Gone | +1 Tishana’s Tidebinder |
Murktide Regent is completely useless in this matchup. Flame of Anor drawing cards also performs decently, so if you don’t need to bring in that many cards, you can keep a few more.
4-Color Control
| Side Out | Side In |
|---|---|
| -1 Shardless Agent | +2 Endurance |
| -1 Murktide Regent | +1 Ertai’s Scorn |
| -1 Dismember | +2 Mystical Dispute |
| -3Dead // Gone | +1 Tishana’s Tidebinder |
| -1 Gemstone Caverns (OTP) | +1 Boseiju, Who Endures |
-1 Mutavault (OTD)
Shardless Agent is sorcery-speed, which doesn’t fit our flash plan, so I want to take out 1. If the opponent doesn’t have Chalice of the Void, there is no need to bring in Boseiju, Who Endures on the draw.
Boros Burn
| Side Out | Side In |
|---|---|
| -3 Subtlety | +1 Brotherhood’s End |
| -1 Dismember | +1 Ertai’s Scorn |
| -1 Gemstone Caverns (OTP) | +2 Mystical Dispute |
| -1 Mutavault (OTD) | +1 Boseiju, Who Endures |
Scales Affinity / Hammer:
| Side Out | Side In |
|---|---|
| -4 Force of Negation | +1 Brotherhood’s End |
| -1 Gemstone Caverns (OTP) | +3 Force of Vigor |
| -1 Mutavault (OTD) | +1 Boseiju, Who Endures |
5-Color Zoo
| Side Out | Side In |
|---|---|
| -4 Force of Negation | +1 Brotherhood’s End |
| -1 Gemstone Caverns (OTP) | +3 Force of Vigor |
| -1 Mutavault (OTD) | +1 Boseiju, Who Endures |
Because of Leyline of the Guildpact, Blood Moon is useless, since basic lands still keep all the basic land types.
5-Color Rhinos
| Side Out | Side In |
|---|---|
| -1 Subtlety | +1 Ertai’s Scorn |
| -1 Dismember | +2 Mystical Dispute |
| -3 Dead // Gone | +3 Force of Vigor |
| -1 Tishana’s Tidebinder | +1 Boseiju, Who Endures |
| -1 Gemstone Caverns (OTP) |
-1 Mutavault (OTD)
Other Questions
Do You Recommend 5-Color Rhinos?
No. I find 5-Color Rhinos very unstable; even with Leyline of the Guildpact you don’t necessarily win, and you must pair it with Scion of Draco for the deck’s domination to show. Also, 5-Color Rhinos is at a bigger disadvantage against control decks, and recently some players have gone back to the embrace of Indomitable Creativity, using All Is Dust or Sundering Titan to punish Leyline of the Guildpact. Finally, as everyone has prepared for this deck, the advantage it can bring is getting smaller and smaller.
Which Color Should I Fetch For First?
I think it depends on your current matchup or hand. Playing blue is a given; what matters most is whether you want two red or two green mana on turns 3 and 4. One more point: in matchups like the mirror, Rakdos Evoke and Izzet Murktide, life total matters, so if paying two life isn’t necessary at the moment, I’ll fetch a basic land.
Any Advice for Preparing for a Tournament?
Testing, lots of testing. The purpose of testing isn’t to figure out which cards are good or how to sideboard (because I’ve written all that here); the main purpose of testing is to deepen your practical understanding of your own deck and the matchups, so that you have more experience than your opponent in the tournament and make fewer mistakes.
Don’t worry about losing all the time while testing. What we want is to see our own weaknesses and improve; leave the wins for the tournament!
Any Other Advice?
Never forget Suspend triggers!!! Being one turn late has an enormous effect, so I absolutely recommend using any method to remind yourself, such as putting a die on top of your library so you won’t forget before drawing. Don’t let one slip-up become a lifelong regret.
If the opponent plays a deck with Tishana’s Tidebinder, be sure to fetch a land only when the opponent cannot cast it. It may not matter much late in the game, but early on, getting a land blown up will slow your tempo.
One more thing: if you have any amulet or lucky charm, I suggest carrying it with you. I would rather lose spectacularly in a match and blame it for not working than blame myself in the end for not having it with me. I found that when I wore my bracelet and necklace, I felt more at ease and more confident during matches. This isn’t irrational superstition; during long games and decisions, it gives you a safe place to return to when you feel lost.
Conclusion
Looking back, when I wrote my last Temur Rhinos deck introduction I was still marveling that I’d qualified for the RC, and now I’ve already qualified for the higher-level PT. Thinking that this will be my first time playing in a PT, I’m both excited and full of anticipation, aaaaaah!!!
I hope you enjoy this article. If you do, please follow our Facebook page “夢續工作室 DreamOn Studio”, or listen to our Podcast: “龍尊與荒野騎士的玄境之談” is now available on both Spotify and Apple Podcasts!
- Title
- A Guide to Temur Rhinos for the RC
- Author
- ClarkShih
- Created at
- March 1, 2024
- License
- This work is licensed under CC BY-NC-SA 4.0 .