A First Look at Esper Ninjas

Note: This article was translated from Chinese by AI and may contain errors. Read the original Chinese version.
Before We Start
First, a disclaimer: my result at MIT#11 was terrible, just 2 wins, 3 losses and 2 draws. If you only care about results, feel free to skip this article. But since some friends said they wanted to read it, I wrote it anyway. I changed my mind many times while writing, and after finishing I still feel this is a fun and powerful deck, and I hope you enjoy playing it too.
Note: Readers who are only interested in the deck build can jump straight to Deck Introduction. That said, the next section, Why Esper Ninjas?, may offer some useful advice and methodology for readers who want to understand the key points of deck building and how to prepare for a big tournament.
Why Esper Ninjas?
MIT#11 was the first week RC (Regional Championship) after the official release of TMT. The environment was unpredictable: were the new cards the answers of the format, or traps!? Testing time was extremely limited, which made it a very challenging tournament. Readers who follow my fan page cephille’s MTG World know that I’m a long-time Dimir midrange player at tournaments. And my one constant understanding when playing this deck is —
Kaito, Bane of Nightmares is the strongest “single card” in Standard!
This understanding was already laid out very clearly in Petr Sochůrek’s earlier article on TCGPLAYER. Readers interested in this archetype are welcome to study it as foundational material before reading the rest of this article.
Article link: Dimir Midrange Standard MTG Deck Guide - Card Choices, Sideboarding, and More!
And Dimir midrange is a deck that only holds together because of the strength of Kaito, Bane of Nightmares . But its problem is also obvious: performance with and without Kaito is often worlds apart. Kaito’s own strength alone can carry Dimir midrange to Tier 1 to Tier 2 performance. So what if there were an archetype that could fully unleash Kaito’s real power? Thus, by adding the new Teenage Mutant Ninja Turtles cards from TMT onto the foundation of Dimir midrange, Esper Ninjas was truly born.
Weeks 1-4 (20260201 - 20260228)
These five weeks were basically spent tinkering with the previous version of Dimir midrange in various ways, plus slacking off during the Lunar New Year. In that time I picked up an MIT#12 qualification, 2 store-championship foil Ocelot Pride , played a few ECL drafts, and stared blankly at the new Turtles cards. Although I had some new ideas when I saw the new ninja cards, I hadn’t acted on them. I still remember that at the store championship at 艾克米, the judge 多多 came and asked me whether the new card Dream Beavers
 had a place in Dimir midrange, and my answer at the time was:
“In Dimir midrange, Dream Beavers can’t replace Spyglass Siren .” But as I’ll write later, I had it wrong.
Thanks to the pros’ MTGA early looks at the new Standard, I was able to catch the viable path for Esper Ninjas early, in Week 4.
References:
- Gabriel Nassif (小黃帽)‘s The Best Cards from Teenage Mutant Ninja Turtles
- Shahar Shenhar’s Bouncing Beavers is BEYOND BROKEN?! | Esper Ninjas | Standard Bo3 | TMT Early Access | MTG Arena
However, after watching the pros’ deck videos, I still had two doubts that I couldn’t be talked out of:
- Is it right to use white ninjas at one mana? Is the cost of the mana base too high?
- The pros’ builds are rather linear. Slamming cards on curve on the play is certainly powerful, but when disrupted, or on the draw, wouldn’t the gap between the deck’s ceiling and floor be too large?
So I began my own deck iteration process.
Week 5 (20260301 - 20260307)
On Sunday I practiced with friends, converting the Dimir midrange base into the Esper Ninjas version below, essentially locking in the version with 3 copies each of Dark Leo & Shredder and The Last Ronin's Technique
 . The reason I didn’t max them out like the pros is that the one-drop curve wasn’t sufficient, especially since Technique gets stuck in hand when there’s no one-drop on the curve, or when the one-drop is killed before blocks.
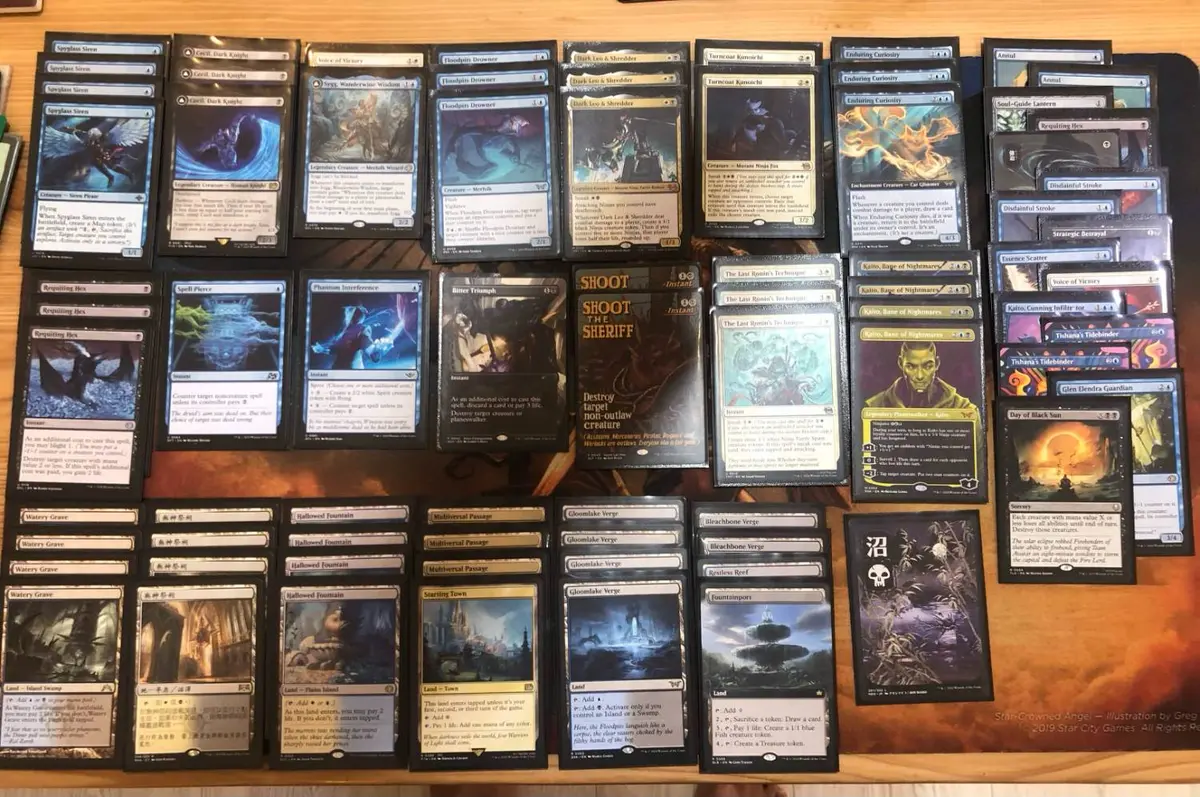
I later realized this version is very close to the MIT#11 main-event Top 8 list by 曾宥均, but I think I thought a few more steps ahead,
otherwise this article should have been written by him XD
By the way, we truly never discussed it; it’s the kind of coincidence between veteran Dimir midrange players XD
On Wednesday, while practicing at Game Square, I deeply felt that 25 lands wasn’t suitable: flooding out in two straight games against control cost me the match, so I quickly took out Fountainport . I originally thought, “there are more tokens now, so Fountainport should be great, right?” But the penalty from flooding was completely unacceptable. In testing I also felt that running only 7 one-drop creatures is reasonable for ninjutsu Kaito on turn three, but still too few if you want to Sneak on time on turn two, so I started increasing the proportion of one-drops.
MIT#11 Main Event Day
For the tournament report you can just read this post on my fan page, so I won’t go into detail. In short, I lost to 2 Mono-White Momo and 1 Mono-Red, a matchup that hard-counters us; drew with 1 five-color Elementals and 1 Mono-White Momo, and had a dismal day.
Deck Introduction
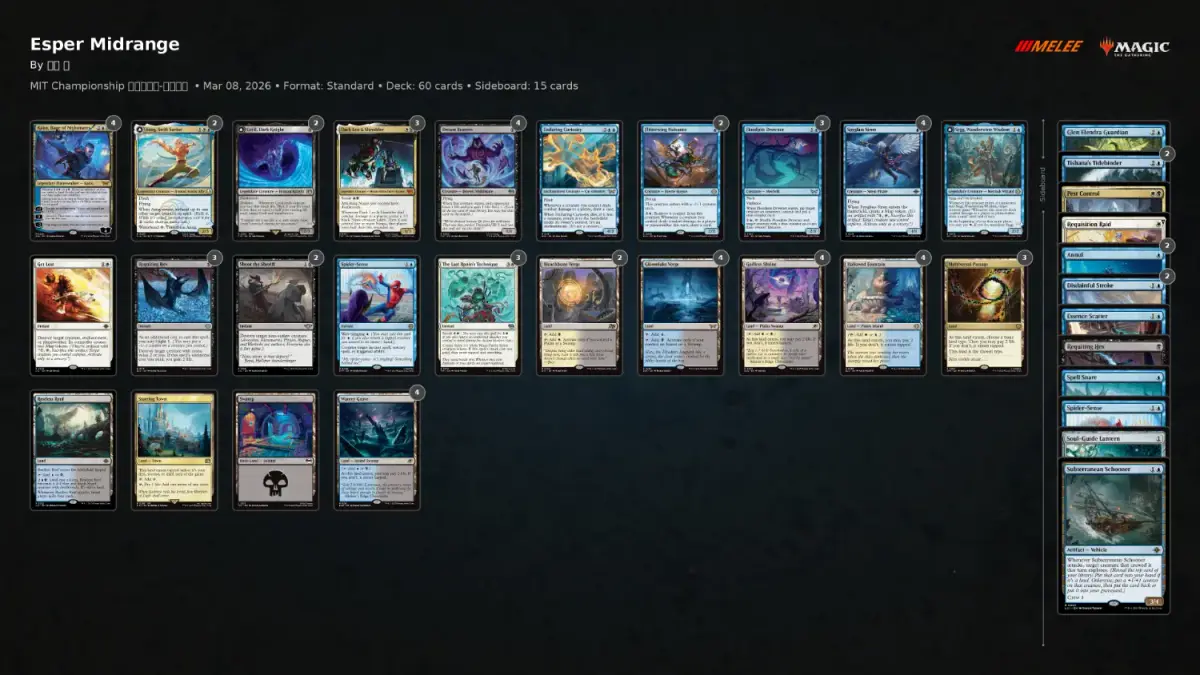
- Creature cards: 25 (12 one-drop creatures and 10 other creatures; in addition, I also count the 3 The Last Ronin's Techniquein the creature slots).
- Non-creature cards: 11, including 4 Kaito.
- Lands: 24.
The goals of the deck’s structure are as follows:
- Achieve the main theme as often as possible: “one-drop on turn one, Sneak on turn two, ninjutsu Kaito on turn three”.
- At the same time, retain the disruption of traditional Dimir midrange decks and the ability to switch from defense to offense when on the draw.
The 36 nonland cards are first summarized in the table below, with details in the later Card Choices:
| Category | Card name | Total | Tactical function |
|---|---|---|---|
| One-drop creatures | Spyglass Sirenetc. | 12 | Evasion from flying or deathtouch; springboard for turn-two Sneak and turn-three ninjutsu Kaito |
| Sneak components | The Last Ronin's Technique | 3 | Board development, biggest beneficiary of Kaito [+1], sets up turn-three Kaito |
| Sneak components | Dark Leo & Shredder | 3 | Attacking ninjas have deathtouch, board development, sets up turn-three Kaito |
| Core threat | Kaito, Bane of Nightmares | 4 | Untouchable slot, the absolute core of the deck |
| Answers/disruption | Floodpits Drowner | 3 | Turn-two tempo disruption, sets up turn-three Kaito |
| Answers/disruption | Requiting Hex etc. | 6 | Answers all kinds of threats |
| Answers/disruption | Spider-Sense | 1 | Avoids sudden death |
| Flex slots | Aang, Swift Savior // Aang and La, Ocean's Fury | 2 | Clears the way, fights high-cost threats, protection; Waterbend 8 fits well with the board-development plan |
| Flex slots | Enduring Curiosity | 1 | Strengthens resource points in the mid to late game |
| Flex slots | Sygg, Wanderwine Wisdom // Sygg, Wanderbrine Shield | 1 | Evasion, resource point, sets up turn-three Kaito |
Land Configuration
The mana base for a three-color aggro deck is always a big subject of study, and 24 lands is the result of many rounds of testing. But how many lands that produce black/blue/white are enough? What land sequence is acceptable each turn? Do we still have room for utility lands and basic lands? These questions must all serve your main game plan, which is the “main theme” we mentioned above — one-drop on turn one, Sneak on turn two, ninjutsu Kaito on turn three.
Mana Requirements of the Main Theme
- Turn 1 (one-drop): Must have Black (if playing a black creature) or Blue (if playing a blue creature).
- Turn 2 (Sneak burst): Must have White and/or Black (for the Sneak requirements of The Last Ronin's Techniqueor Dark Leo & Shredder).
- Turn 3 (Kaito arrives): Must have Blue + Black (pay $1 {Blue}{Black}).
| Target timing | Required color combination | Probability achieved (7-card opening hand) | Notes |
|---|---|---|---|
| T1 | 1 Black or 1 Blue | >98% | High probability, since there are 15 + 16 black/blue lands |
| T2 | 1 Black and 1 White | ~71.5%Note 1 | Main bottleneck, limited by 14 white lands |
| T3 | 1 Blue and 1 Black | ~89.0% | Quite stable, thanks to 17 blue / 20 black lands |
From the analysis above we can see that the current deck’s mana base is acceptable, but the probability of producing black on turn one is slightly below the 16 sources suggested by Frank KarstenNote 2, and the probability of producing white on turn two is also insufficient. After the tournament I worked with AI to adjust this into a version I’m more satisfied with, provided in a later section. The table below introduces the properties of the lands used:
| Category | Card name | Count | Notes |
|---|---|---|---|
| Shock lands | Watery Grave | 4 | Turn 1 produces Blue/Black |
| Shock lands | Godless Shrine | 4 | Turn 1 produces Black/White |
| Shock lands | Hallowed Fountain | 4 | Turn 1 produces Blue/White |
| Verge lands | Gloomlake Verge | 4 | Turn 1 produces Blue, turn 2 produces Blue/Black |
| Verge lands | Bleachbone Verge | 2 | Turn 1 produces Black, turn 2 produces Black/White |
| Fixing lands | Multiversal Passage | 3 | Turn 1 produces Black/Blue, turn 2 produces White; locked in on entering and can’t produce other colors |
| Fixing lands | Starting Town | 1 | Turn 1 produces Black/Blue/White |
| Utility lands | Restless Reef | 1 | No contribution on turn 1, turn 2 produces Blue/Black |
| Basic lands | Swamp | 1 | Turn 1 produces Black |
Notes:
- When keeping a hand, if you only have two lands and they are Gloomlake Verge+ Multiversal Passageor Starting Town, you can’t produce both black and white on turn two. If your turn-two Sneak card is Dark Leo & Shredder, you may be forced to mulligan or delay your development.
- Floodfarm Verge
 is primarily white with secondary blue, and absolutely must not be included in this deck (because this deck’s turn-one requirement is to produce black/blue, and this land producing white on turn one doesn’t fit at all).
- When you have a Verge in hand, Multiversal Passageshould preferentially name the type that “activates the Verge” (for example: if you have a Dimir Verge, choose Swamp/Island).
- If your opening hand has both a one-drop creature and Restless Reef, unless you urgently need Reef to produce color next turn, always play the creature on T1 and play Reef after T4. Don’t sacrifice tempo for Reef.
- Starting Town is great in the first three turns, but terrible if drawn after turn four, so it has the largest gap between ceiling and floor. Therefore, on T1-T3, if you have a choice, prioritize playing the Starting Town in your hand.
- To keep a three-color aggro deck running, expect to lose 4-6 life yourself in the first three turns just from playing lands. This is quite unfavorable against decks like Mono-Red aggro that win by pressuring your life total.
Probability and Balance of the Main Theme
| Mulligan strategy | Probability with 8 Sneak cards | Probability with 6 Sneak cards | Sneak count comparison |
|---|---|---|---|
| Keep 7 | 11.2% | ~8.4% | Going down to 6 Sneak cards drops the main theme from once every 9-10 games to about once every 12 games |
| Mulligan to 6 | 21.5% | ~15.2% | With 6 Sneak cards, the main-theme rate is still reasonable and still a strong threat in BO3 |
| Mulligan to 5 | 30.4% | ~23.1% | Efficiency of going for the ceiling drops significantly |
Having seen the theory, we still have to return to actual testing. In the current meta, when you’re on the draw against Izzet Prowess or Mono-White Momo, you’re basically the defender; and in the current meta, running four of each turn-two Sneak card greatly increases the chance that your Sneak cards are stuck in hand when you lose the roll, which is quite unfavorable. In response to the current meta, running three of each tested as a relatively reasonable choice; the ceiling is lower, but raising the deck’s resilience is the direction we want. I’ll plant a seed here though: if the meta shifts in the future so that Esper is the protagonist of the environment, running four of each turn-two Sneak card will be a necessary pivot.
Readers who aren’t interested in individual card choices are welcome to jump straight to Sideboard Strategy.
Card Choices
Whether in Dimir midrange or this version of Esper Ninjas, Kaito is the core and strongest single card. If in Dimir midrange Kaito single-handedly carries the whole family of junk, then in Esper Ninjas Kaito has finally found partners who can fight alongside him!
First, Kaito’s [+1]: You get an emblem with “Ninjas you control get +1/+1.” Unlike before, when after Kaito entered you had to open with [+1] just to protect yourself and lower the risk of being killed in response by Sear , in this version, with ninja-themed cards you can Sneak out on turn two to go wide, so the turn-three Kaito [+1] is no longer just a defensive choice but also a highly aggressive strategy! When ahead on board, using [+1] twice in a row basically seals the win, and also turns a Sneak-activated The Last Ronin's Techniqueinto a lethal blow! For Dimir midrange that wins rather slowly, the quick wins Esper Ninjas can achieve are very noticeable.
As for the [0], surveil 2, and if the opponent lost life this turn, draw a card. In ninjas with their front-loaded, dense curve, it’s easier to draw that card. Even if you can’t get through, manually slamming a Dream Beaversto drain 1 can help you draw it.
And the [-2] puts two stun counters on a target creature; whether to clear the way, prevent a counterattack, or buy time when behind on board, Dimir midrange players can always make the best choice for the current situation. You can also combine it with a Floodpits Drownerthat has lost summoning sickness to do some tricks.
One-Drop Creatures
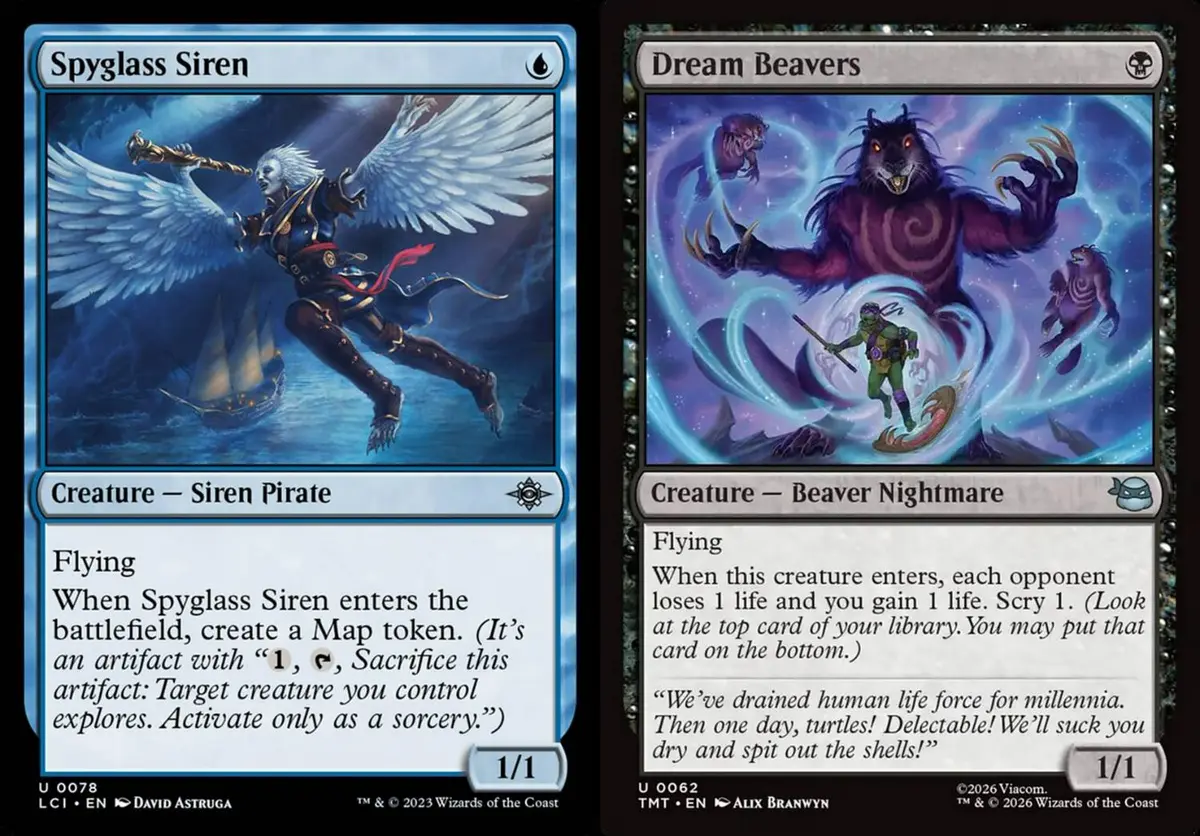
Choosing Esper Ninjas means adding the two-mana Sneak burst. To reliably Sneak on turn two, one-drop creatures that can attack are indispensable. Under this strategy, increasing the one-drop count is necessary, so the earlier question of whether Spyglass Sirenor Dream Beaversis better is no longer an issue: playing both, as many as possible, is the optimal answer.
Comparing the cards, everyone is familiar with Siren: flying is just the baseline, and the Map token can help a two-land Dimir opening hand develop toward the third land what do you mean you only have one land? Mulligan! and exploring into a nonland card to grow its body is also quite key; a 1/1 flyer versus a 2/2 flyer is worlds apart in the damage race.
Then looking at Dream Beavers, at first I thought drain 1 + scry 1 was inconsequential, but after real testing I found it’s indeed an important addition that TMT brought! The reasons are:
- You gain an edge in the damage race, even from turn one!
- In Esper’s painful three-color mana base, you recover 1 life this way, and that little breathing room lets you handle the rest of the game with more composure.
- It has the ability to finish off a low-life opponent! With ninjutsu and Sneak support, once a Dream Beavers shows up it may enter a second or even third time!
- Scry 1 looks little different from Faerie Dreamthief
 ‘s surveil 1, but putting an unneeded card on the bottom of the library avoids becoming a target for Superior Spider-Man
 ; also, if Doomsday Excruciator
 mills you down to 6 cards in library, the cards you scried down might even save your life.
- Compared with Faerie Dreamthief, paying life to draw is not great on a three-color base; and paying three mana to draw is not the tempo this deck wants.
These two Dimir bruisers establish our first-turn offensive point and provide extra hidden resources that make development after turn two go more smoothly.
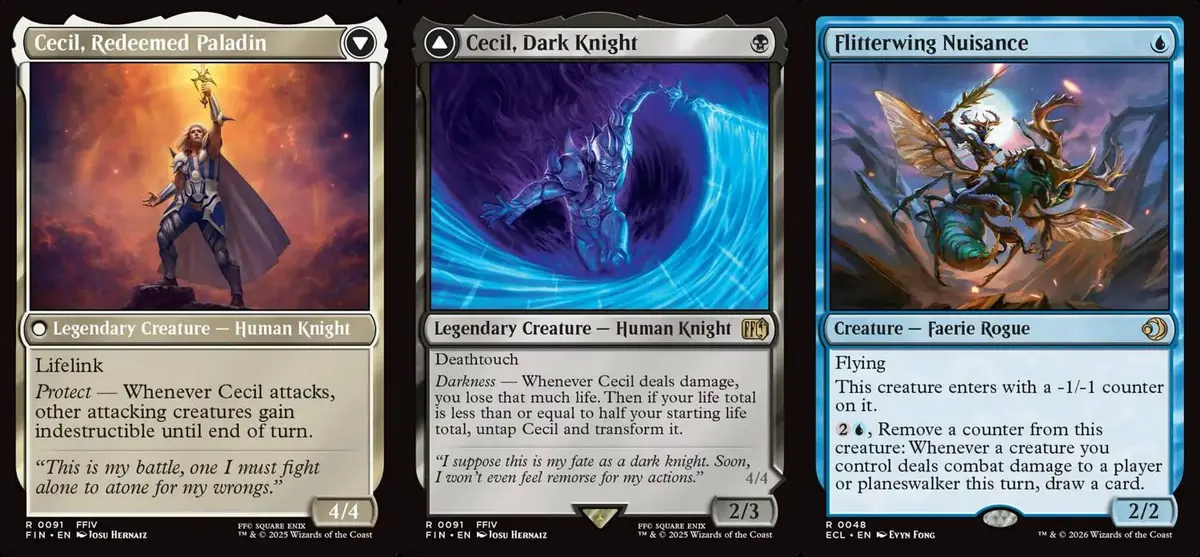
In our mana base, which hurts no matter how we configure it, we can make flipping Cecil on turn three no problem. And the 2/3 deathtouch one-drop body makes him quite reliable on both offense and defense. After flipping into a 4/4 lifelink Paladin, he can also give other creatures indestructible when attacking, making subsequent ninjutsu and Sneak more likely to succeed!
Flitterwing Nuisance is the weakest one-drop on the curve, but its activated ability lets us avoid maxing out the clunkier Enduring Curiosity, which is the main reason I chose him. Don’t forget, our deck design gives him chances to activate his ability multiple times after being returned to hand; even Requiting Hexhelps reactivate him. If all goes well, the card advantage from this back-and-forth is considerable.
Besides strengthening our resistance to aggro, these two creatures, with a little extension, can even bring us far greater resource returns than other one-drops!
The second addition TMT brought! The turn-two Sneak tempo greatly improves on the traditional Dimir turn two, which was mostly passive defense, or flashing in Floodpits Drownerto disrupt + pave the way for a turn-three Kaito. Three 1/1 white ninja tokens look ordinary at first glance, but unless the opponent responds by sweeping them with Fire Magic or Pyroclasm
 , a turn-three Kaito is inevitable! And the ninja creature type is crucial: you can even skip the turn-two Sneak, use [+1] twice in a row after Kaito arrives on turn three, then Sneak with another creature on turn four, at which point it’s three unblocked 3/3 ninjas + a 5/6 Kaito, for a total of 14 damage!
Also, don’t forget this is an instant: when you need to defend, “flashing” in 3 creatures for four mana will completely disrupt the opponent’s plans, and if you’ve used Kaito’s [+1] once or more beforehand, it’s even deadlier!
A black-white Sneak card that can also be cast normally on turn two, and is less prone to getting stuck in hand than Technique. The 1/3 body may look unremarkable but is actually cleverly designed. 3 toughness can usually survive a small red sweeper, giving us a chance to keep developing. The deathtouch on attacking ninjas is a static ability, so you don’t even need him to attack, which is especially important when you can’t get through after playing Technique first. We can first attack with a group of 1/1 ninjas + a 1/1 flyer; after the opponent’s creatures block the ninjas, we return the flyer and Sneak in Dark Leo, and now the blocked ninja has deathtouch; after combat damage, we’ve freeloaded off one of the opponent’s blockers, and because of Dark Leo’s ability, the “lost” ninja is made again, and can even block!
Dark Leo is a card I was extremely satisfied with after real testing. I also believe he’s the last missing piece in Esper Ninjas!
Drowner is our old comrade in Dimir, so he needs no special introduction here. But I must stress that in today’s meta, a Drowner on the play can completely suppress green-based decks: keeping the mana dorks and Earthbending land creatures from standing up for a turn always stalls the opponent’s development, which is the main reason I can’t part with him.
Aang was another surprise from splashing white! The original slot was Tishana's Tidebinder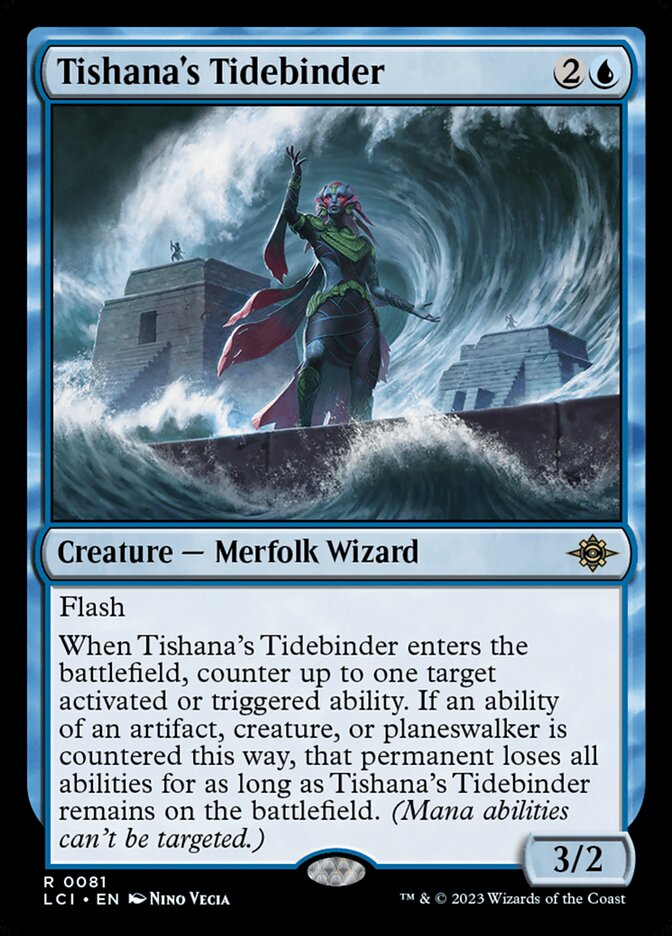 , and Aang performed even better! The main reasons are that Aang flies, and a 2/3 body is far better than a 3/2. Also, Aang can mostly take part in blocking, indirectly saving you some life.
And Aang can do far more than that. As I understand it, his tactical roles are at least the following four:
- Path-clearer (proactive): Airbend can proactively exile the opponent’s blockers, and even keep tokens or non-Earthbend creature lands from ever coming back. It can also increase the chance that your one-drops go unblocked, in turn activating ninjutsu or Sneak.
- Delaying disruption (reactive): When the opponent taps out to slam a high-cost threat, Airbend can interrupt and delay the opponent’s plan. Against sweepers, this can even be the key to winning or losing!
- Umbrella for creatures or spells (reactive): Flash in Aang in response to removal to Airbend your own creature; at first glance it costs tempo, but making sure our threats can keep dealing damage is very important. If you exile something like Enduring Curiositythat costs more than two, it’s even a gain. And Aang’s Airbend can also exile a target spell; when the opponent responds by countering your important spell, Aang lets you escape and recast it for two.
- Plan B finisher (proactive): Beyond the ETB ability mentioned above, Aang’s Waterbend 8, when the game is deadlocked or Kaito isn’t making an impact, makes a flipped, attacking Aang not only a 6/6 reach, trample source of damage, but also able to put +1/+1 counters on all tapped creatures. This lets your one-drop flyers and your ninja tokens that never grow become huge threats under Aang’s leadership even in the late game.
Before putting Aang in, I had used TMT’s new ninja Turncoat Kunoichi . But after I started investing in Aang, I increasingly believed he’s this deck’s Spell Queller
 , and an enhanced one at that.
As mentioned earlier, the 2 copies of Flitterwing Nuisanceserve as tempo filler for the blue cat, but the real Enduring Curiosity is still indispensable. Though I only run one, one is enough. I tested a 2-copy version before; believe me, you usually won’t, and don’t need to, draw a second.
Sygg’s slot is a flex slot, a so-called Pet Card. But let me still say what Sygg can do.
- Besides turn-two proactive Sneak or reactive defense, provides a third proactive plan of attacking and drawing cards with a one-drop curve.
- Unblockable by itself; unless the opponent has removal, it ensures the inevitability of a turn-three ninjutsu or Sneak.
- The flip-side ability can give a creature protection from all five colors. You can not only make an invincible Drowner that attacks and blocks, but also target a Kaito that’s a creature on your turn, ensuring he survives on the opponent’s turn! (Even if Kaito turns back into a planeswalker, the protection from all colors lasts until your turn, at which point Kaito is hexproof again!)
- Although Sygg repeatedly flipping is powerful, it still requires paying a bit of white/blue as the cost, so we should prioritize the ninjutsu, Sneak, or spell we can execute and need right now, and not put the cart before the horse.
Removal Spells in the Deck
Hex, as extremely reliable one-mana removal, can stop the starting points of all kinds of decks before turn two. Such as Mono-White Momo’s Momo, Friendly Flier , nearly all of the creatures in the standard Izzet Prowess builds, Simic Rhythm’s Badgermole Cub
 , or the Llanowar Elves
 in green-based decks that must die on turn one. Don’t forget, in response to your creature about to be removed, Blight 1 kills the opponent’s small creature to gain 2 life, which is extremely important in a three-color deck.

After the environment shifted toward Mono-White Momo, green-based decks, Izzet decks, and even Dimir Demons and multicolor Elementals, this card, once criticized for killing nothing, has become quite close to a two-mana clean kill. If I could choose again, I might put a third copy in the main deck or sideboard, to address the current shortage of kill spells among the 75 cards.

Running Bitter Triumph in a three-color deck is often suicide, and we should take the chance of splashing white to use kill spells that don’t cost life. Get Lost even has the added function of destroying enchantments, offering possible main-deck enchantment removal against Izzet Lessons and Mono-Green Landfall, reducing the risk of sudden death. But it must be said that giving the opponent two Map Tokens, when you have no sweeper, can sometimes still cause a considerable disadvantage. Get Lost isn’t a removal spell you can use mindlessly; think a few steps ahead before using it.
Why Run Spider-Sense?
For this conditional counterspell slot, everyone’s choice differs. Previously most people would choose the relatively middling Phantom Interference , or, based on their read of the meta, counterspells like Spell Pierce
 or Spell Snare
 . However, in a tightly curved Esper Ninjas deck, I think there’s no room for a two-mana counterspell. Put another way, if you leave two mana up for a counter on turns two and three, your early board must be super weak or nonexistent; unless you can counter and then follow up with two creatures to set up, or jump to the blue cat, blind defense equals certain defeat. And the ninjas’ board-development ability is both an advantage and a disadvantage, the disadvantage being punishment from sweeper spells or sweeper effects. Web-slinging, at the cost of one {Blue} + returning a tapped creature to hand, can handle the following unfavorable situations:
- Countering sweeper spells/triggered abilities, such as the Living End
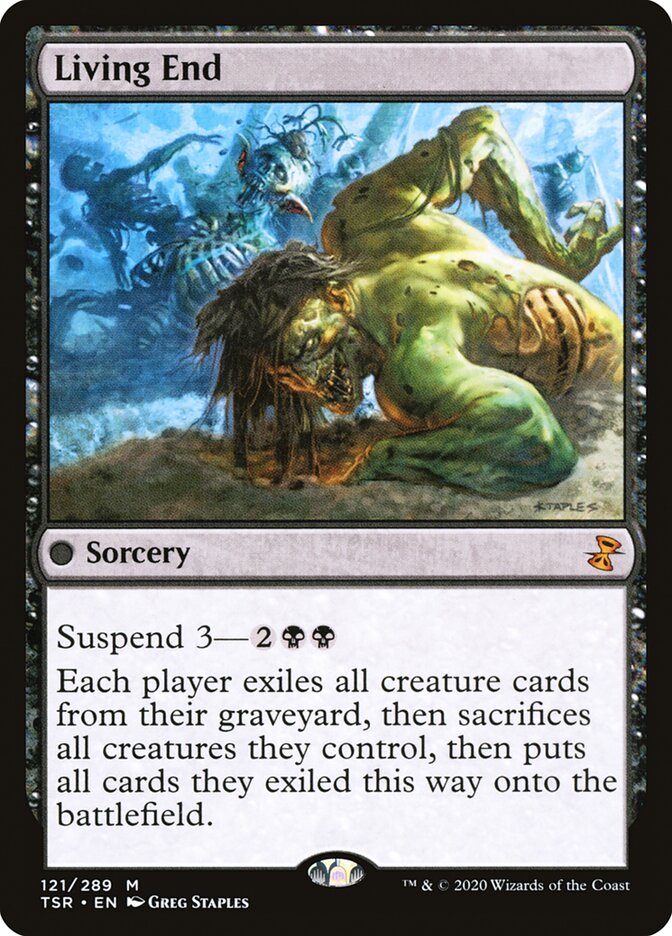 effect of “casting” Bringer of the Last Gift
 , or the return-all-nonElemental-creatures effect of “casting” Sunderflock
 .
- Countering spot removal.
- Countering triggered abilities that could be lethal if not countered, such as Cosmogrand Zenith
 ‘s making two 1/1s or putting counters on the whole team in Mono-White tempo; and Sunspine Lynx
 ‘s effect of dealing damage based on how many nonbasic lands you control.
- Various Elementals’ ETBs, or Doomsday Excruciator‘s effect of exiling your library down to six cards.
In short, the purpose of Spider-Sense isn’t to reliably counter a particular spell, but to avoid situations where, in game one when I’m ahead on board, a triggered ability or sweeper spell flips the game. Although this card is extremely weak against an empty board, the ninja build itself is meant to keep snowballing board advantage and convert it into a winning position, and under that premise I chose Spider-Sense.
Small Tip: Interactions Between Sneak, Ninjutsu, and Web-slinging
When designing this deck, in the spirit of play, I included all the cards from mechanics derived from ninjutsu. Let me use Floodpits Drownerto explain how to play some tricks.
Prerequisites:
- A Drowner that has lost summoning sickness
- The opponent has a creature with one or more Stun Counter(s) on it
- Drowner attacks and is unblocked
The interaction begins:
- Activate Drowner’s ability with {1}{Blue}
- In response, before the ability resolves, cast a Sneak spell, or activate Kaito’s ninjutsu ability to return Drowner to hand (returning Drowner is part of the cost, so the opponent can’t respond to it)
- Resolve Drowner’s ability, but only the opponent needs to shuffle the targeted creature with Stun Counter(s) into their library. Note that you can’t, and shouldn’t, shuffle (a spell or ability with two targets still performs its effect as long as one of the targets is legal)
- Don’t forget: a Sneak spell only lets you return an unblocked creature during the declare blockers step in order to cast it; but a ninjutsu ability lets you activate it any time after the creature becomes unblocked and before the end of the combat phase!
And if you want to cast Spider-Sensefor {Blue} via Web-slinging, you need a tapped creature, whether from attacking or by other means. Incidentally, this is also one of the reasons Spider-Sense is used in Simic Rhythm or Azorius Momo, because they have many ways to tap their own creatures.
Sideboard Strategy
Below I’ll explain my sideboard strategy around these 4 key points:
1. Identify Difficult Matchups
Three-color decks definitely have a hard time against red-based decks. Besides the archnemesis Sunspine Lynx, some even carry the nonbasic-land hater Zhao, the Moon Slayer , which is absolutely a difficult matchup for us. By the same logic, Boros Dragons, which can blow up our lands + have a chance to develop quickly, is also a major enemy.
Among the three pillars of Izzet, Izzet Prowess depends on being on the play or draw and whether the corresponding cards come in time; the key for Izzet Lessons is whether Gran-Gran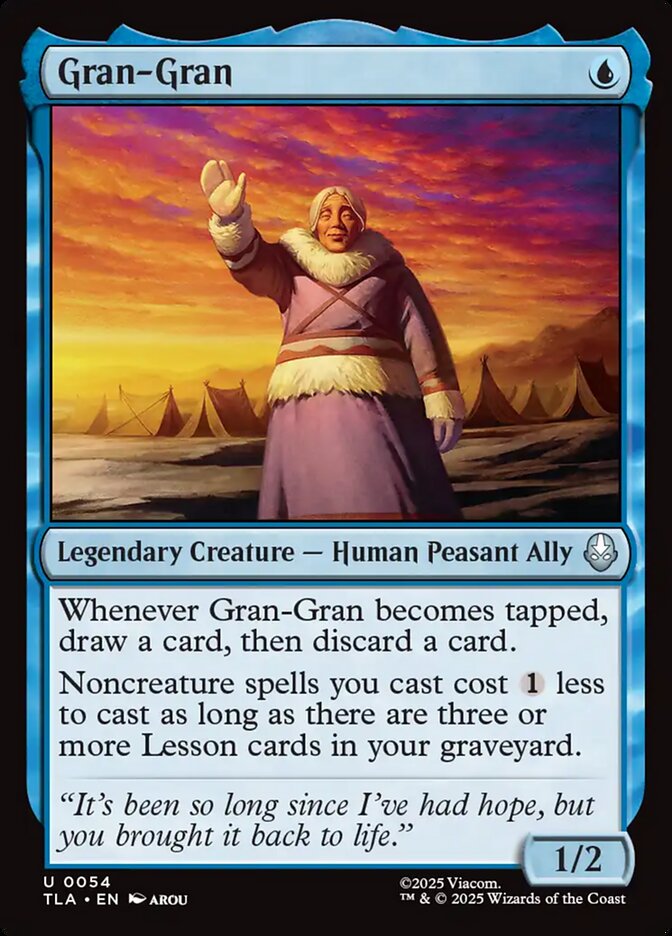 lives long enough and whether the lethal talent and the monument come out in time; Izzet Elementals are basically a good matchup for us.
However, not noticing and practicing enough against the Mono-White Momo that rose a week before the event directly led to my poor performance at this tournament. But failure is the mother of success, and if I face Mono-White Momo again, I also have the corresponding sideboard cards and strategy to deal with it.
2. Maximize the Benefit of Splashing White

Before the tournament I noticed that the share of Izzet Prowess kept climbing, and splashing white lets us run this low-cost sweeper! If I had noticed Mono-White Momo in time, I’d have given it enough respect — putting a second Pest Control in the sideboard. Pest Control’s strength is that it can flip a Mono-White deck’s starting points with one card:
- Momo, Friendly Flier
- Springleaf Drum

- The tokens made by Cosmogrand Zenith
- Other one-drop creatures
- Even Seam Rip
 , after which we also get back the one- and two-drops it had pinned down.
When the Mono-White side doesn’t have enough board, or against a god-draw opening of turn-one drum, turn-two Momo + Sage of the Skies as a pair, a successfully resolved Pest Control blows up not just part of the opponent’s board but also cuts off their subsequent tempo.

When still playing Dimir midrange, we always struggled to cover everything against Izzet Lessons. But with white mixed in we have Requisition Raid, and even if the opponent goes turn-one Gran-Gran, turn-two Artist's Talent , turn-three Monument to Endurance
 , we can still steadily use this card to two-for-one them. And even if we only destroy one side, if we have some creatures left on the board we can also choose to put counters on the whole team to increase board attack power, speed up the clock, and raise our resistance to small red sweepers.
The advantages of a sideboard containing white go far beyond this and deserve further study.
3. Risk Management
A card I once loved. Although it’s no longer strong enough today, Tidebinder still does a fine job of preventing sudden death against combo decks. Don’t forget, if the opposing Elementals deck wants to sweep our board with Ill-Timed Explosion , we can respond to the damage trigger after the opponent finishes discarding and jump in Tidebinder to counter it.

2 Annul are still necessary against Mono-Green Landfall and Izzet Lessons, able to counter key threats and swing the tempo back.
The fourth Hex is especially key against Simic Rhythm, Mono-Red aggro, and Izzet Prowess. Mono-White always bursts out with a one-to-three jump; on the play you can leave it out, but on the draw you can decide case by case, and if the sideboard has no other removal you may still have to bring it in.
In the current meta, we may truly need a third two-mana black kill spell to stay alive. If we can promptly remove the Quantum Riddler that the opponent brings in from the sideboard, we won’t easily lose from falling behind on cards.
4. Versatility

2 Disdainful Stroke are quite useful against the meta’s other dimension of midrange, control, Mono-Green Landfall, Izzet Elementals and similar decks.

A creature counterspell is a highly versatile card. You can bring it in against almost everything except Izzet Lessons and Jeskai (non-Dragon) control, and considering the current meta there’s even a need for 1 main deck and 1 sideboard; on the draw against Mono-White, a god-draw Sage of the Skiescan be pinned down with this card. Also, against Izzet Prowess or Izzet Lessons, which may bring in Quantum Riddlerfrom the sideboard, the existence of this creature counterspell also keeps us from over-boarding Disdainful Stroke.

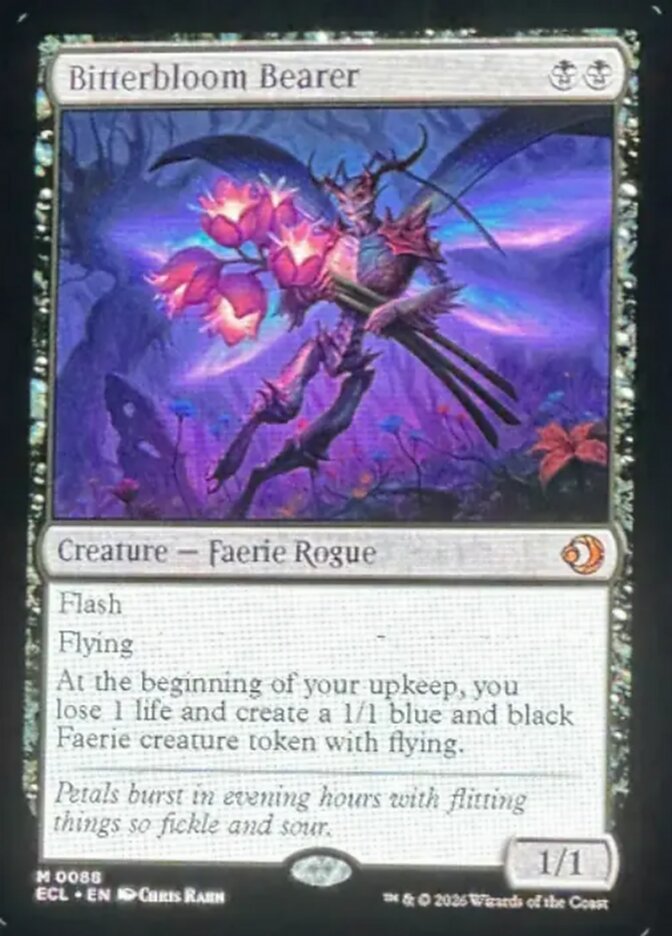
This card is quite middling against fast decks, but performs very well when brought in against slower decks. The part that counters noncreature spells can withstand a removal spell, sweeper, or planeswalker. After removing the -1/-1 counter, the 3/4 flying body is also quite deadly in these matchups. Although we’d mostly take out Requiting Hexin these matchups, you can also keep 1 as the situation allows, for a possible Voice of Victory or Bitterbloom Bearer
 .
Sideboard Cards I Wouldn’t Play If Choosing Again
The second Spider-Sense in the sideboard is actually not good; swapping in Negate or something else would be a bit better, and I rarely brought this sideboard card in.

My reason for reactivating this card was inspiration from the previous Standard’s Esper midrange; the slot used to be Loch Mare , but most of the time I didn’t have room to pay to draw. Considering the Esper color combination’s tighter curve, I wanted a card like Schooner that lets me trade for resources without paying extra. However, this card is poor against Requiting Hex, and in most matchups where I’d want to bring it in to strengthen the board, like Dimir Excruciator, they never take out a single Hex. If going down this route, one should look toward three-mana Vehicles or Spacecraft.
And with those 2 freed-up slots, I could put in the second Pest Controland a third Shoot the Sheriff.
Oh right, I seem not to have mentioned a sideboard plan for Dimir midrange at all. But Esper Ninjas is fundamentally an upgraded replacement for Dimir midrange in its deck design, and as long as we can develop according to our game plan, with lands and the related tempo not being overly disrupted, Dimir midrange has a hard time standing up to us.
Post-Tournament Review
With hindsight, the version of Esper Ninjas I played may have been a version that appeared a week too early. With the champion being Dimir Excruciator and the runner-up being the newly rising Mono-White Momo this week, Esper Ninjas running into all sorts of Mono-White Momo is quite hard to play against. But if next week or later the meta shifts toward Dimir Excruciator or other midrange-focused decks, it will land right in the sweet spot of this version of Esper Ninjas. Of course, it still has many areas to improve, but the core and framework of this version are worth continuing to refine. The unsatisfying result comes from my insufficient understanding of the meta and my lack of proficiency with Mono-White Momo, not from the deck itself.
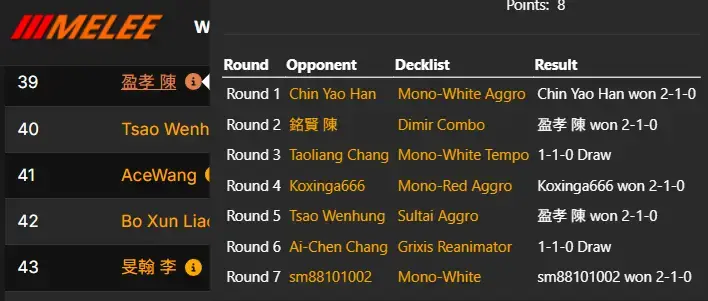
Looking back at the main event results, on my side I lost to 2 Mono-White Momo and drew with one Mono-White. I also lost to a Mono-Red aggro deck that hard-counters us; how exactly is a three-color base supposed to play against Mono-Red, with Sunspine Lynx+ Zhao, the Moon SlayerQQ
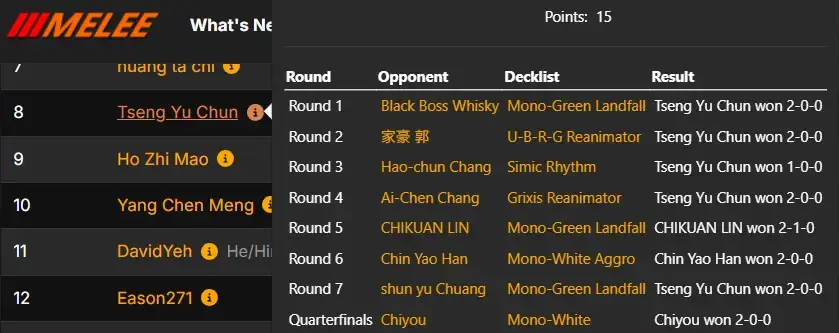
And on 宥均’s side, he lost to 2 Mono-White Momo and 1 Mono-Green Landfall, which also proves that the current version is relatively weak against the new Mono-White tempo, or that there’s something worth studying further.
How to Handle Mono-White Momo’s Turn-Two God-Draw on the Draw?
If Mono-White is on the play: pretty much hopeless. The only way is to bring Intimidation Tactics in the sideboard, and draw it together with Pest Controlin your opening hand. Incidentally, you can mulligan up to twice to find this hand.

- Mono-White T1: Play Plains + Drum
- Esper T1: Play the Orzhov Verge + Intimidation Tactics to take Sage of the Skies (if the opponent has 2 Sages, or topdecks a second, it’s still hopeless, but we won’t discuss that scenario).
- Mono-White T2: Play Plains, Momo + Warp out Starfield Shepherd
 , find Nurturing Pixie
 , tap the Angel + Drum for white, play Pixie to return the Angel.
- Esper T2: Cast Pest Control to blow up the Drum, Momo, and Pixie.
- Mono-White T3: If Mono-White doesn’t have a third land, they may have to Warp the Angel to find a Plains, and the tempo will break a bit here. After that it depends on how both sides draw, and the outcome is still up in the air.
If Esper is on the play: besides the opening hand above, you can also consider keeping a hand of Siren, Technique, Aang + 3 right lands, with the 7th card as you like, tolerating a mulligan to six.

- Esper T1: Play Dimir Verge + Siren
- Mono-White T1: Play Plains + Drum
- Esper T2: Play the Azorius shock land + after Siren attacks, Sneak Technique to make 3
- Mono-White T2: Play Plains, Momo + Sage of the Skies as a pair
- Esper T3: Play Passage, then pass.
- Mono-White T3: Play Cosmogrand Zenith + Seam Rip to kill one Token, Flurry to put +1/+1 counters on the whole team. Suppose two 3/4 lifelink flyers attack; flash in Aang to airbend away the Sage copy, and if the opponent misattacks with Momo too, we can block and kill Momo, and if not, we take 3.
- Esper T4: Play the fourth untapped land + replay Siren, then activate Aang’s waterbend 8 (at this point we have 3 untapped lands, Siren, 2 Map tokens, and 2 1/1 ninja tokens); even without a land drop, you can already defend and then activate Waterbend 8. Decide based on hand and life total. But if you activate on T4 and Aang attacks and grows things, T5’s attack can create at least 17 damage on board; if you choose to defend, it’s only 13 damage on board.
The above doesn’t account for the cards not yet mulliganed away, or the 3 cards drawn later; if you have 4 extra cards of preparation in hand, our survival rate against a Mono-White god-draw on the draw is still not small. You can all test it in practice and feel it out.
Land Base Optimization
Core goals:
- Don’t affect the main theme of “one-drop on turn one, Sneak on turn two, ninjutsu Kaito on turn three”
- Average life lost from playing lands within three turns should not exceed 4
- Over six turns, the cumulative probability of drawing a Starting Town that must enter tapped must not exceed 10%
The table below briefly shows the average life lost for the two configurations:
| Turn | Configuration A (3 Passage : 2 Town) | Configuration B (4 Passage : 1 Town) | Difference (B - A) | Notes |
|---|---|---|---|---|
| T1 | 1.12 | 1.25 | +0.13 | Almost unnoticeable, usually the price paid for the one-drop |
| T2 | 2.18 | 2.44 | +0.26 | If you want to Sneak, Configuration B starts to feel more life loss |
| T3 | 3.14 | 3.52 | +0.38 | Configurations A & B both stay within 4 life |
| T4 | 3.85 | 4.31 | +0.46 | The difference becomes noticeable, Configuration B loses over 4 life |
| T5 | 4.42 | 4.98 | +0.56 | Configurations A & B both lose over 4 life |
| T6 | 4.88 | 5.54 | +0.66 | Endgame; you need to end the game quickly or rely on Cecil or creature lifelink to recover life |
We’ll also look at the cumulative probability of drawing Starting Town after T4:
| Turn | Configuration A (3 Passage : 2 Town) | Configuration B (4 Passage : 1 Town) | Difference (B - A) |
|---|---|---|---|
| T1 | NA | NA | NA |
| T2 | NA | NA | NA |
| T3 | NA | NA | NA |
| T4 | ~1.9% | ~3.8% | +1.9% |
| T5 | ~3.9% | ~7.7% | +3.8% |
| T6 | ~5.8% | ~11.3% | +5.5% |
Given the constraint that current Standard has no lands like Darkslick Shores , whether we choose Configuration A or B, we need to trade off between life total and mid-to-late-game dead draws. If red aggro and burn dominate, our win rate with Configuration A may be higher; but if the environment shifts toward midrange/control being king, Configuration B makes more sense.
Conclusion: Designing Your Own Deck Is Still Fun, but Watch the Meta Shifts
Although the result of the MIT#11 main event was far from ideal, organizing this article, and discussing my deck-building thinking back and forth with AI until it converged into a more systematic guide, was also a great takeaway. Although the AI’s database is a bit outdated, and its technical professional advice is often outdated and incorrect, discussing the probability questions and article logic it’s good at unexpectedly sparked extra enjoyment and yielded quantitative evidence.
If you, like me, want to take on big tournaments with a self-built deck, I hope the content of this article can help you a bit, and I hope readers can learn from the detours I took and the mistakes I made and grow further. Finally, as a tournament player, we must respect the meta and study and understand it in depth. The more thoroughly you prepare, the better your grasp during matches will be, and as you keep competing, your average win rate will get better and better.
Note 1: In practice the probability is slightly higher, since The Last Ronin’s Technique only requires white.
Note 2: In pursuit of ultimate stability, Frank Karsten’s latest Standard recommendation is that 16 sources is the safest “competitive threshold” (providing at least a 90% chance in the opening hand). For the article link, see How Many Sources Do You Need to Consistently Cast Your Spells? A 2022 Update.
- Title
- A First Look at Esper Ninjas
- Author
- cephille
- Created at
- March 15, 2026
- License
- This work is licensed under CC BY-NC-SA 4.0 .