Eyes That See Through the Ages: A Guide to Standard Jeskai Oculus

Note: This article was translated from Chinese by AI and may contain errors. Read the original Chinese version.
Introduction
Hi everyone, I’m Chennel, which is what my real name sounds like if you say it fast. At MIT Round 9 I piloted Jeskai Oculus and was lucky enough to make the Top 16, which is how this article came about. Before I introduce the deck, let me tell you how it came to be.
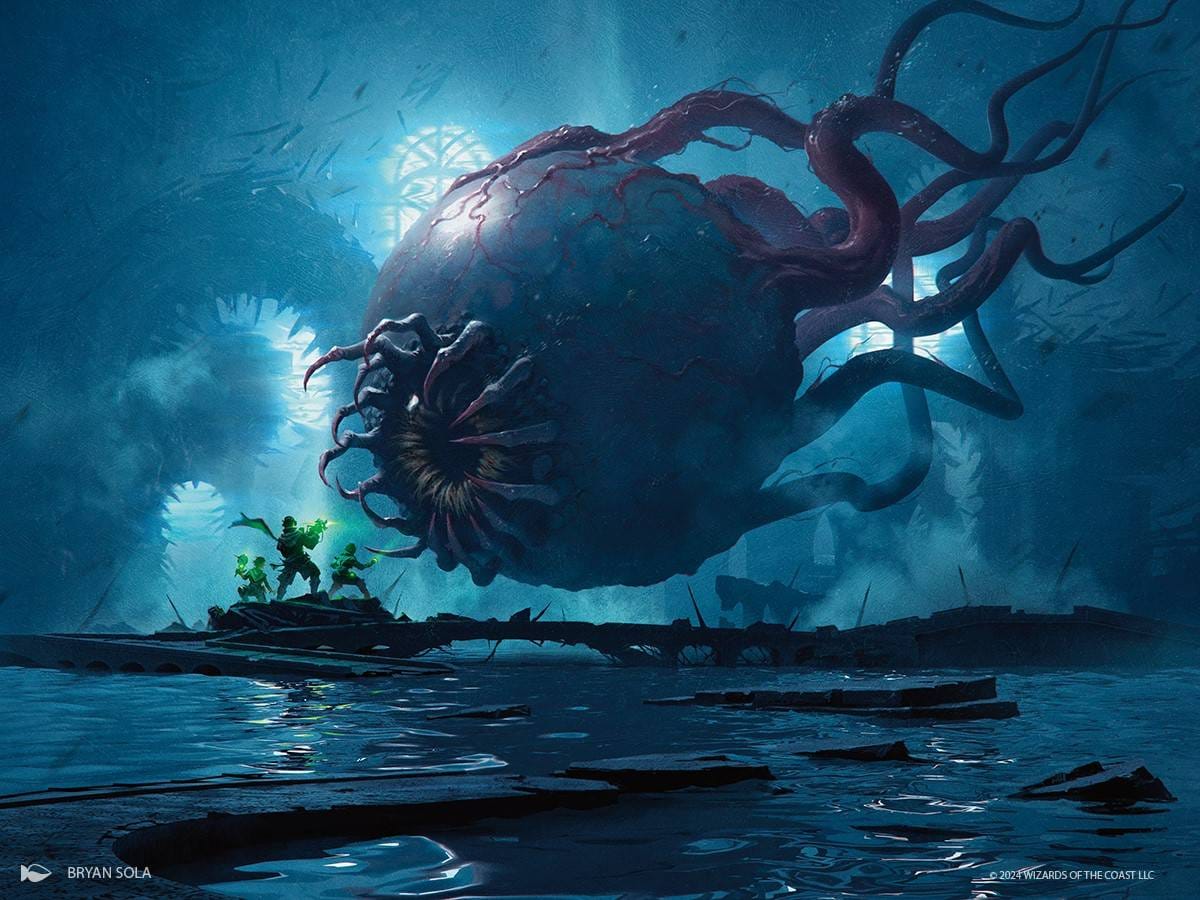
Ever since Abhorrent Oculus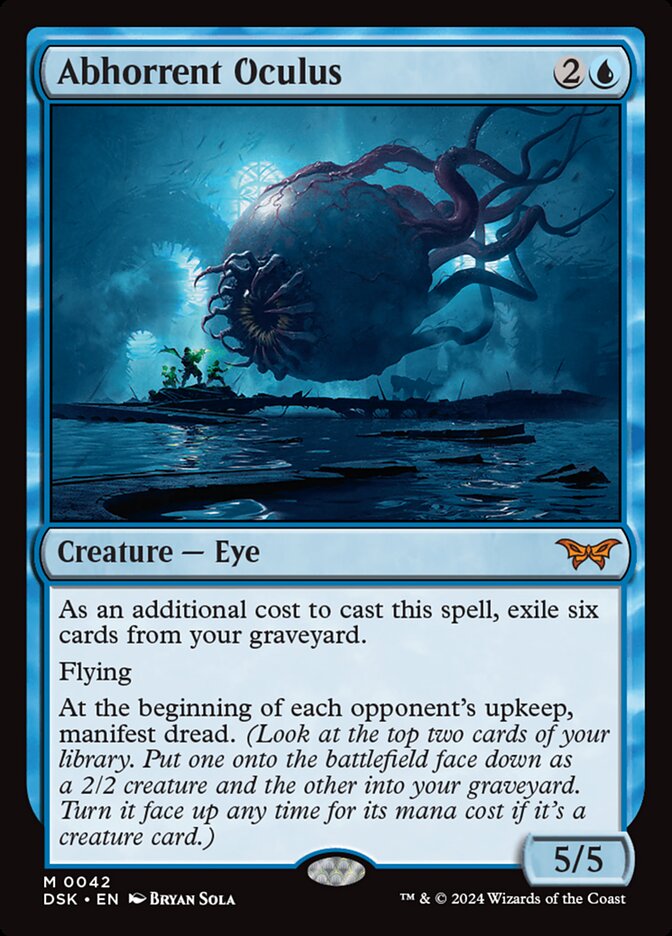 (hereafter “Oculus”) was released, people have been excited about it, and players have kept trying to build decks around it. The first version to appear at a competitive-level event was called Azorius Oculus, a graveyard-based deck whose game plan was to put Oculus and other three-mana threats into the graveyard and then reanimate them. I once piloted that deck to a Top 4 at an MITQ. The deck was strong, but its weakness was obvious: as soon as the graveyard got disrupted, it was easy to just lose.
Soon after, DFT was released and brought us Marauding Mako (hereafter “Mako”) and Chandra, Spark Hunter
 (hereafter “Chandra”). Pro players began blending red into the Oculus build, reducing the reliance on the graveyard and adding another dimension of threats. So the prototype of Jeskai Oculus first appeared at the Pro Tour in February this year. I tried that build too, but it always felt like the whole thing didn’t run smoothly. It felt clunky and heavy to pilot, so I shelved it for the time being and went back to Golgari Midrange, which I’m more familiar with.
It wasn’t until TDM came out that Jeskai Oculus received what you could call an epic boost. With three new cards, Tersa Lightshatter brought a faster clock, Glacial Dragonhunt
 brought more efficient removal, and Winternight Stories
 brought a stronger card-advantage engine. The links between individual cards in the deck grew tighter, like loose gears finally meshing precisely, and the whole deck ran much more harmoniously.
This transformation reignited my interest in the deck, and since I happened to have good results, I’m taking this chance to share my understanding of it, hoping this article helps you understand the deck better. Maybe, like me, you’ll start to get interested in it.
Preparation
I started preparing for this tournament about a month before MIT. Since I’m quite busy on weekdays, I can only attend a limited number of in-person weeklies, so most of my practice was playing Standard Ranked Bo3 matches online on MTGA. After all, playing three Bo3 matches is equivalent to one weekly, right? And MTGA is really convenient: you can play a game or two on your commute, and losing doesn’t weigh on you much since you can just queue again. It suits a player like me.
In the end I played about thirty Bo3 matches on MTGA, which I figure is far less practice than other players who prepare seriously. So in the two weeks before the tournament, I made time to join some in-person weeklies and store championships, hoping to build more familiarity with the deck, feel the rhythm and pressure of real matches, and verify whether certain adjustments work in a paper environment.
I’d also like to thank my teammates from 平方, with whom I keep discussing and iterating on this deck in our Discord group. Each discussion deepened my understanding of every individual card’s role and its value in different matchups. Thanks to everyone’s help and feedback, I was able to adjust step by step into the final build I played.
Why This Deck?
Standard is always the fastest-changing constructed format, and any week a new deck might appear that rewrites the metagame. Because of that, I waited until RCs had started in various places and the metagame had mostly settled before deciding which deck to play. During this time I kept following RC results and metagame data, and actively exchanged experiences and matchup thoughts with other players. In the end I predicted the following for the Taiwan RC metagame: Izzet Prowess, Azorius Omniscience, and black-based midrange decks would probably take the top three spots. After further analysis, I considered Jeskai Oculus’s matchups against the expected top decks: against Izzet Prowess it should be close to even, against Azorius Omniscience slightly favorable, and against black midrange slightly unfavorable. Overall, although Jeskai Oculus isn’t a dominant deck that suppresses the expected metagame, it is a very stable and flexible choice. More importantly, it has three elements I like: plenty of looting and card draw, flexible counterspells and removal, and explosive individual-card combinations. On top of that, I have far more experience piloting this kind of tempo deck than other decks, so I finally decided to bring it to MIT.
Decklist
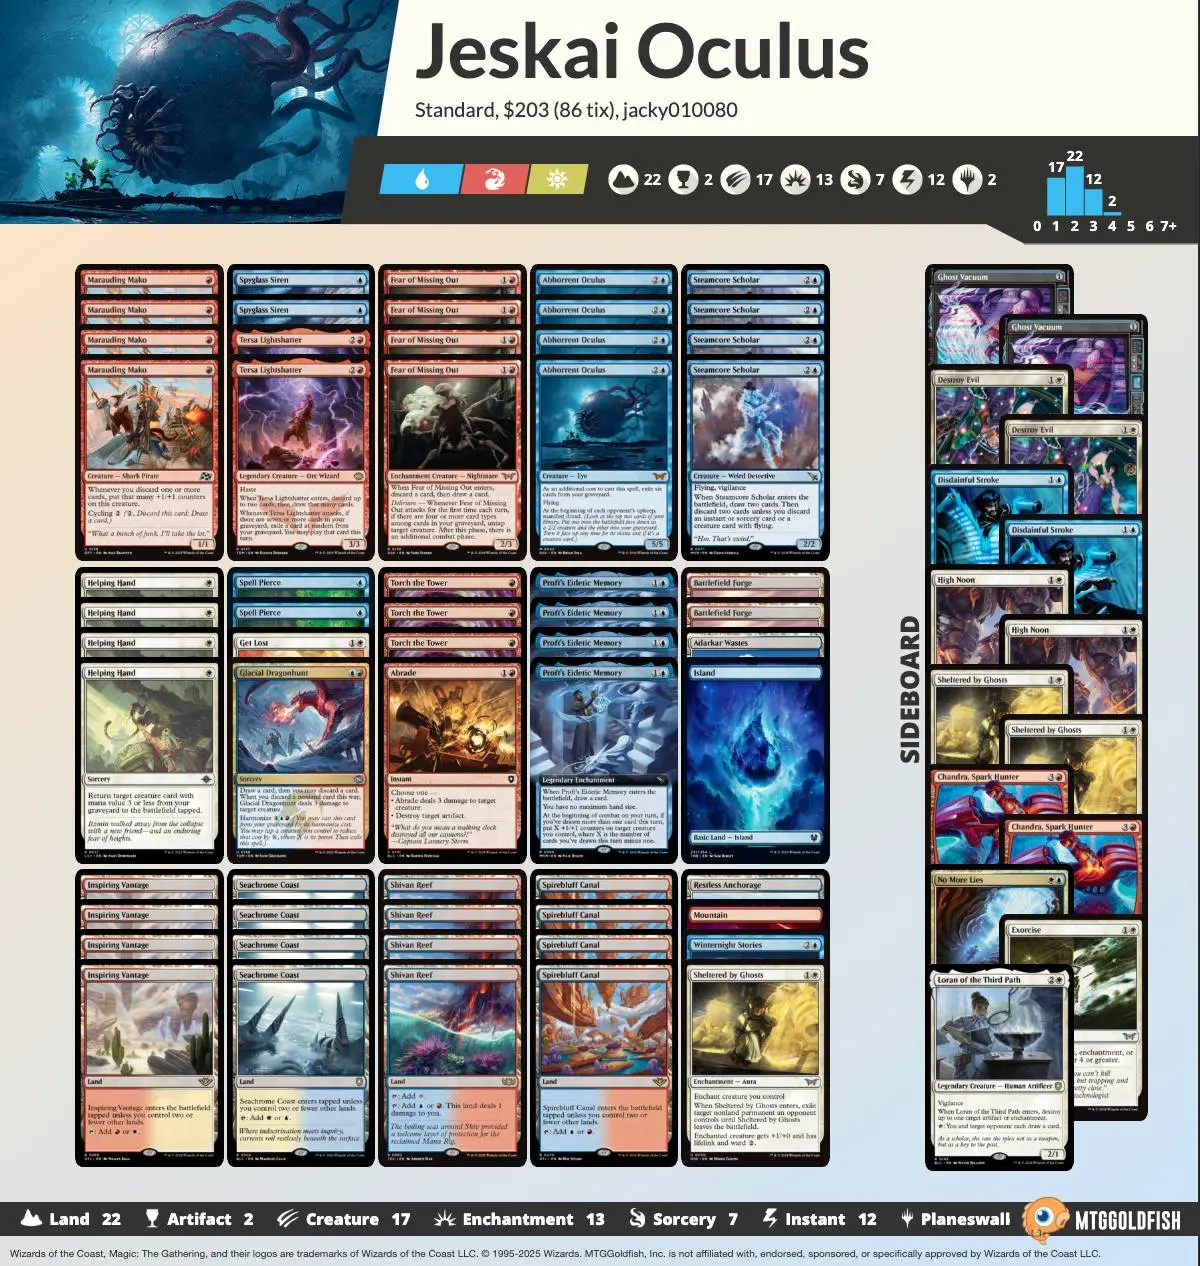
Fixed Main Deck Slots
4 Proft’s Eidetic Memory
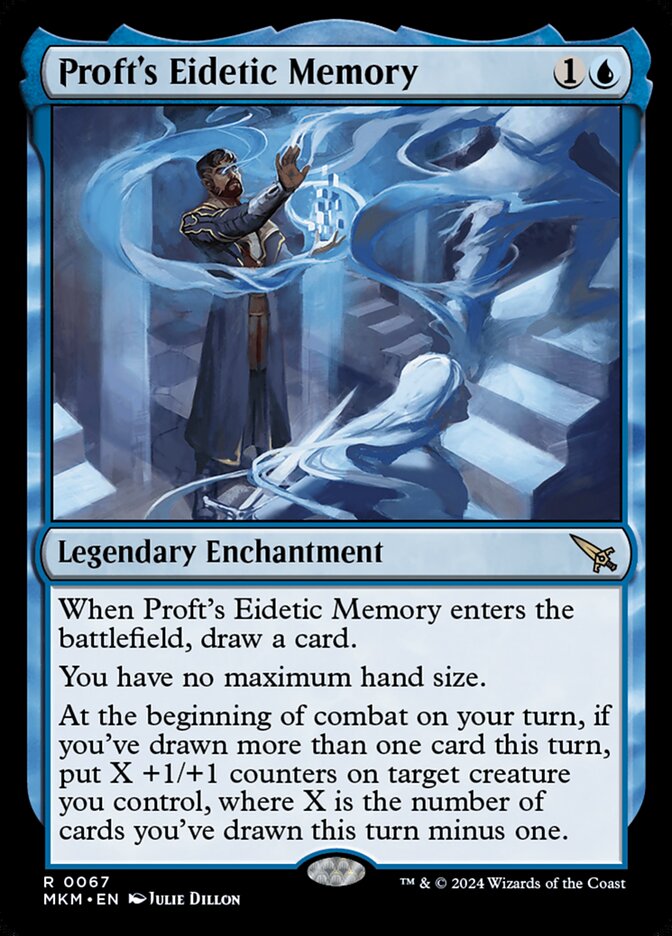
Commonly known as the blue Up the Beanstalk XD
Hereafter “Eidetic Memory”. It draws you a card on entering, so it never loses card advantage no matter how the opponent removes it. In combat, it converts the number of extra cards drawn this turn into the same number of +1/+1 counters to increase board pressure. Although it’s legendary, if you draw multiples you can still slam one down and blow up one of them to trigger the enter effect and draw one, effectively working as a two-mana draw-a-card spell. More than half of the creatures in the build have loot abilities on entering, which pairs very well, making your creatures grow several sizes as they enter. If your creatures aren’t removed right away before Eidetic Memory lands, it becomes very hard for -X/-X or damage-based removal to kill them afterward, and the opponent has a hard time attacking into us to trade creatures. Growing creatures that the opponent cannot deal with through Eidetic Memory is often the key to winning.
4 Abhorrent Oculus
The top priority reanimation target. A 5/5 flyer is a threat by itself, and Manifest Dread spreads the board horizontally while also filling the graveyard. Even if it is killed by single-target removal, as long as it isn’t exiled you still have a chance to reanimate it, and if you can land it early via Helping Hand , it’s the opponent’s nightmare. If you don’t draw reanimation, it doesn’t matter much: the deck has plenty of loot effects, so getting over 6 cards in the graveyard is a breeze and it’s not hard to just cast it outright. Once the opponent can’t remove it, it will start snowballing the game on its own.
4 Steamcore Scholar

Hereafter “Scholar”. Its enter effect is a stronger version of Faithless Looting : if you discard an instant, sorcery, or flying creature, you only need to discard one card. Sometimes you can deliberately discard two to enable delirium, build up the graveyard count, or grow Marauding Mako. With Proft's Eidetic Memoryon the battlefield, it’s a 4/4 once you enter combat, and flying and vigilance let it attack and defend, going over blockers to take a good chunk of the opponent’s life. It’s an even better fit with Fear of Missing Out
 ; thanks to vigilance, it can attack in every combat phase, and once grown huge by Eidetic Memory it becomes more threatening than Abhorrent Oculus.
4 Fear of Missing Out
Hereafter “FOMO”. The deck’s core explosive creature. Its enter-loot effect lets us dig up Abhorrent Oculusby turn three when the draw goes smoothly. FOMO’s strongest feature is that after delirium is met, attacking with it gives an additional combat phase. Extra combats combine with many cards, such as triggering Proft's Eidetic Memoryto put +1/+1 counters again, letting vigilance creatures attack again, or letting Tersa Lightshatterattack one more time to trigger the graveyard slot machine again, and so on. When multiple FOMOs are on the battlefield they can deal huge bursts of damage. This deck’s ceiling depends on how quickly you can get FOMO to delirium and attack with it.
4 Helping Hand
Every creature in the deck can be reanimated. A three-mana creature in the graveyard effectively costs one mana, which is really cheating. The first priority target is of course Abhorrent Oculus, bypassing the restriction of exiling six cards from the graveyard when casting it. When your hand is clunky, you can also reanimate Fear of Missing Out, Steamcore Scholar, or Tersa Lightshatterto adjust your hand. This deck very easily puts creatures into the graveyard, so unless it gets hit by graveyard hate, you rarely fear lacking targets.
Choices for the Remaining Slots
4 Marauding Mako
Whenever you discard, it puts that many +1/+1 counters on itself, so it easily grows beyond the range of Cut Down and burn. If the opponent doesn’t remove it, it keeps growing and attacking, and they quickly can’t keep up. In real games it often forces the opponent to spend a removal spell costing two or more mana, losing tempo, which makes it easier for our other, more valuable creatures to survive. If you draw it in the mid to late game and can’t use it, you can cycle it for two mana, which fits the deck’s theme perfectly. At its ceiling, together with Fear of Missing Out, it can finish the opponent by turn four, making it a very threatening one-drop in this deck.
2 Spyglass Siren

Hereafter “Siren”. The map token it makes can be used to Bargain Torch the Tower or to filter the top of your library while filling the graveyard. Flying lets it get through, and when grown by Proft's Eidetic Memoryit’s easier to hit the opponent directly. It also lets Steamcore Scholardiscard just that one card when looting. As a one-mana curve creature, I only play two.
2 Tersa Lightshatter
The only creature in the main deck with haste. It can unexpectedly add an extra attacker and make the opponent misjudge our kill line. Builds before TDM didn’t use haste creatures, so whether a creature was cast normally or reanimated, almost all of them had to stand around for a turn before attacking. Without Bitter Reunion , the overall tempo felt rather clunky and was very afraid of sweepers, and Tersa’s addition perfectly makes up for that. Tersa also has a loot effect on entering. Since it discards first and then draws, you have fewer options to plan which cards to discard. It’s slightly inferior to Steamcore Scholar, which draws first and then discards, but still useful, and with Marauding Makoor Proft's Eidetic Memoryit can produce a burst. Once the graveyard has seven cards, its “graveyard slot machine” effect gives every card in the graveyard a chance to be used again, which is equivalent to having an extra card in hand this turn. If the exiled card is a sorcery or instant, it goes back to the graveyard after being cast, giving you a chance to cast it again next turn, forming a powerful resource loop. Because it’s a legendary creature, I only play two.
1 Winternight Stories
Draw three cards, then discard a creature card or two cards from your hand. Since this card also goes to the graveyard after being cast, you may discard two cards from your hand and meet delirium right away. From the graveyard, by tapping a creature with power 4 via harmonize, it can be cast for as little as one blue mana. It’s basically Standard’s Treasure Cruise , with astonishing power. While creating a huge hand-size advantage, together with Marauding Makoor Proft's Eidetic Memoryit can greatly increase board pressure, making it a key card against midrange or control. If there were really room, I would even play a second copy.
2 Spell Pierce

One of the best soft counterspells. For only one blue mana, it counters a noncreature spell, which is very efficient at disrupting the opponent. Against Izzet Prowess, it can counter Cori-Steel Cutter (hereafter “Cutter”) or stop Stock Up
 from refilling their hand; against black midrange, it counters removal and Unholy Annex // Ritual Chamber
 ; against control, it counters sweepers; against combo, it counters combo pieces. It’s useful in almost any matchup. I play two hoping to draw one over the course of a match, and if I can counter the opponent’s key spell once, it has earned its value.
3 Torch The Tower
One-mana removal with very high efficiency. A creature burned this turn that would die is exiled instead, avoiding death triggers or graveyard usage. If 2 damage isn’t enough, you can Bargain to deal 3 and then scry 1. In some situations where the opponent has a threat you must remove, you can Bargain with Fear of Missing Outor Proft's Eidetic Memoryto force it through. I only play three so I can swap one slot for other single-target removal with a wider range.
1 Abrade

Single-target removal included specifically to handle Izzet Prowess. It’s good at destroying Cori-Steel Cutteror killing creatures. Dealing 3 damage more reliably kills prowess creatures, and it can also kill Drake Hatcher , the creature that gives us the biggest headache, when the opponent is tapped out.
1 Get Lost

This was originally the slot for Into the Flood Maw , but I think bouncing can’t fully solve the problem apart from bouncing tokens. If the opponent just replays the threat, it still gives me a headache. Also, considering that our build is actually more midrange, we can’t necessarily explode next turn after bouncing the opponent’s threat and finish them off. So I chose Get Lost, which has a similar range but reliably deals with the threat.
1 Glacial Dragonhunt
It can draw, discard, and remove, and can be cast again from the graveyard via harmonize. It’s practically removal designed for this deck. After drawing, you can choose whether to discard, which is very flexible. When you can’t use it, treating it as a two-mana draw a card is also fine. The optional discard fits well whether you’re putting Abhorrent Oculusin the graveyard, enabling delirium, or growing Marauding Mako. The drawbacks are that the sorcery timing restricts when you can use it and that it can only deal damage to creatures, so I only play one to keep the removal suite more diverse.
1 Sheltered by Ghosts
 - The best removal against aggro. While removing a threat, you can gain life with lifelink as you attack, and once you successfully put it on a creature you’ve almost won. If the creature is removed before the Aura is attached, you get two-for-one’d and lose life, so you need to get the timing right. It’s a high-risk, high-reward removal spell. It’s terrible against midrange and control decks with lots of removal, so I only play one, specifically against aggro.
Lands
4 Inspiring Vantage (Boros fast land)
4 Spirebluff Canal (Izzet fast land)
4 Seachrome Coast (Azorius fast land)
2 Battlefield Forge (Boros pain land)
4 Shivan Reef (Izzet pain land)
1 Adarkar Wastes (Azorius pain land)
1 Restless Anchorage (Azorius creature land)
1 Island
1 Mountain
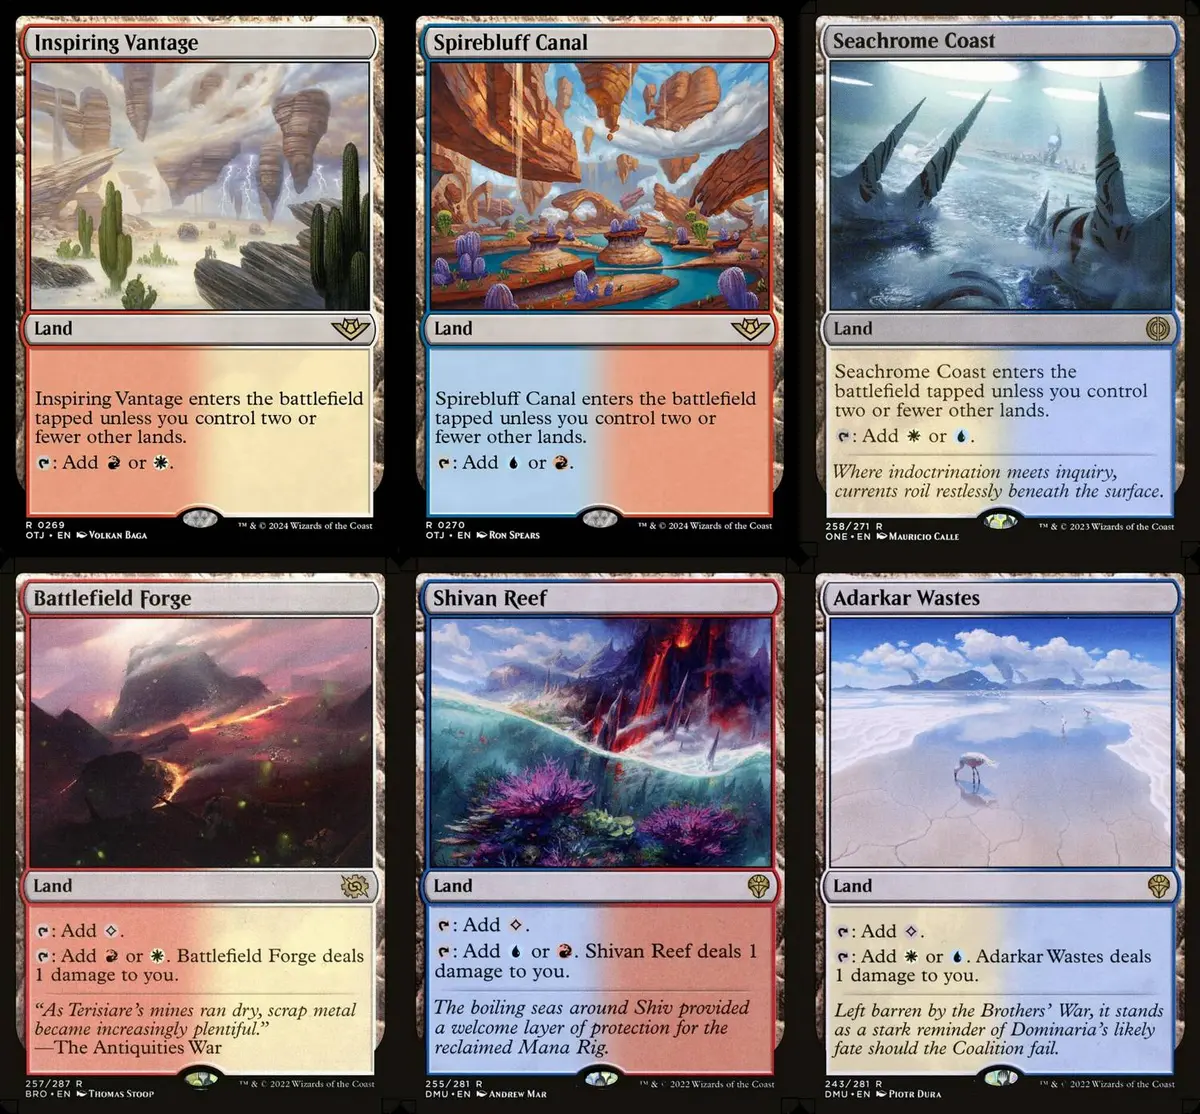
The main deck’s colored requirements are 18 blue, 15 red, and 6 white, a ratio of 46.15% blue, 38.46% red, and 15.38% white. If the sideboard is included, it becomes 21 blue, 17 red, and 15 white, a ratio of 39.62% blue, 32.08% red, and 28.3% white. From these numbers you can see that the deck’s main colors are blue and red, but white’s importance can’t be ignored, especially since white’s demand rises substantially in sideboard games.
| Blue | Red | White | |
|---|---|---|---|
| Main deck colored requirements | 18 (46.15%) | 15 (38.46%) | 6 (15.38%) |
| Main deck + sideboard colored requirements | 21 (39.62%) | 17 (32.08%) | 15 (28.3%) |
In addition, I specifically wanted to be able to produce red on turn one in the build, in order to cast Marauding Makoand apply pressure from the start, or to hold Torch the Towerin hand to interact with the opponent’s one-drops. For this reason I slightly increased the share of red-producing lands, and my final land configuration provides colored sources of 15 blue, 15 red, and 12 white, a ratio of 35.71% blue, 35.71% red, and 28.57% white.
| Blue | Red | White | |
|---|---|---|---|
| Colored sources provided by lands | 15 (35.71%) | 15 (35.71%) | 12 (28.57%) |
Although the deck has only 22 lands, which looks low at first glance, we actually have lots of draw and filtering, so getting stuck on lands is not very likely. As long as you make sure your opening hand has two to three lands, it usually runs smoothly. The deck’s key mana value is three, so whether you can play your third land on turn three is crucial for tempo.
In my configuration, except for Restless Anchorage, all lands enter untapped in the first three turns, ensuring we develop the board smoothly. Considering that midrange and control may bring land destruction, I included two basic lands, and chose one Island and one Mountain based on the colored requirements.
Compared with other people’s builds, without affecting color fixing, I swapped one Azorius pain land for Restless Anchorage. When there’s no one-mana play on turn one, having the land enter tapped barely affects tempo, and against midrange and control decks with lots of removal and sweepers, one more creature that can’t be swept may be the key advantage.
Sideboard Configuration
2 Ghost Vacuum — (Graveyard hate)

Hereafter “Vacuum”. It watches over all graveyard-related game plans, including but not limited to reanimation and delirium. Late in the game, for six mana you can also reanimate all the creatures it has eaten onto your own battlefield, making it a good card that works both as a hate card and as a threat.
2 High Noon — (Lock)

A dedicated card against Izzet Prowess. A single card locks the opponent’s whole game plan, and for five mana it can deal five damage to any target, which can be used to finish the game.
2 Disdainful Stroke — (Counter against high-cost threats)

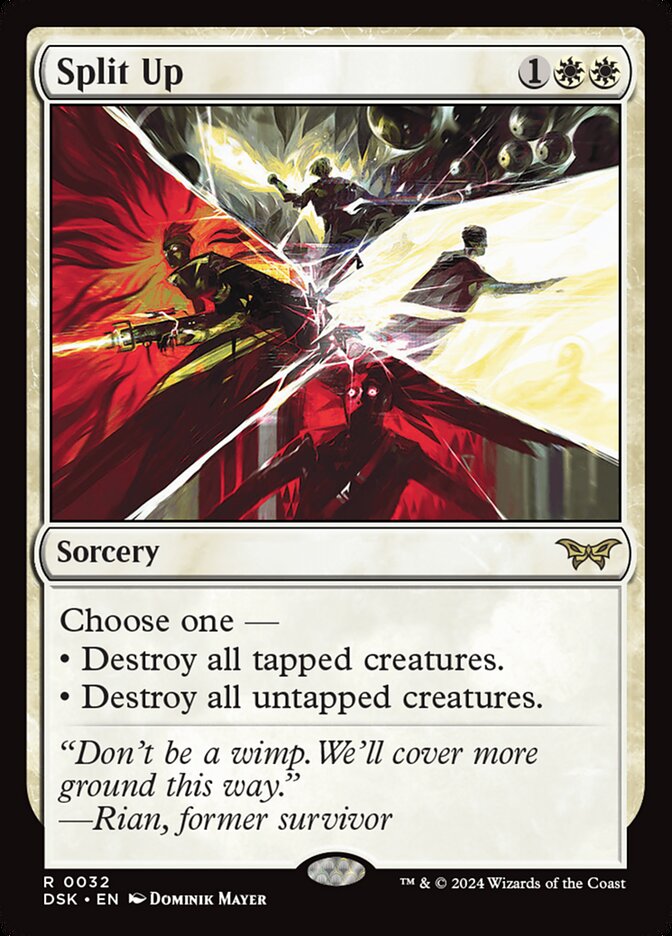
It can counter the opponent’s sweepers, high-cost creatures, and planeswalker threats, with a function similar to Negate . The main difference is that Negate can counter three-mana sweepers such as Split Up
 and Temporary Lockdown
 as well as resource-gaining individual cards like Stock Up, while Disdainful Stroke can counter creature threats such as Shiko, Paragon of the Way
 (hereafter “Shiko”), Beza, the Bounding Spring
 (hereafter “Beza”), Marang River Regent // Coil and Catch
 (hereafter “Regent”), and the Overlords. I figured that today’s creature threats usually have enter abilities, and once they enter successfully they start generating value in all sorts of fancy ways, making it easy for the opponent to snowball. To solve this problem, I brought 2 Disdainful Stroke and no Negate.
1 No More Lies — (Counterspell)

Its function is somewhat like Spell Pierce, interfering with the opponent at low cost. But its greater strength is that as long as you’re on tempo, it can counter anything we dislike, with even creature threats within range, and the exile clause also avoids graveyard usage by the opponent.
2 Sheltered by Ghosts — (Removal against aggro)
It comes in at full count in aggro matchups. It removes a creature and restores our life total through lifelink, a double blow against aggro. If the opponent wants to remove the enchanted creature, because of ward 2 it usually costs them a whole turn’s worth of mana, greatly slowing their tempo.
1 Loran of the Third Path — (Artifact removal / Enchantment removal)

Hereafter “Loran”. Universal artifact and enchantment removal, and since it’s a creature enter ability, it’s hard to interact with. Its built-in draw ability works well with Proft's Eidetic Memory, and with vigilance it can attack again during the extra combat phase from Fear of Missing Out. With Helping Handyou can also reanimate it from the graveyard to remove something again.
2 Destroy Evil — (Enchantment removal / Creature removal)

A wide-ranging instant-speed removal spell that can kill creature threats from midrange and control, and can also destroy Temporary Lockdown, which everyone is running plenty of in the current metagame, or destroy Rest in Peace so we can continue our reanimation plan.
1 Exorcise — (Artifact removal / Enchantment removal / Creature removal)

Its targets are similar to Destroy Evil, with a slightly wider range: it kills creature threats and destroys enchantments, and can also destroy artifacts. The removal is exile, which avoids graveyard usage. The drawback is that it’s a sorcery, so timing is a bit restricted.
2 Chandra, Spark Hunter — (Planeswalker threat)
In sideboard games, a threat besides Proft's Eidetic Memoryand Abhorrent Oculus. Its passive gives token Vehicles haste, quickly dealing lots of damage. On the turn you slam it down, it makes a Vehicle with haste that hits for 3. If next turn you cast a creature to crew the old Vehicle and attack together with the newly made Vehicle, that’s 6, so over two turns you take nearly half the opponent’s life. The life-total pressure it provides is enormous, and a big advantage is that the Vehicles can’t be removed by creature sweepers on the opponent’s turn.
Other Main Deck / Sideboard Options to Consider
Mockingbird

It can enter as a copy of any creature on the battlefield, which is very flexible. Whether it becomes your own Oculus, Scholar, or FOMO, it works well, and when the opponent has Sheoldred, the Apocalypse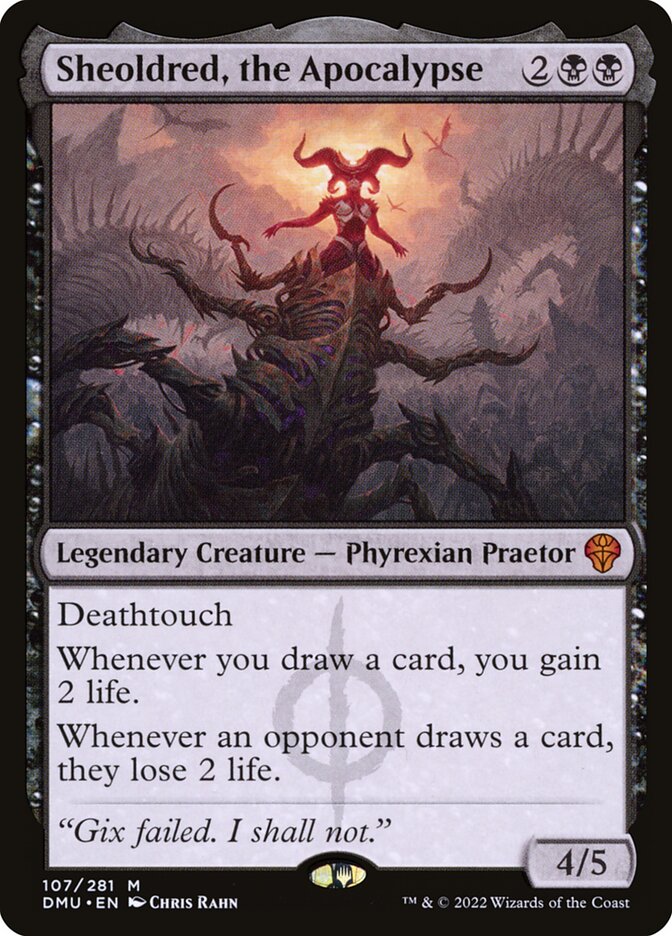 (hereafter “Sheoldred”) on the battlefield, you can go head to head with it, and one back-and-forth ignores the opponent’s Sheoldred draw-and-drain effects. The drawback is that if there are no creatures on the battlefield, this card is even worse than Siren. It’s an option with a very high ceiling but a relatively low floor.
Tishana’s Tidebinder
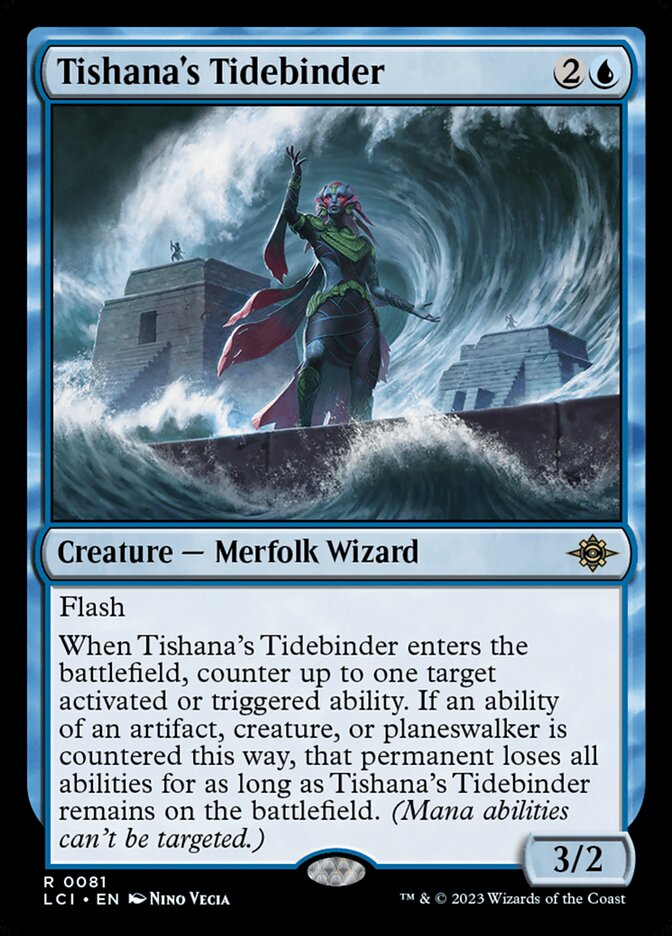
Hereafter “Tidebinder”. It can counter activated and triggered abilities, and since its effect is a triggered ability on entering, the opponent usually has a hard time responding. If it counters the ability of a creature, artifact, or planeswalker, the permanent loses all abilities for as long as Tidebinder remains on the battlefield. Thinking about it, there are actually a great many threats it can counter, such as Izzet Prowess’s Cutter; black midrange’s Sheoldred; Dimir midrange’s Kaito, Bane of Nightmares (hereafter “Kaito”); control’s Shiko, Beza, and Regent; and Domain’s Zur, Eternal Schemer
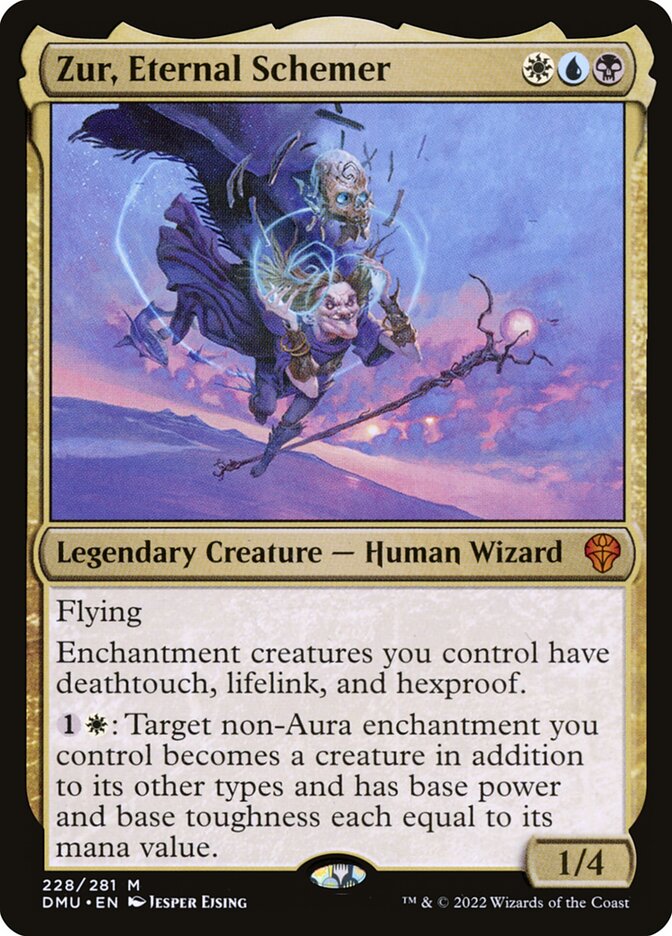 (hereafter “Zur”) and the Overlords. In addition, Tidebinder is itself a 3/2 creature and puts considerable pressure on the battlefield.
The Filigree Sylex

Against Izzet Prowess, it can sweep all the opponent’s tokens at once, and since it’s an activated ability, its timing is very flexible. Against Orzhov Pixie it can also be used to sweep one-drop creatures and various enchantments.
Recommission

Reanimated creatures enter with a +1/+1 counter, letting Oculus dodge burn that deals 5 damage. Reanimated creatures enter untapped, letting Tersa attack right away, and other creatures can help cast harmonize spells from the graveyard.
Into the Flood Maw
For only one mana, it temporarily removes a threat from the battlefield, and with good timing it’s very efficient. Against aggro it can bounce tokens and creatures to make the opponent miscalculate lethal; in the mirror it’s used to bounce the opponent’s Oculus; against midrange or control it can bounce Temporary Lockdownon the opponent’s turn to release our two-mana threats. It has a chance to be used in any matchup, making it a fairly versatile choice.
Negate
A classic counterspell that counters any noncreature spell for only two mana. From single-target removal, sweepers, and card-draw engines to key artifacts, enchantments, and combo pieces, they are all in its range.
Three Steps Ahead

Counterspell, copy, and loot all in one, letting you flexibly choose the most suitable effect depending on the situation. Whether it’s disrupting the opponent, creating a threat, or filtering, each option fits the deck’s theme very well, and picking two or more modes is a great deal. It gets stronger the later the game goes.
Ral, Crackling Wit

Hereafter “Ral”. The [+1] makes an otter that can attack and block, the [-3] draws three and discards two, which is a Winternight Stories, and the ultimate, after drawing three cards, gives sorceries and instants storm. Ral’s benefit is that all three abilities fit the deck’s original theme: it can make creatures on its own, and Proft's Eidetic Memorycan convert the looting into board pressure, giving a long-game advantage in late-game resource wars. Also, its passive adds loyalty whenever you cast a noncreature spell, so Ral isn’t easy to kill. I thought for a long time about whether to play Chandra, Spark Hunteror Ral. The reason I finally chose Chandra is that I wanted to end matches as fast as possible and not let games drag on, but Ral is certainly a good card too, and you can adjust this according to personal preference.
How the Deck Plays
This is a midrange tempo deck with flexible and varied ways to win, without a single fixed formula. Flexibly adjusting your game plan to each matchup and calculating damage kill lines is exactly the most challenging and most appealing part of this deck.
Although the deck is called Jeskai Oculus, most of the time I win without Oculus at all XD, so treat it as the deck’s Plan B. The real core is Eidetic Memory, which steadily provides explosive boosts in every combat, and when the hand is very smooth it can even deliver lethal on turn three.
When tempo is good, in the early game we steadily build the board with draw and loot payoffs like Mako, FOMO, and Eidetic Memory, and in the mid game use Scholar and Tersa to further adjust our hand and strengthen board pressure, sometimes combined with Helping Hand for a highly efficient development. At the same time, we hold counterspells or removal in hand to disrupt the opponent and keep control of the tempo.
When tempo isn’t as expected and the opponent holds more of the initiative, the deck can keep looting and gaining resources through Scholar, Tersa, Winternight Stories, and so on, slowly building a resource advantage and transitioning into the midrange plan. When behind, as long as you manage your resources and the timing of your trades, there is a chance to slowly claw back and turn the game around.
In summary, this is a deck that can burst quickly in the early game, has stable mid-to-late-game resource-war capability, and has win conditions that are hard to target easily. It demands considerable judgment and attention to detail from its pilot, but it also brings very rich game depth and a sense of accomplishment.
Tips and Tricks
- Combo when on the draw:
If you’re on the draw with a seven-card hand and you hold the combination of an untapped white-producing land + Helping Hand + Oculus, you can choose not to play a land on turn one, go straight to the end step and discard Oculus, then on turn two use Helping Hand to reanimate Oculus right away. This is a high-risk, high-reward combo, so pay attention to whether the opponent is a control deck, and it’s not recommended in sideboard games where you may face a lot of disruption. - Turn 2 priority of Eidetic Memory vs. FOMO:
If the opponent leaves two mana open on turn two and you hold both FOMO and Eidetic Memory, I prefer to cast Eidetic Memory first and keep FOMO in hand. On one hand, this avoids FOMO being removed immediately and lets creatures with loot effects that enter afterward grow to toughness 4 or more, making it harder for removal other than outright kill spells to remove our creatures. On the other hand, it also lets Eidetic Memory’s enter trigger plus the turn-three draw give FOMO’s discard more options. - Attack trigger order for FOMO + Tersa:
When FOMO and Tersa attack together, both triggers go on the stack at the same time. Remember to order FOMO’s trigger on the stack after Tersa’s trigger, so that FOMO’s trigger resolves first and then Tersa’s. The reason is that Tersa exiles a card at random, and if it exiles a card of a certain type, it may break delirium. - Damage allocation when multiple FOMOs attack:
When you have multiple FOMOs with delirium on the battlefield, attack each combat phase with one FOMO plus your biggest creature, so the biggest creature gets the most attacks. - Mako’s discard trigger:
Mako also grows with the same number of +1/+1 counters when the opponent makes you discard cards from your hand. - Drawing multiple Oculi:
When there is already an Oculus in the graveyard available for reanimation, you don’t need to rush to put additional Oculi you draw into the graveyard. You can keep them in hand and wait for a chance to cast them outright. - Glacial Dragonhunt’s damage target:
If you discard a nonland card with this card, it will always deal 3 damage to a creature. If the opponent has no creatures on the battlefield, it can only hit your own creature, so pay special attention before casting to avoid accidentally killing your own creature. - FOMO + Eidetic Memory synergy:
When FOMO and Eidetic Memory are both on the battlefield, pay attention to the loot effects and the card types in the graveyard, and you can easily and unexpectedly deal a huge burst of damage and kill the opponent. - Which creature to put Sheltered by Ghosts on:
In sideboard games against red-based aggro, try to put Sheltered by Ghosts on your own red creatures, to avoid Lithomantic Barrage ignoring ward and removing it directly.
- Against Vacuum:
When the opponent has a Vacuum on the battlefield, as long as you make sure every card type in our graveyard has multiple copies, or reach six or more types, a single Vacuum won’t break delirium.
Matchup Strategy
Izzet Prowess
An even matchup in both the main deck and sideboard games. The key is whether the opponent lays out a bunch of prowess creatures first, or we first cast Oculus to fill the board and use Eidetic Memory to grow the board until the opponent can’t attack through it. Whoever builds the board first will win. In sideboard games, bringing in all the hate cards slows the opponent down a lot, but it’s still not an easy matchup. Be very careful of Into the Flood Maw; when attaching Sheltered by Ghosts, getting hit by one can easily collapse our tempo entirely.
| Side Out | Side In |
|---|---|
| -2 Spyglass Siren | +2 High Noon |
| -1 Abhorrent Oculus | +2 Sheltered by Ghosts |
| -1 Helping Hand | +1 Loran of the Third Path |
| -1 Glacial Dragonhunt | +1 Exorcise |
| -1 Winternight Stories |
- High Noon can lock out Cori-Steel Cuttermaking tokens and the multi-spell bursts of other prowess creatures, and it also forces the opponent to use Into the Flood Mawon it, which makes it easier for our Sheltered by Ghosts to resolve successfully.
- The lifelink from Sheltered by Ghosts is crucial; after a few hits the opponent can no longer kill us.
- Abrade, Loran, and Exorcise mainly aim to remove Cori-Steel Cutter. As long as it can’t build a board, the pressure on us is much lower.
Azorius Omniscience
Unfavorable in the main deck, favorable in sideboard games. In the main deck, all we can do is pray the opponent stumbles a bit and attack aggressively to race them quickly. Our only effective interaction is Spell Pierce, so make sure to save it for Abuelo's Awakening to interrupt the combo. In sideboard games we can bring in all the graveyard hate to watch the combo, and with the two counterspells Disdainful Stroke and No More Lies we can counter all of the opponent’s game plans. Once creature threats land, we also have Destroy Evil to remove those blockers.
| Side Out | Side In |
|---|---|
| -2 Spyglass Siren | +2 Ghost Vacuum |
| -3 Torch the Tower | +2 Disdainful Stroke |
| -1 Glacial Dragonhunt | +1 No More Lies |
| -1 Sheltered by Ghosts | +2 Destroy Evil |
- Ghost Vacuum specifically exiles the Omniscience
 that the opponent puts into the graveyard, sealing off the combo plan and forcing the opponent to switch to a creature plan to kill us.
- The counterspells’ main target is Abuelo’s Awakening. With Vacuum on the battlefield, they can be used to counter sweepers and creature threats.
- Destroy Evil is used to remove creature threats the opponent lands, such as Overlord of the Mistmoors
 , Beza, the Bounding Spring, and Marang River Regent // Coil and Catch, and it can also destroy Temporary Lockdownon the opponent’s turn so we can go for a burst on our turn.
Jeskai Control
A slightly favorable matchup in both the main deck and sideboard games. Although the opponent has lots of single-target removal, our creatures all have enter effects that generate value, so even if the opponent removes them, we still get value from the enter abilities. Watch out especially for Temporary Lockdown’s sweep; having one-, two-, and three-mana threats on the battlefield avoids being swept off the whole board. Apply pressure as aggressively as possible and end the game quickly. In sideboard games there is lots of removal to swap out dead cards from the main deck, so overall it’s a very manageable matchup.
| Side Out | Side In |
|---|---|
| -2 Spyglass Siren | +2 Ghost Vacuum |
| -1 Abhorrent Oculus | +2 Disdainful Stroke |
| -1 Helping Hand | +1 No More Lies |
| -3 Torch the Tower | +1 Loran of the Third Path |
| -1 Glacial Dragonhunt | +2 Destroy Evil |
| -1 Abrade | +1 Exorcise |
| -1 Get Lost | +2 Chandra, Spark Hunter |
| -1 Sheltered by Ghosts |
- Ghost Vacuum can eat all the spells with mana value 3 or less in the opponent’s graveyard, directly nullifying the enter ability of Shiko, Paragon of the Way.
- Disdainful Stroke counters all of the opponent’s creature threats well.
- Try to save No More Lies to counter sweepers and protect our key creatures.
- Loran can destroy Temporary Lockdown and Vacuum, countering the opponent’s disruption of us.
- Destroy Evil and Exorcise are mainly used to remove blockers that land, and can also destroy Temporary Lockdown.
- Chandra provides a very fast clock, and as long as it isn’t removed, it can quickly take over the game.
Jeskai Oculus
The most important thing in the mirror is who casts Oculus first. In the main deck it is extremely hard to remove: apart from Get Lost and Sheltered by Ghosts, it can only be forced through with two burn spells, and the side that sticks it first usually wins. But if both sides cast Oculus successfully, it usually turns into an Oculus-versus-Oculus standoff, and at that point growing creatures with Eidetic Memory becomes crucial. Whoever first turns the board into a big Oculus against a small one will win. The key in sideboard games is Destroy Evil and Exorcise, which can disrupt both the Eidetic Memory plan and the Oculus plan. The other key is Vacuum, which can exile Oculus and other creatures in the opponent’s graveyard and steal them for your own use later in the game.
| Side Out | Side In |
|---|---|
| -2 Spell Pierce | +2 Ghost Vacuum |
| -1 Sheltered by Ghosts | +1 Loran of the Third Path |
| (On the draw) -2 Marauding Mako | +2 Destroy Evil |
| (On the draw) -1 Helping Hand | +1 Exorcise |
| (On the play) -2 Spyglass Siren | |
| (On the play) -1 Torch the Tower |
- Vacuum can watch the opponent’s reanimation plan, and can also stop FOMO from reaching delirium and Tersa’s graveyard slot machine.
- Loran is used to destroy Eidetic Memory to stop the opponent from growing creatures, and to destroy Vacuum so we can continue our reanimation plan; it can also act as single-target removal for FOMO.
- Destroy Evil and Exorcise can kill Oculus, kill FOMO, and destroy Eidetic Memory; in this matchup they are the best removal, able to handle every threat.
Domain
One of the very unfavorable matchups. The opponent has Up the Beanstalk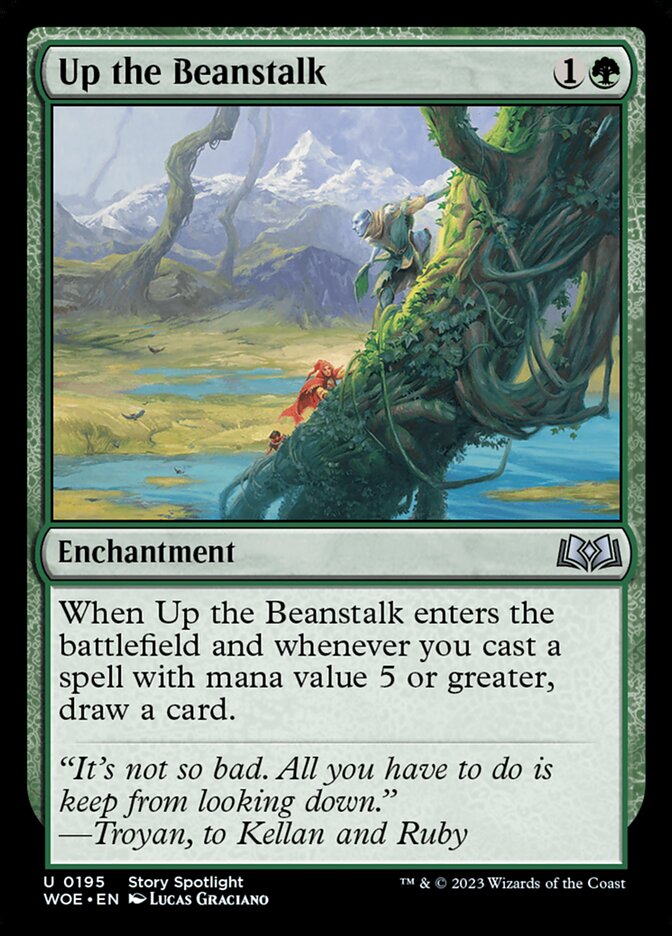 , which refills their hand while removing our board, so it’s hard for us to out-resource them, and most of our main-deck removal is damage-based burn, which struggles to remove the opponent’s creature threats. The opponent also has many lands, which lets their sweepers completely get around Spell Pierce, and once Zur, Eternal Schemerstarts turning enchantments into attacking creatures, we almost can’t win. In sideboard games, we have plenty of enchantment removal to bring in to replace useless burn, plus two counterspells, Disdainful Stroke and No More Lies, to disrupt the opponent. Although we have more ways to answer, it’s still a very hard matchup.
| Side Out | Side In |
|---|---|
| -1 Spyglass Siren | +2 Disdainful Stroke |
| -1 Abhorrent Oculus | +1 No More Lies |
| -1 Helping Hand | +1 Loran of the Third Path |
| -3 Torch the Tower | +2 Destroy Evil |
| -1 Glacial Dragonhunt | +1 Exorcise |
| -1 Abrade | +2 Chandra, Spark Hunter |
| -1 Sheltered by Ghosts |
- Disdainful Stroke and No More Lies can counter sweepers and the Overlords.
- Loran can destroy every enchantment we dislike, whether it’s an Overlord, Temporary Lockdown, Up the Beanstalk, or even Rest in Peace, which we hate most, it can take out in passing.
- Destroy Evil can handle almost everything they have. The key target is Zur; if it turns an Overlord into a creature, it gets troublesome. This is the most efficient removal for Zur, so be sure to save it for him.
- Exorcise can handle every threat other than Zur.
- Chandra is an extra way to win after RIP, providing a very fast clock to quickly build the board.
Dimir Midrange
The second of the very unfavorable matchups. The opponent has a pile of removal as well as various creatures that obstruct our attacks, such as Floodpits Drowner and Preacher of the Schism
 , and the main-deck Sheoldred, the Apocalypseand Kaito, Bane of Nightmaresare threats we have a hard time removing. In sideboard games the opponent will play more like a control deck, bringing in more Sheoldreds to target us. With it on the battlefield, we basically can’t play the game, but our sideboard also has quite a few removal spells aimed at Sheoldred, and as long as we remove it in time and keep applying board pressure, we still have a chance to win.
| Side Out | Side In |
|---|---|
| -1 Marauding Mako | +1 No More Lies |
| -1 Helping Hand | +2 Destroy Evil |
| -2 Spell Pierce | +1 Exorcise |
| -1 Glacial Dragonhunt | +2 Chandra, Spark Hunter |
| -1 Sheltered by Ghosts |
- The opponent is tight on mana, so No More Lies performs well, almost equivalent to a real counterspell.
- Destroy Evil is specifically for dealing with Sheoldred.
- Exorcise’s main target is also Sheoldred, and if needed it can also exile Enduring Curiosity
 to stop the opponent from drawing cards.
- Chandra is a threat the opponent has difficulty handling and keeps applying pressure.
Mono-Black Midrange
The third of the very unfavorable matchups. The opponent has a huge number of ways to disrupt our hand, such as discarding our removal with Duress , followed by Deep-Cavern Bat
 taking away our loot creature, which will badly damage our game plan and put us in a very passive position. The opponent also has lots of single-target removal, so our creatures have a hard time building a board, and if the opponent just plays creatures on curve, they can beat us down. In sideboard games the opponent swaps in more discard and graveyard exile while keeping the main deck’s large amount of removal, and even brings in more Sheoldreds to shut off our looting. In short, it’s very hard to deal with.
| Side Out | Side In |
|---|---|
| -1 Spyglass Siren | +1 No More Lies |
| -1 Helping Hand | +2 Destroy Evil |
| -2 Spell Pierce | +1 Exorcise |
| -1 Glacial Dragonhunt | +2 Chandra, Spark Hunter |
| -1 Sheltered by Ghosts |
- The opponent’s mana is very tight, so No More Lies is almost a real counterspell and can crucially stall their tempo for a turn.
- Destroy Evil and Exorcise’s main target is Sheoldred, which we hate most, followed by destroying Unholy Annex // Ritual Chamberto stop the opponent from drawing cards.
- Chandra provides an extra threat the opponent has difficulty removing.
Orzhov Pixie
A very favorable matchup. The opponent’s discard effects against us help our graveyard plan, and as long as we grow with Eidetic Memory, the opponent’s single-target removal won’t be able to remove our creatures, after which we can win through board advantage. In sideboard games the opponent may have a lot of graveyard hate, and may also bring in Sheoldred or Elesh Norn, Mother of Machines (hereafter “White Praetor”) to try to shut off our looting, but our sideboard also has Destroy Evil and Exorcise to deal with them, so there’s no need to worry too much.
| Side Out | Side In |
|---|---|
| -1 Abhorrent Oculus | +1 No More Lies |
| -1 Helping Hand | +1 Loran of the Third Path |
| -2 Torch the Tower | +2 Destroy Evil |
| -1 Glacial Dragonhunt | +1 Exorcise |
| -1 Abrade | +2 Chandra, Spark Hunter |
| -1 Sheltered by Ghosts |
- The opponent’s mana is limited, so No More Lies can disrupt their tempo well.
- Loran is used to destroy Temporary Lockdown and Vacuum.
- Destroy Evil can remove either Sheoldred or White Praetor; White Praetor shutting off the loot from our creatures entering is also a headache for us.
- Exorcise’s main target is also removing Sheoldred or White Praetor, and it can also destroy the opponent’s graveyard hate, such as Vacuum and Rest in Peace.
- Considering that the graveyard may be completely sealed off by Rest in Peace, Chandra is brought in as an alternative win condition.
Mono-Red Aggro
A very favorable matchup. Basically, as long as you can survive four turns you can win. The main deck already has lots of single-target removal, almost every one of which can trade one-for-one with an opposing creature, and by dragging the game into the mid to late game and growing creatures with Eidetic Memory, the opponent never has another chance to attack through. After swapping in more Sheltered by Ghosts in the sideboard, the opponent has even less of an answer to our creatures.
| Side Out | Side In |
|---|---|
| -2 Spell Pierce | +2 Sheltered by Ghosts |
- Sheltered by Ghosts both removes and heals, and is simply the MVP.
Wrap-up
The result at MIT #9 was quite good for me: I finished 16th with a 4-1-2 record. Although I was just one step short of the Top 8, I successfully made it into the prize payout, which is a decent consolation prize.
From a post-tournament review standpoint, Jeskai Oculus wasn’t the most advantaged choice in this metagame, and its overall win rate isn’t as impressive as the top mainstream decks. However, I had good pairings this time, running into only one unfavorable Domain matchup, which I even won. The only match I lost to Izzet Prowess wasn’t because of any misplay on my part, but simply bad luck. Every hand was stuck on lands and I couldn’t play without mulliganing, and with no hate cards drawn in the sideboard game, there was no room to maneuver, so I could only accept the loss.
Although I’m a little disappointed to have missed the Top 8, I don’t have many regrets about this result. Being able to fight all the way to the end with a deck I carefully tuned and love the most, and to put up my best result at MIT so far, is the biggest takeaway for me. Especially the time and effort put into preparation, and the shared practice and discussions with my fellow players, these bits and pieces made the whole tournament not just a pursuit of results, but more like a journey of pushing past my own limits.
Closing Thoughts
Looking back at Oculus’s rise since DSK first came out, I can’t help but feel a lot of emotion. When it first appeared, it was played in large numbers because it fit Dimir midrange perfectly in Modern, quickly soaring into a hot star card, and its price rose accordingly, at one point firmly holding the throne of DSK’s most expensive card. However, as the metagame evolved and trends changed, it eventually faded from the Modern constructed stage, and this rise and fall can even be seen clearly in the price fluctuations on MTGGoldfish.
But for a player like me, who had collected all four extended-art Oculi before the price took off, I never doubted its potential and value, and always hoped it could find a place in constructed. Standard Jeskai Oculus is, I think, the most fitting home for it. This deck not only lets Oculus’s power shine, but also brings out its synergies with other individual cards to the fullest.
Perhaps Jeskai Oculus’s influence in the mainstream metagame is gradually waning for now, but I still believe in its potential, and once the time is right it will make waves again. This deck combines stable looting ability with high-burst win conditions, and it feels full of rhythm to play. If you’re interested in it too, you might as well try it yourself. Of course, the deck still has many details worth polishing, and different versions of the build each involve trade-offs. You’re welcome to discuss builds and exchange matchup notes with me, and I’ll see you at the tournaments.
- Title
- Eyes That See Through the Ages: A Guide to Standard Jeskai Oculus
- Author
- Chennel
- Created at
- June 17, 2025
- License
- This work is licensed under CC BY-NC-SA 4.0 .